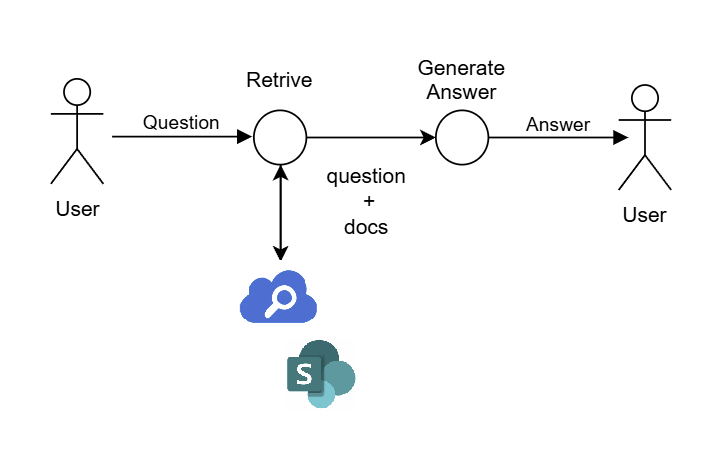
Building upon our previous work with AI Search, I implemented a Naive RAG (Retrieval-Augmented Generation) system in Copilot Studio.
Naive RAG
- Retrieve relevant information from external databases or documents based on user queries
- Generate responses using a language model (such as GPT) based on the retrieved information
While Advanced RAG techniques and Agentic Workflow/Agentic Design Patterns are becoming increasingly popular, I decided to start with the basic Naive RAG implementation as a learning exercise.
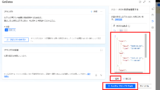
Tip: Official Recommendation for Using Knowledge Feature
If you need to create a custom Copilot / RAG (Retrieval Augmented Generation) application to chat with SharePoint data, the recommended approach is to use Microsoft Copilot Studio instead of this preview feature.
Excerpt from official documentation
While I’m building a custom implementation for this experiment, for production environments, a practical approach would be to first try the Knowledge feature, and only develop a custom RAG solution if the accuracy doesn’t meet your requirements.
Implementation
Note: We use recent information because using older data wouldn’t be interesting – the LLM could answer queries using its own knowledge base.
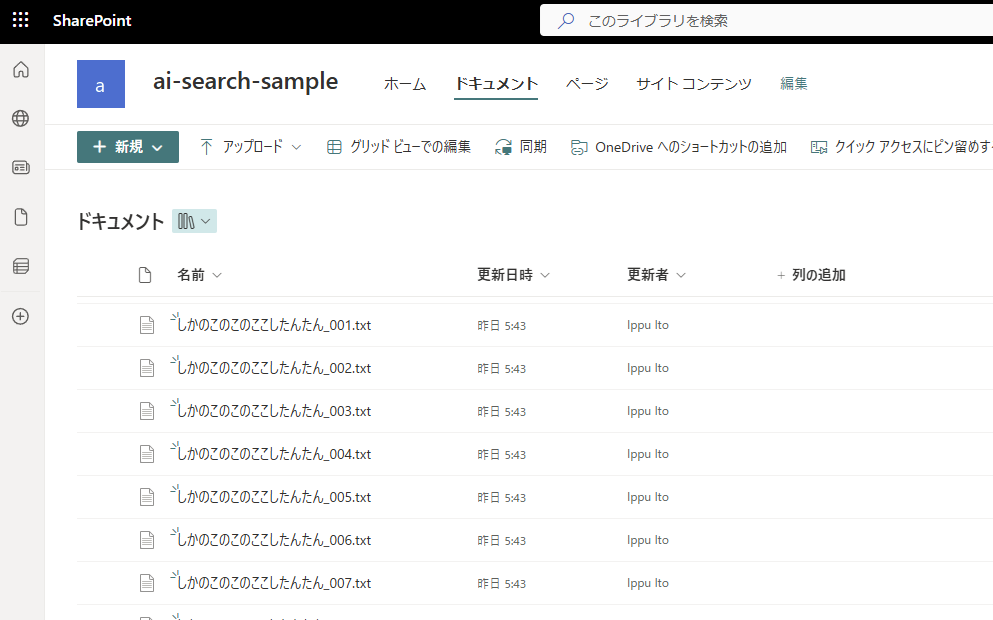
For details on data preparation and AI Search integration, please refer to:
- Create topics and generate search keywords
- Perform search (AI Search call)
- Generate responses and send messages
- Optional: Invoke from Conversational boosting
Step 1: Create Topics and Generate Search Keywords
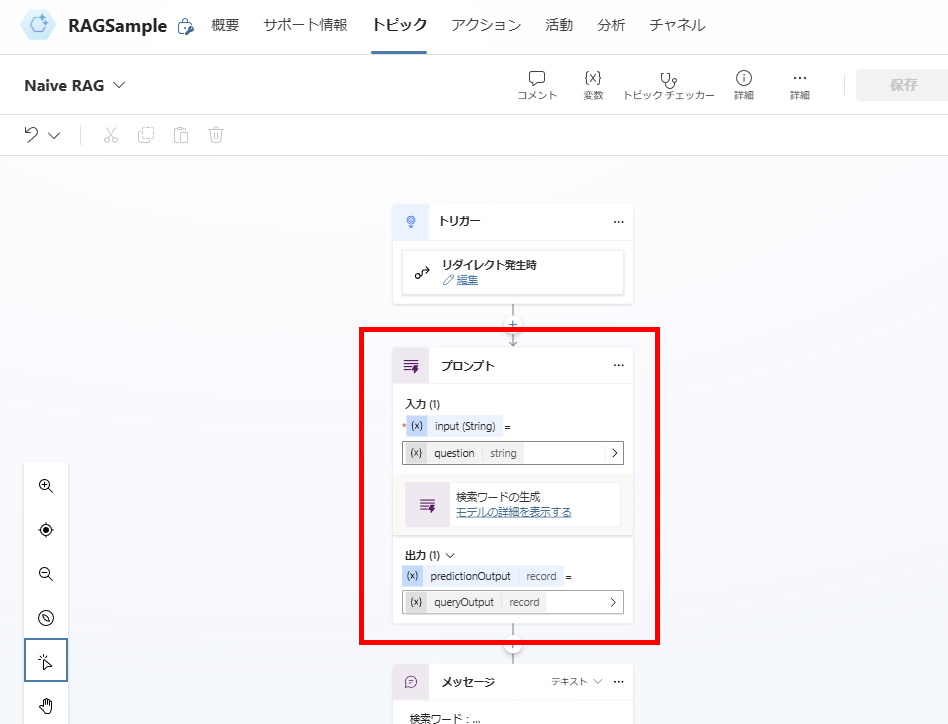
Note: Since our main goal here is to implement a basic Naive RAG system, we’re not focusing on optimizing accuracy at this stage.

Here are examples of user questions and their corresponding search queries.
Use these examples to guide your transformation of the input question.

Example Input 1: "How to connect to a database using Python?"
Example Output: "Python database connection method"
Example Input 2: "What are the effects of climate change on ecosystems?"
Example Output: "climate change ecosystem impact"
Example Input 3: "What are the ethical challenges of AI?"
Example Output: "AI ethics challenges"

Now, based on these examples, transform the following user question into an effective search query.

Input: {input}
Step 2: Search (AI Search Call)
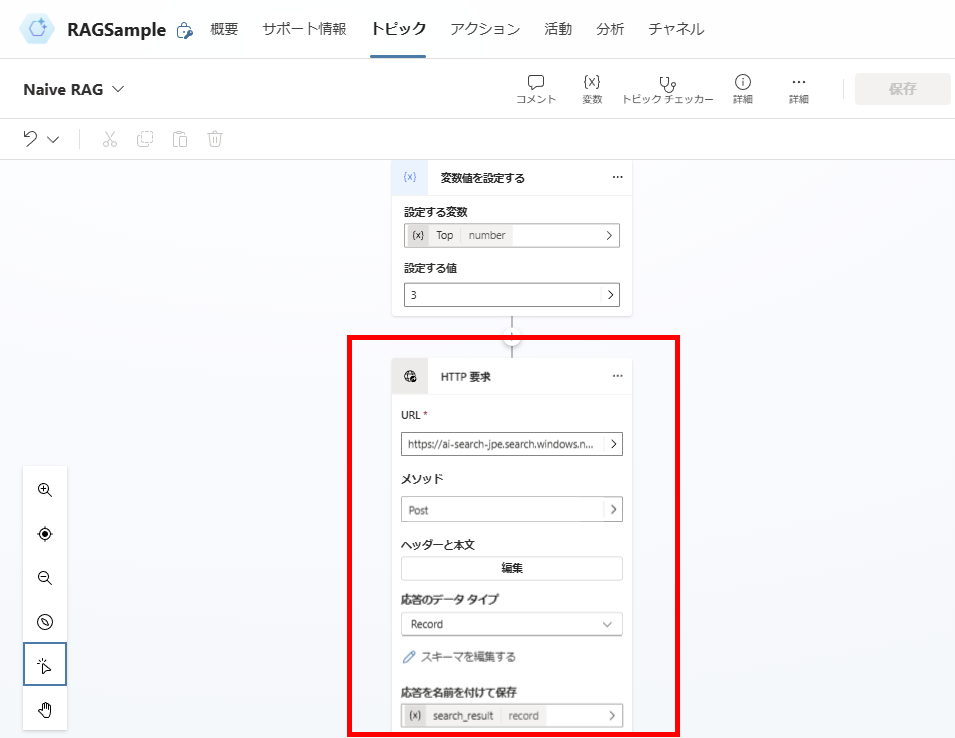
// POST to the following URL
https://[AI-Search-Resource-Name].search.windows.net/indexes/[Index-Name]/docs/search?api-version=2024-11-01-preview
Note: This is a sample implementation, so we’re handling the API key in a simplified manner.

Note: We’ll generate responses from the top 3 search results.
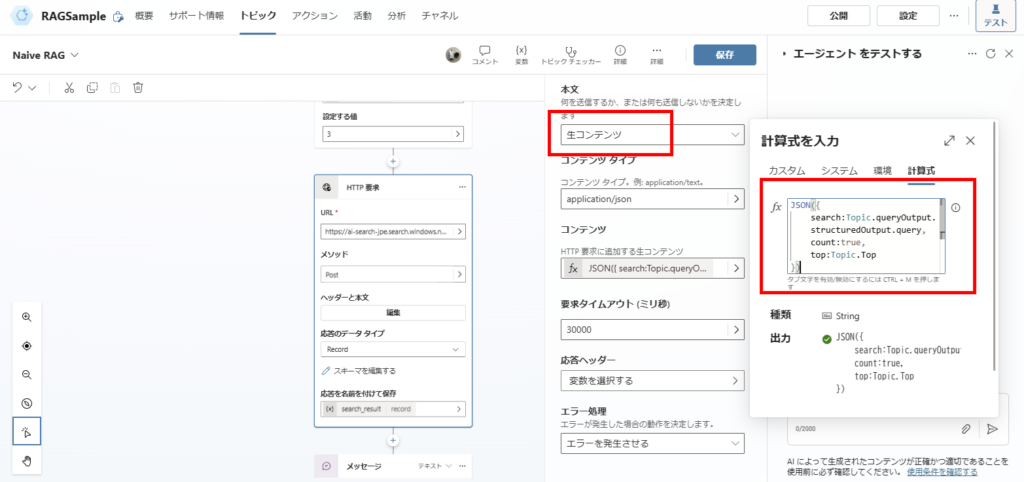
JSON({
    search:Topic.queryOutput.structuredOutput.query,
    count:true,
    top:Topic.Top // Variable "Top" is preset to 3
})
Note: The schema definition varies depending on your AI Search index – it’s easiest to generate it from a sample response.
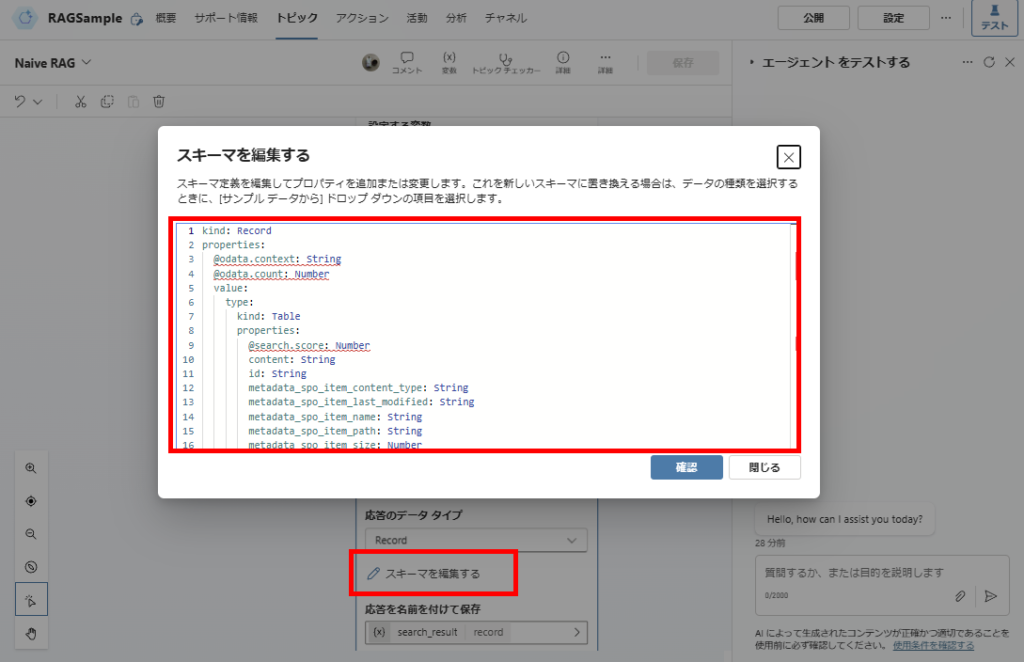
kind: Record
properties:
  @odata.context: String
  @odata.count: Number
  value:
    type:
      kind: Table
      properties:
        @search.score: Number
        content: String
        id: String
        metadata_spo_item_content_type: String
        metadata_spo_item_last_modified: String
        metadata_spo_item_name: String
        metadata_spo_item_path: String
        metadata_spo_item_size: Number
Step 3: Generate Response and Send Message
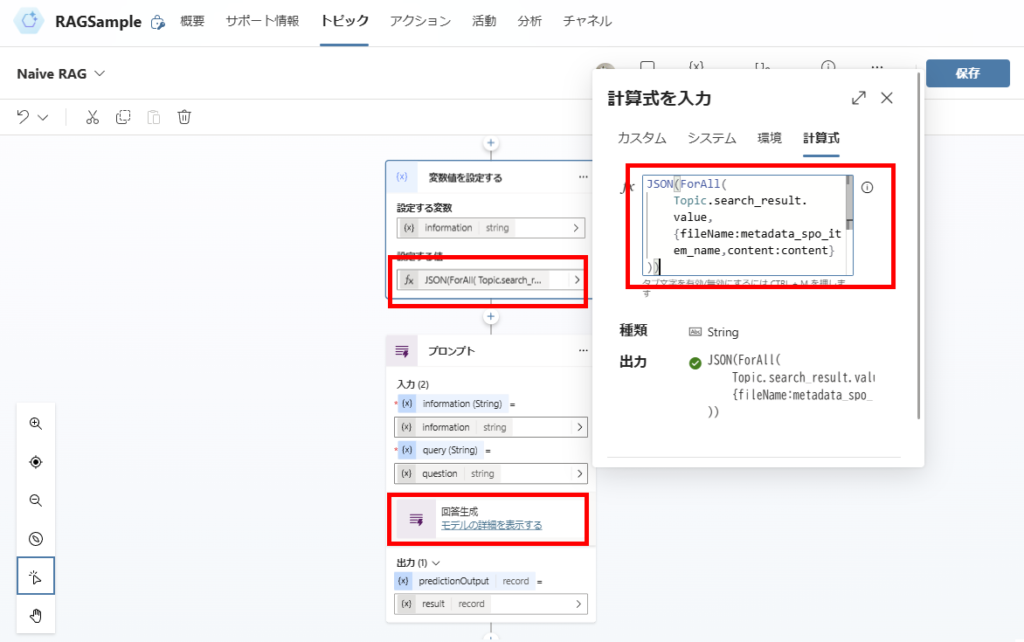
// Pass the "file name" and "file content" as search results
JSON(
    ForAll(Topic.search_result.value,
    {
        fileName:metadata_spo_item_name,content:content
    }
))
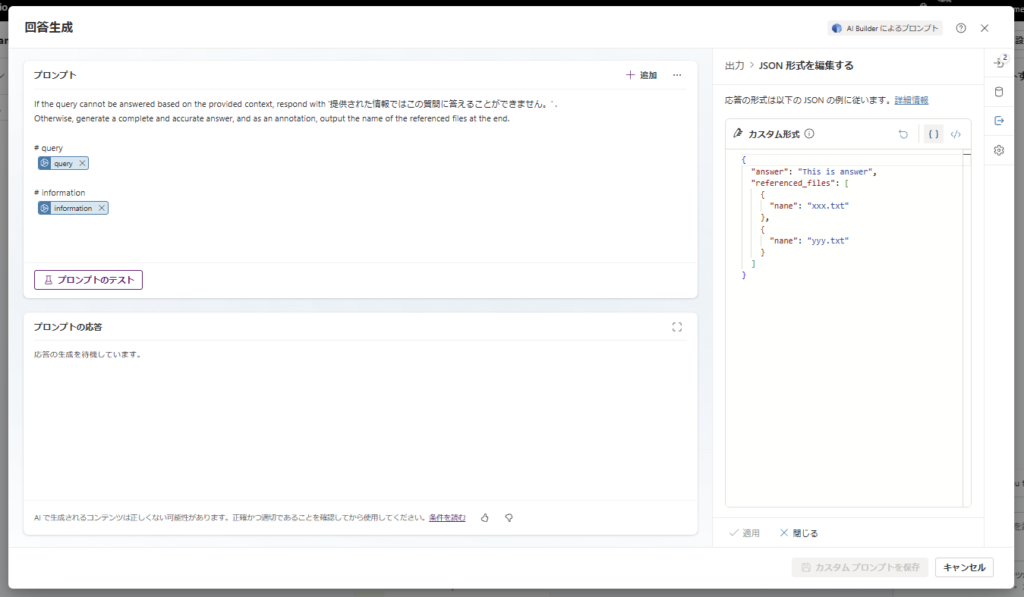
If the query cannot be answered based on the provided context, respond with 'Unable to answer this question with the provided information.'
Otherwise, generate a complete and accurate answer, and as an annotation, output the name of the referenced files at the end.
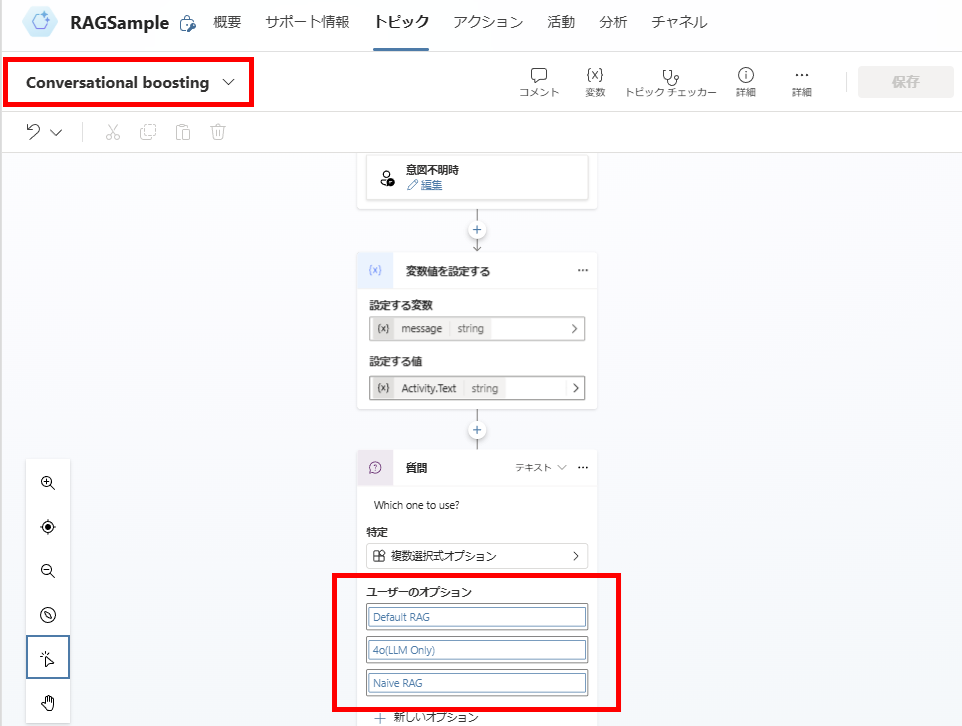
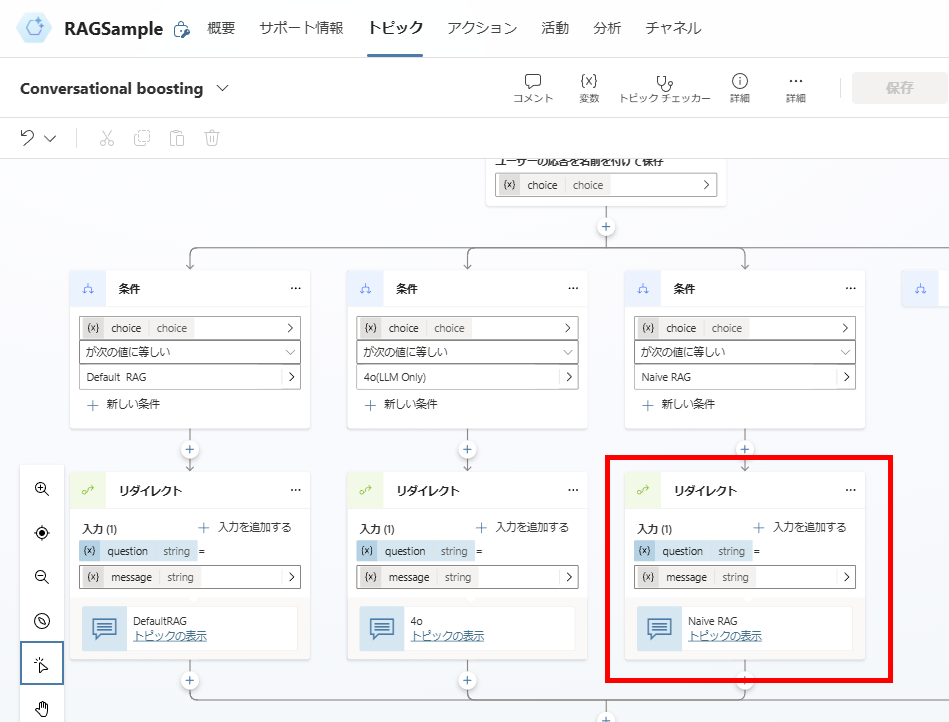
Step 4 (Optional): Invoke from Conversational Boosting
Finally, since I plan to experiment with various RAG methods in the future, I’ll set up Conversational boosting to handle user messages.
This completes the implementation.
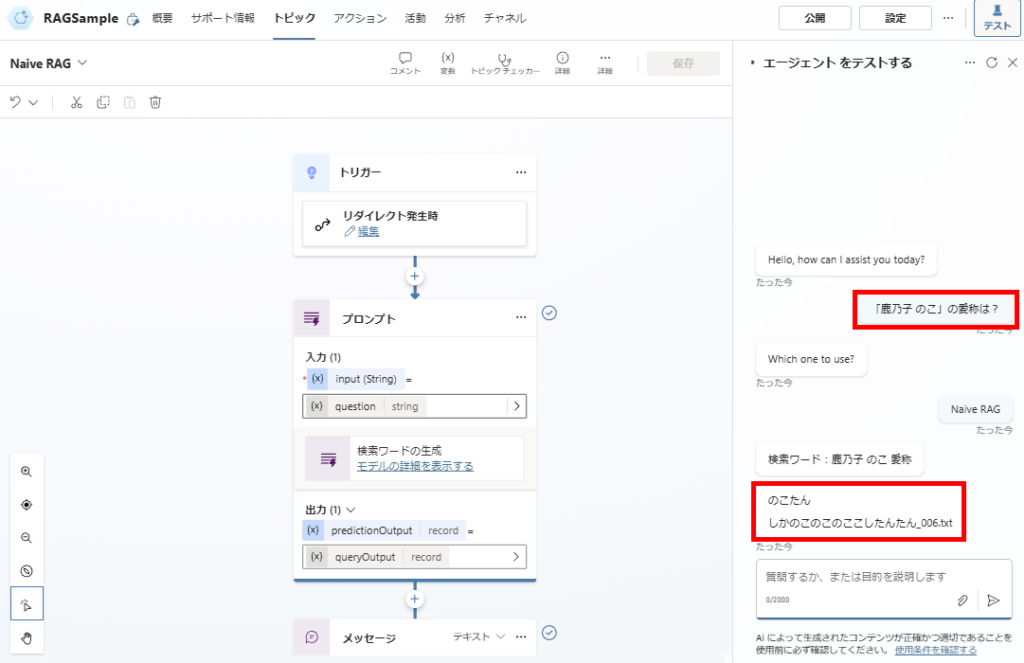
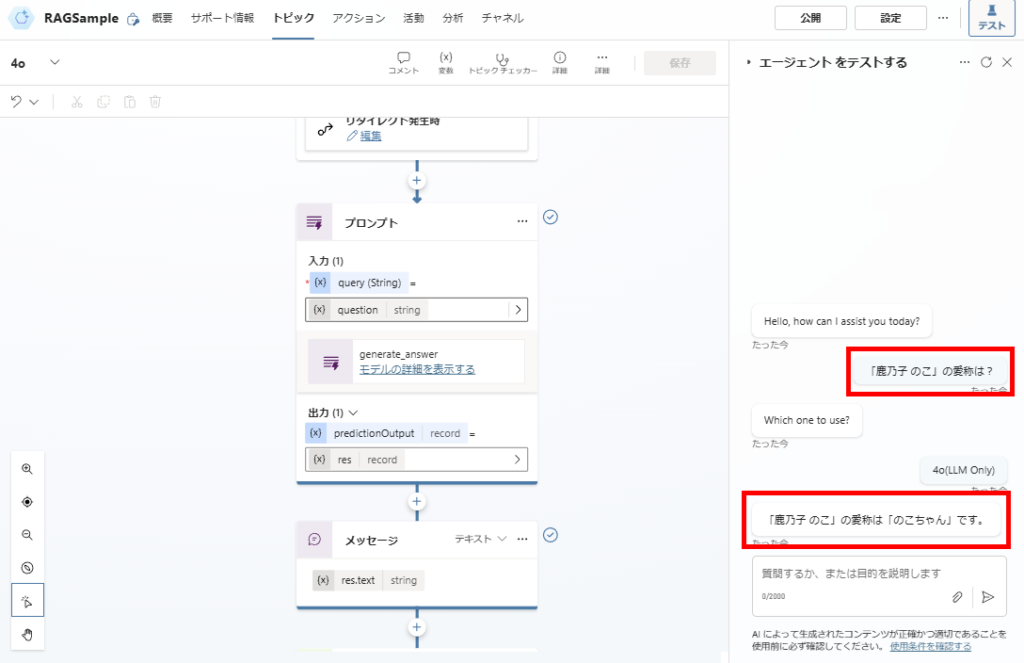
Testing the Implementation

In future articles, I’ll explore various Advanced RAG implementations to improve the system’s performance.
コメント