PDF Function
The PDF function is a preview feature that allows you to create PDF file content directly from screen elements in Power Apps. While developers previously relied on the Print function via PDFWriter for PDF creation, the PDF function enables direct PDF content generation, with a notable capability to create multi-page PDFs.
PDF Function Parameters
When creating PDFs, you can specify the following parameters:
- Screen or control name (Required): The target screen or control for PDF generation
- Size: PDF dimensions (defaults to A4 in Japan)
- DPI: PDF resolution (default is 96)
- Margin: Space around PDF content (default is 0.5 inch)
- Orientation: Portrait or Landscape
- ExpandContainers: Boolean parameter determining whether to include controls within containers and canvases (enables multi-page output)
Now, let’s dive into how to use this function.
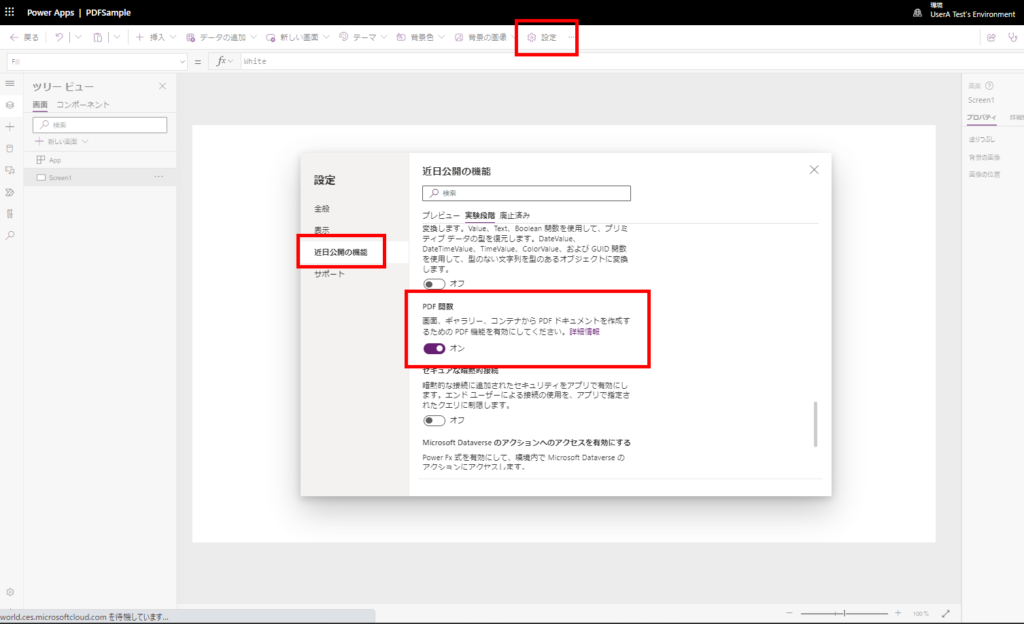
Prerequisites
As a preliminary step, navigate to [Settings], enable the [PDF Function] toggle, and restart your app for the changes to take effect.
Displaying PDF Content in PDFViewer
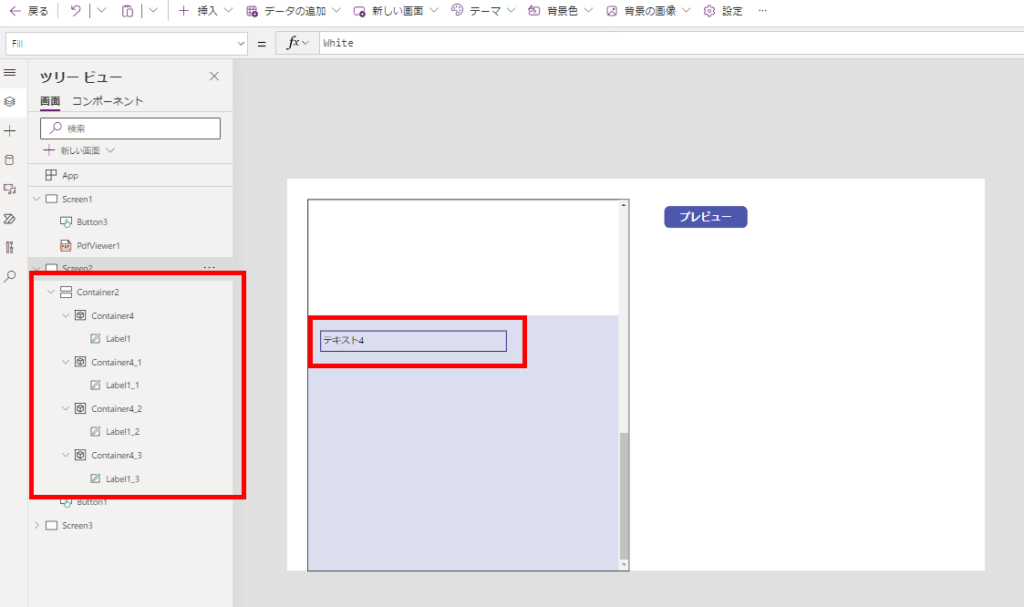
First, prepare a container with scroll functionality (needed for multi-page PDF generation) and controls like this:
Then, call the PDF function targeting this container from a button and store the generated content in the “glbPDF” variable.
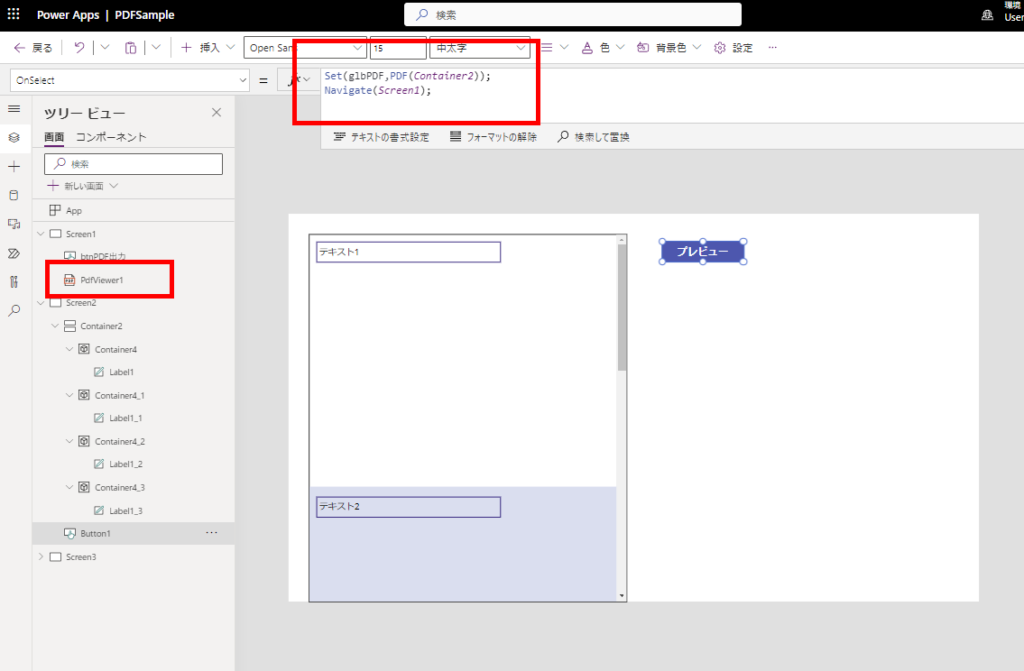
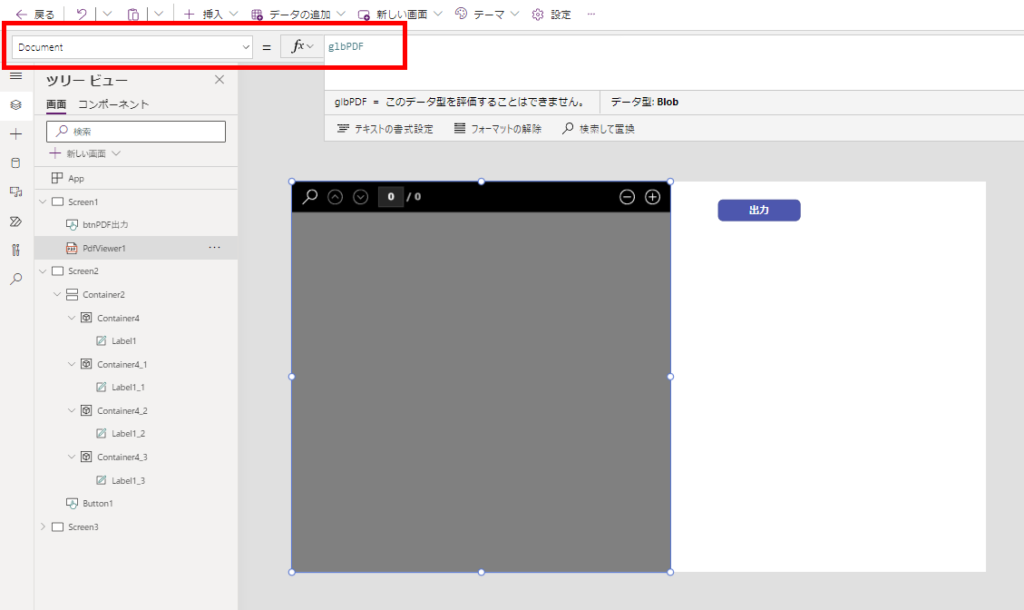
Next, set glbPDF to the Document property of the PDFViewer:
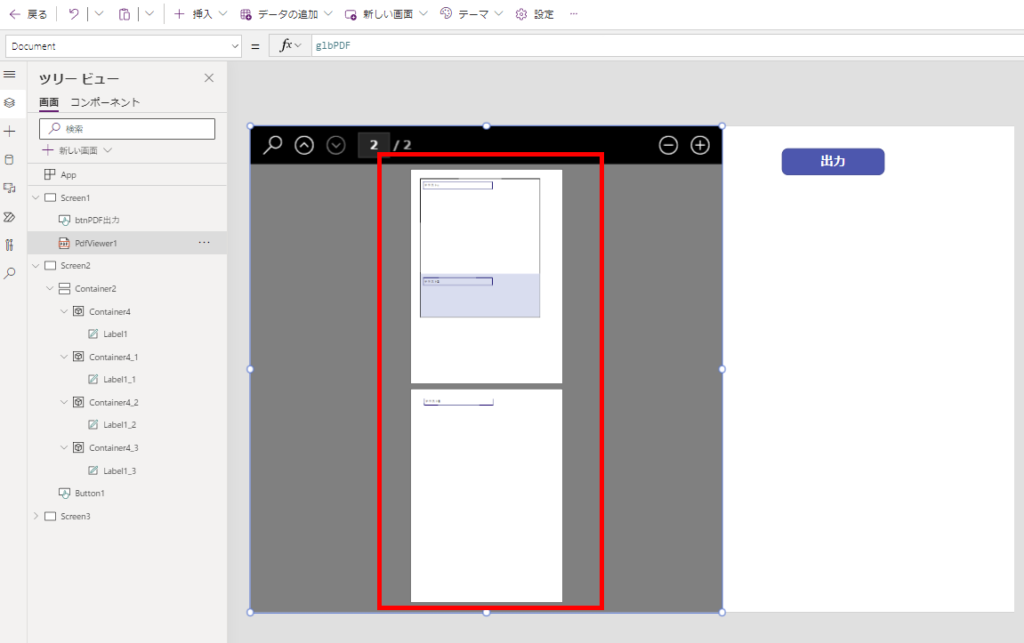
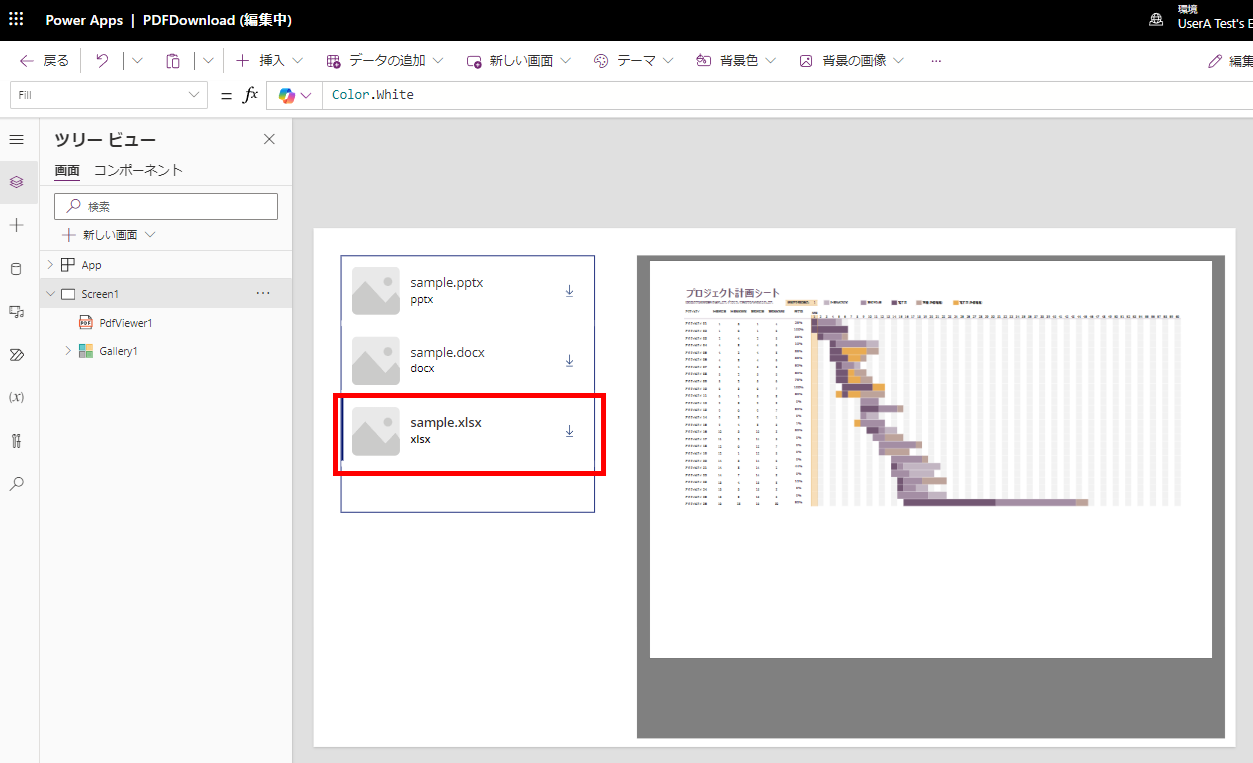
When you press the button with the PDF function, a multi-page PDF displays like this.
Configuring PDF Function Parameters
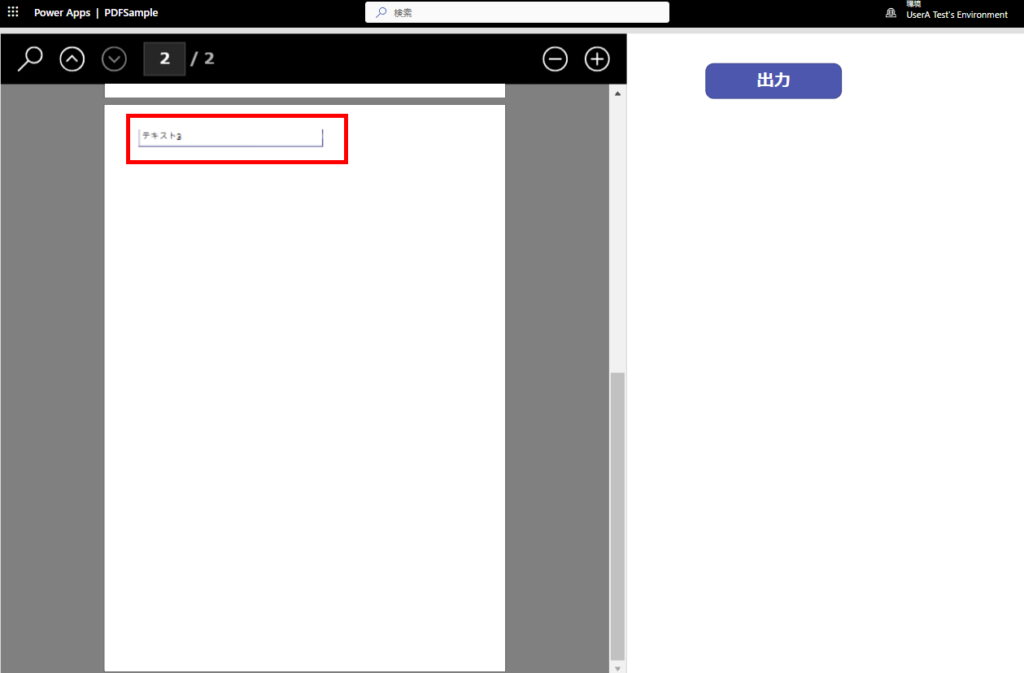
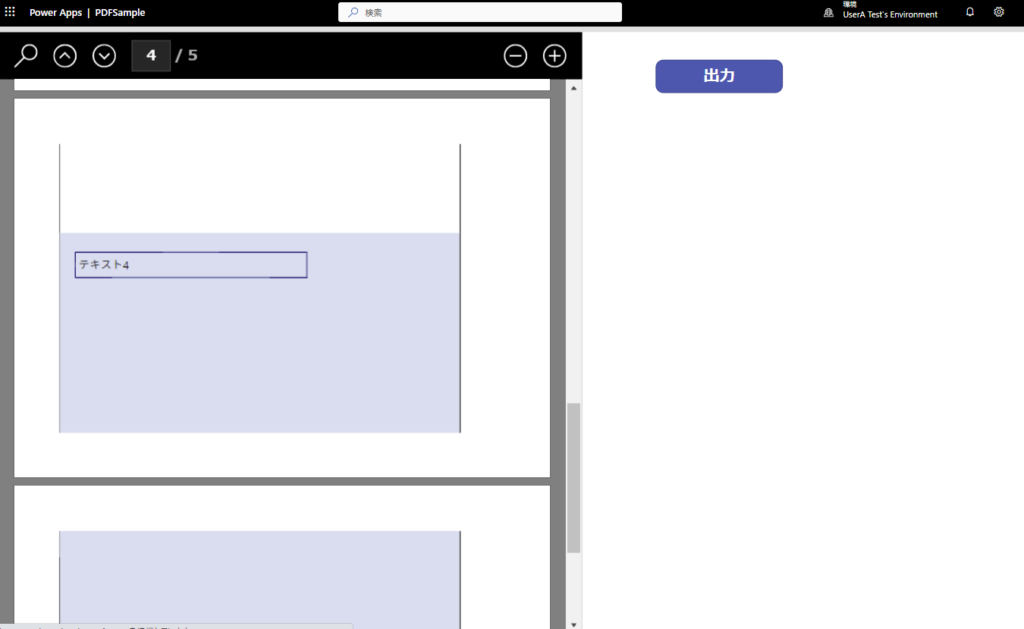
Since we didn’t specify any parameters for the PDF function earlier, the label “Text 4” at the bottom isn’t included in the PDF even when scrolling down.
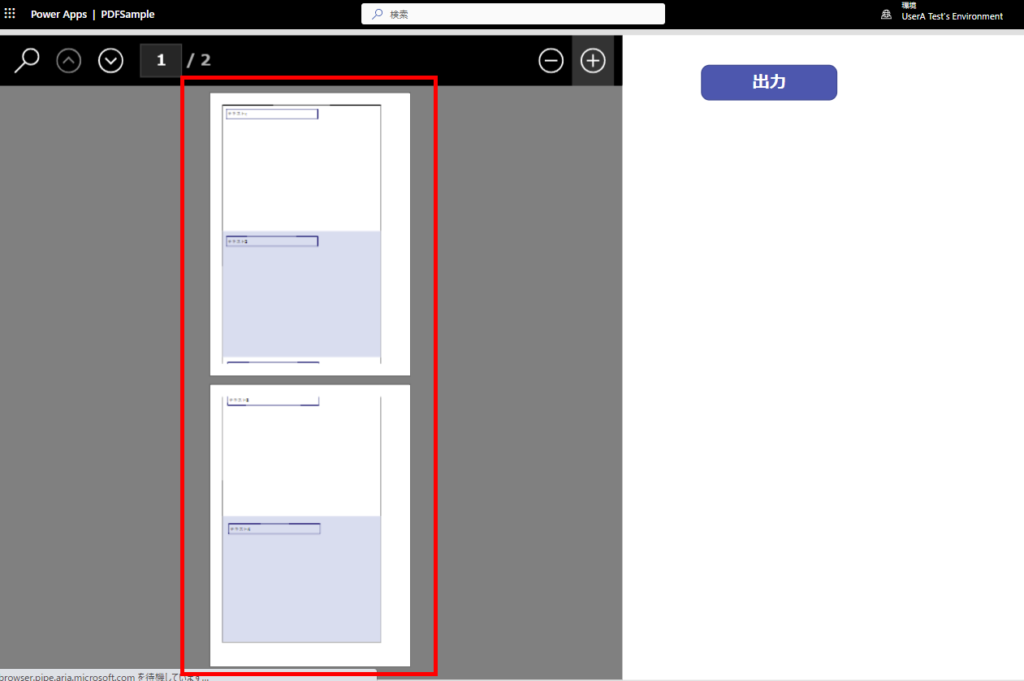
So, let’s set the “ExpandContainers” parameter to true and run it again:
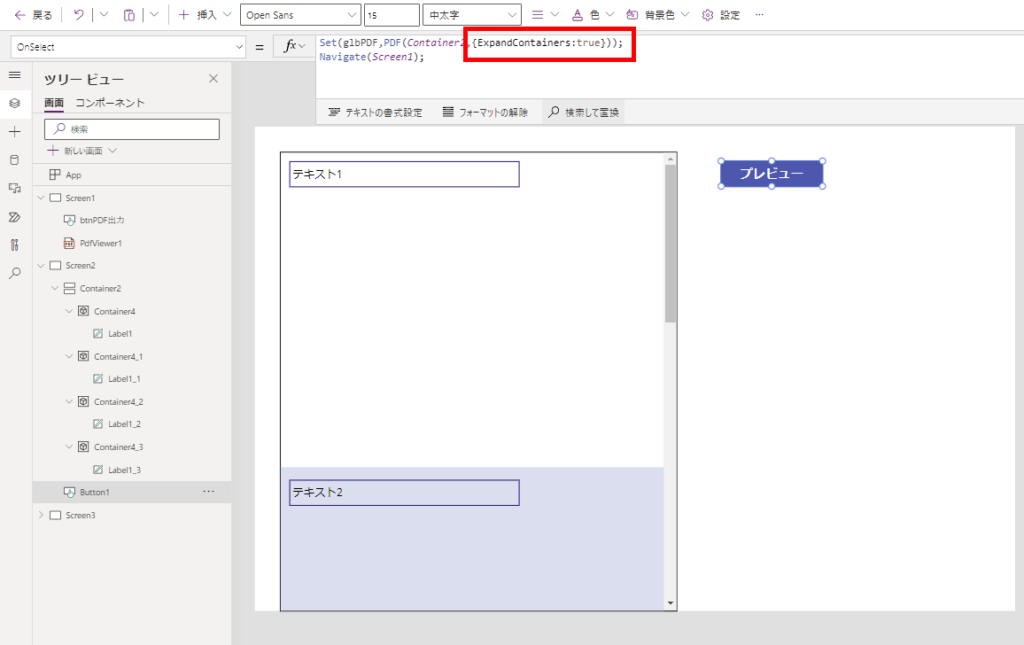
Now all elements within the container are converted to PDF.
We can also specify various other parameters (DPI 72, 25mm margin, landscape orientation) when calling the PDF function:
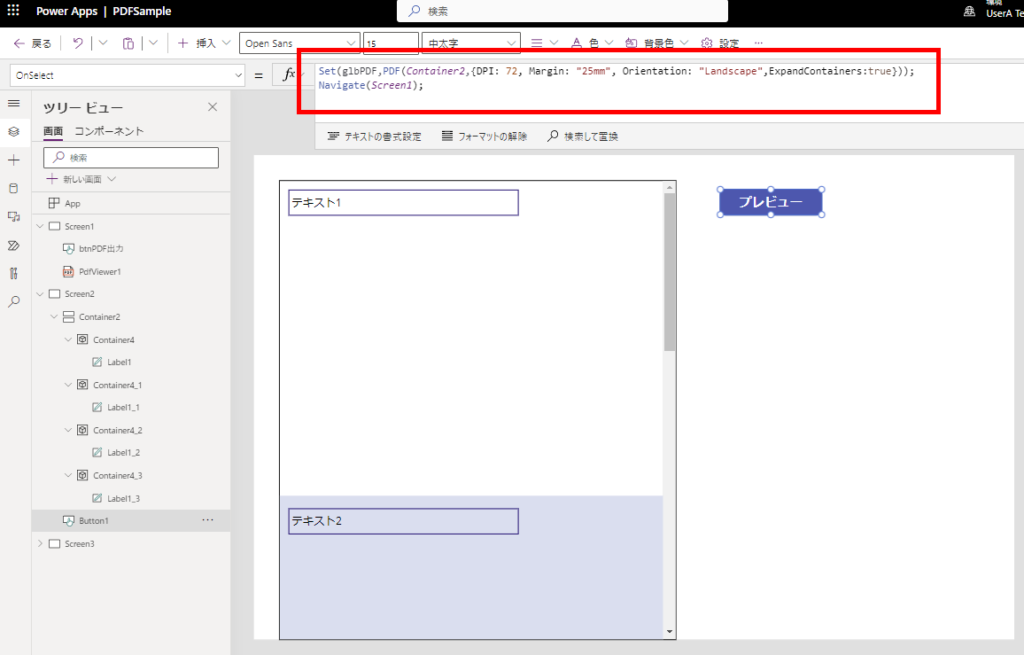
And the PDF is created exactly as specified.
This is really useful!
Saving Generated PDFs
Now, let’s explore how to save the generated PDF as a file.
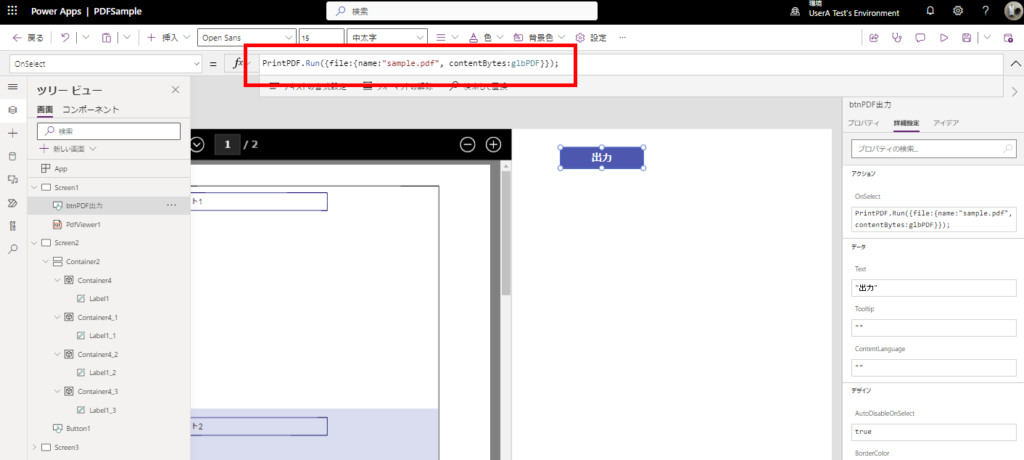
Since we need to use Power Automate to save files, first create a flow with Power Apps (V2) trigger and set up a “file” parameter.
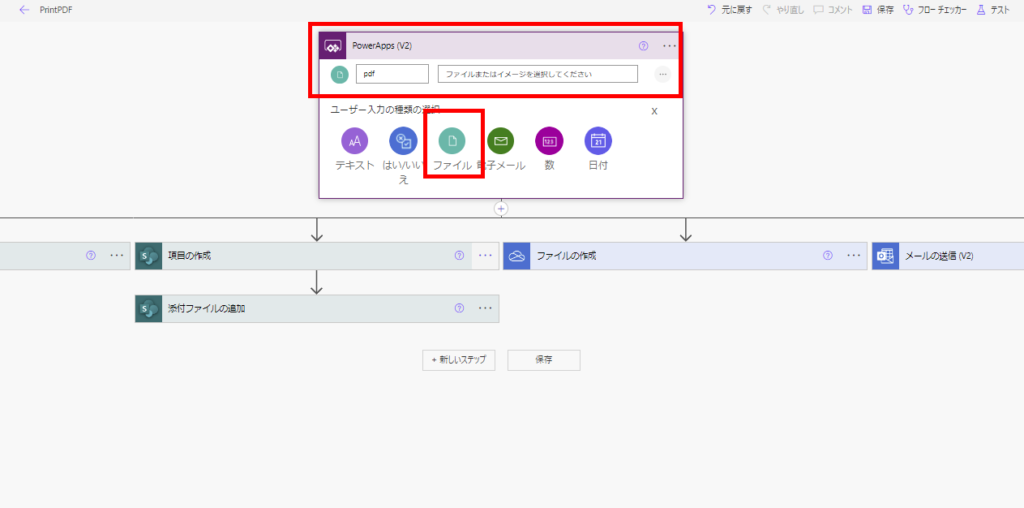
Then, call it from Power Apps like this: ※Specify the filename in ‘name’ and the generated PDF content in ‘contentBytes’ (in this case, we’re using the variable glbPDF)
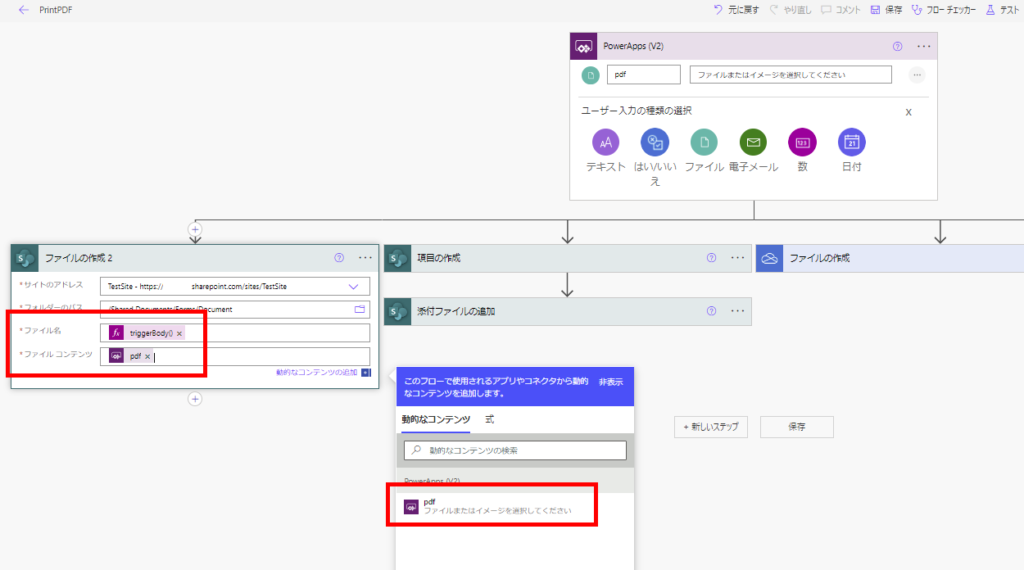
SharePoint Online Document Library / OneDrive
When saving to a document library, use the “Create file” action and specify:
- File name: From the “Expression” tab, use either the filename stored in triggerBody or your desired filename
- File content: Select from the “Dynamic content” tab
 ※Expression for the filename:
triggerBody()['file']['name']
The same process applies to OneDrive.
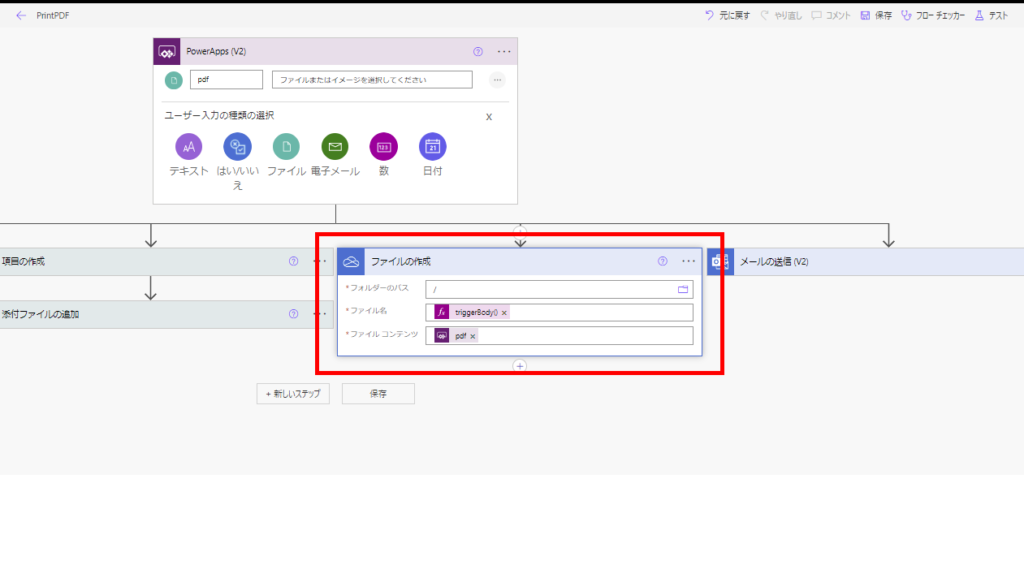
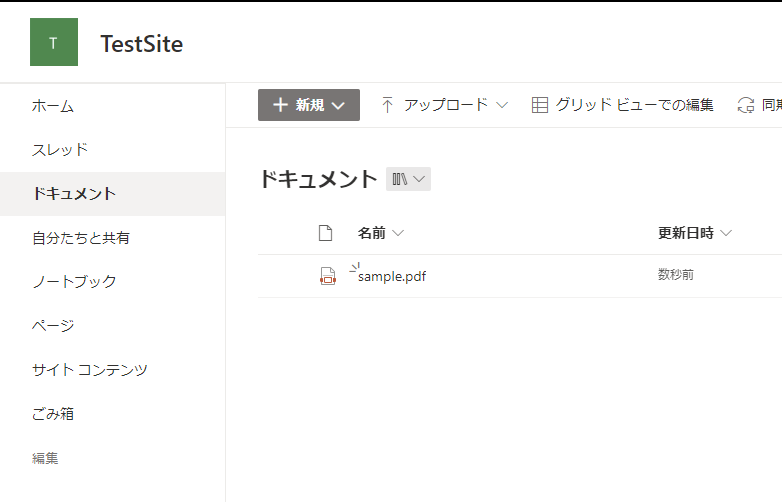
When executed, the PDF will be created like this:
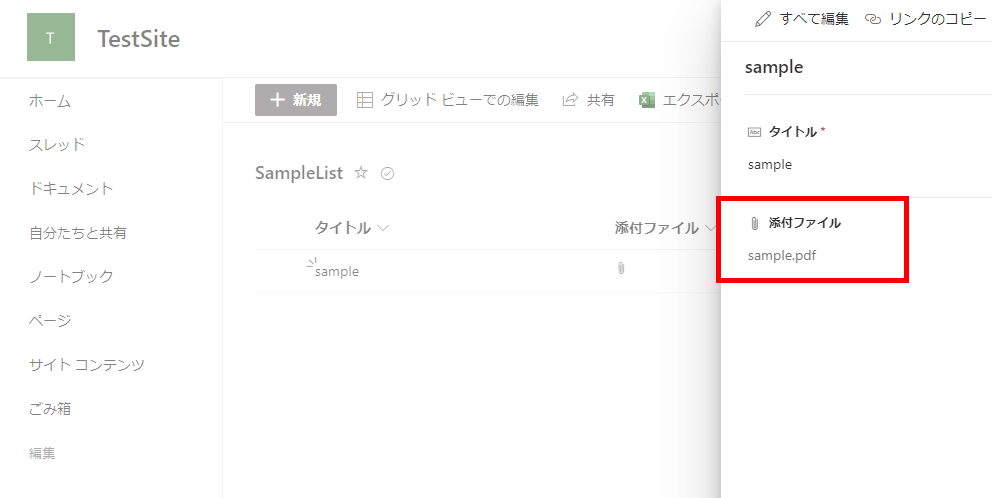
SharePoint Online List Attachments
When saving as an attachment to a SharePoint Online list, configure it like this:
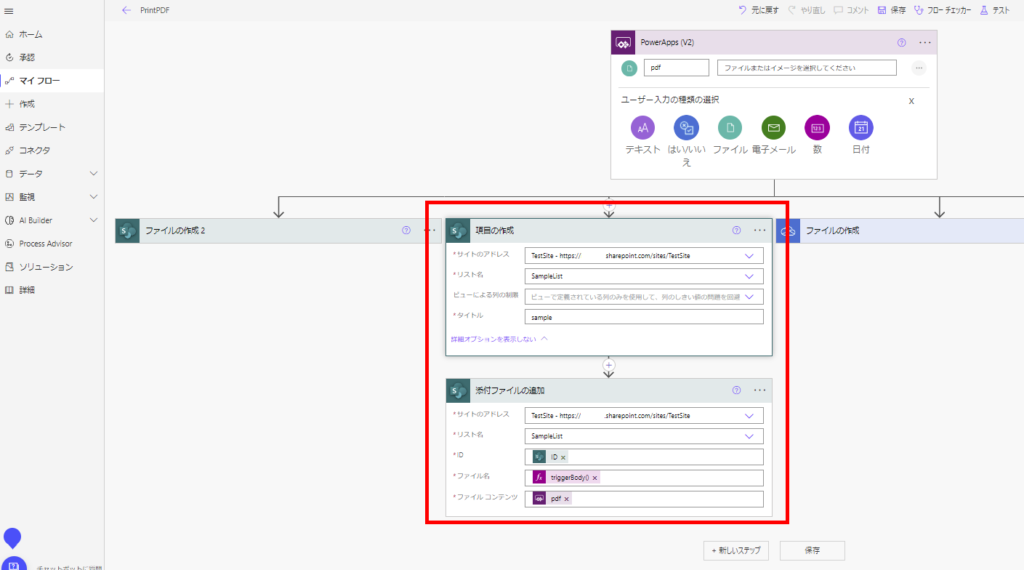
When executed, the file is successfully saved as an attachment.
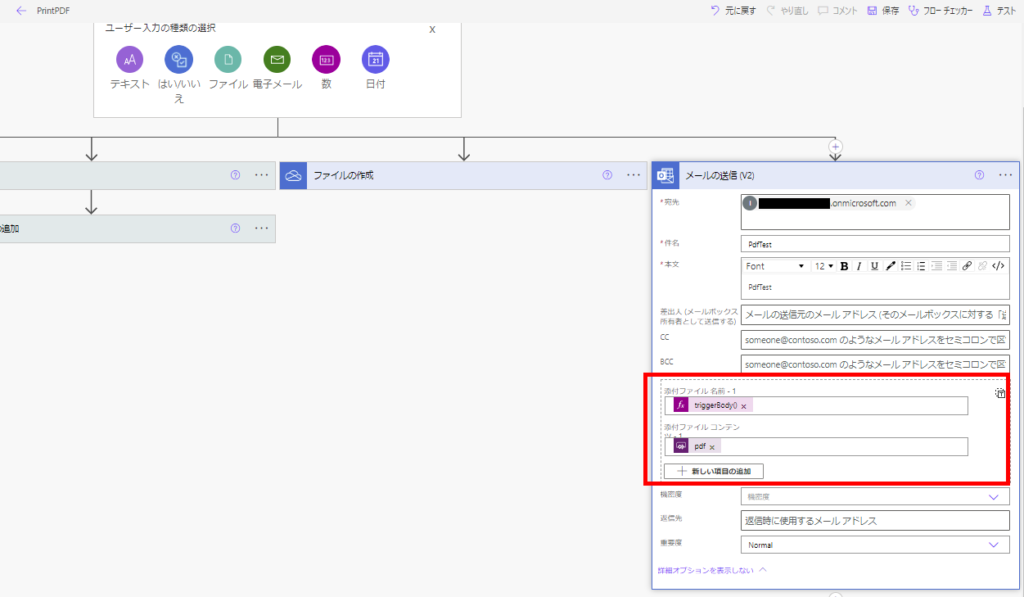
Attaching to Outlook Emails
To attach the PDF to an Outlook email, configure your flow settings like this:
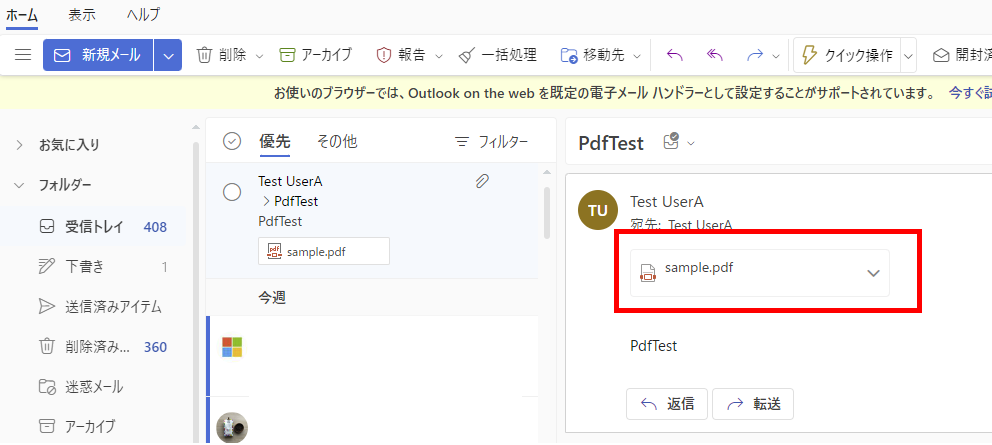
Once executed, you can successfully send the PDF as an email attachment.
Limitations
While the PDF function is useful, it comes with several limitations as it’s still an experimental feature.
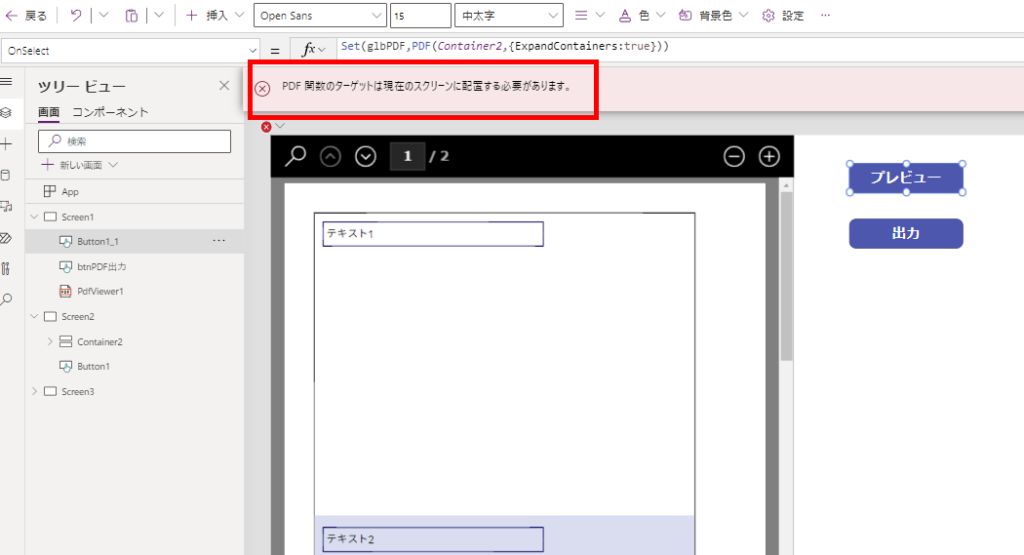
PDF Generation Limited to Current Screen Elements
The PDF function can only convert elements that exist on the current screen or controls within that screen.
Attempting to reference a container from another screen (Container2) will result in an error like this:
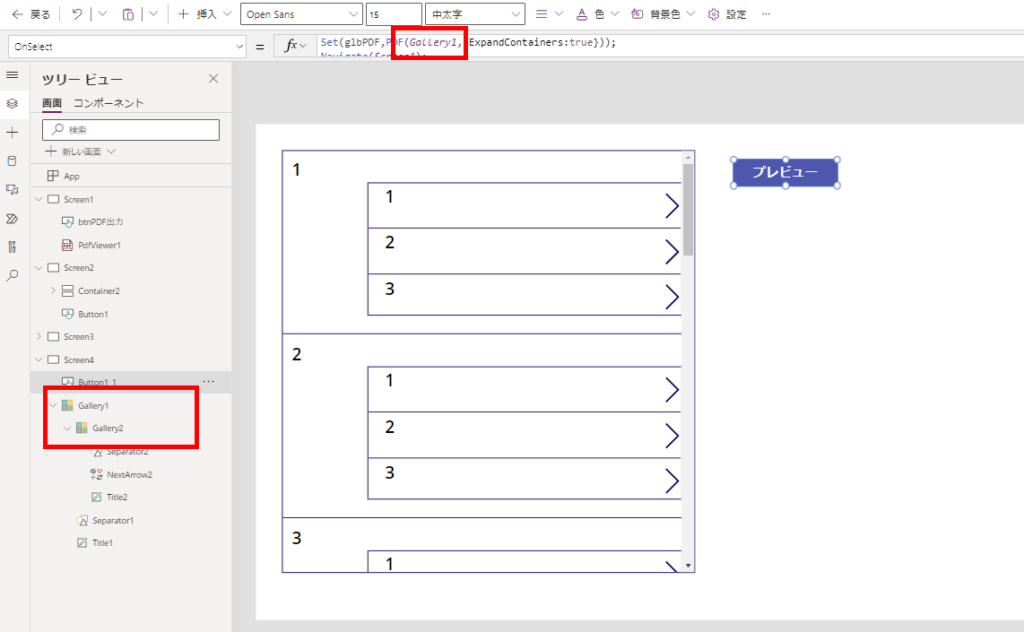
Nested Galleries Not Supported
Additionally, nested galleries cannot be properly converted to PDF.
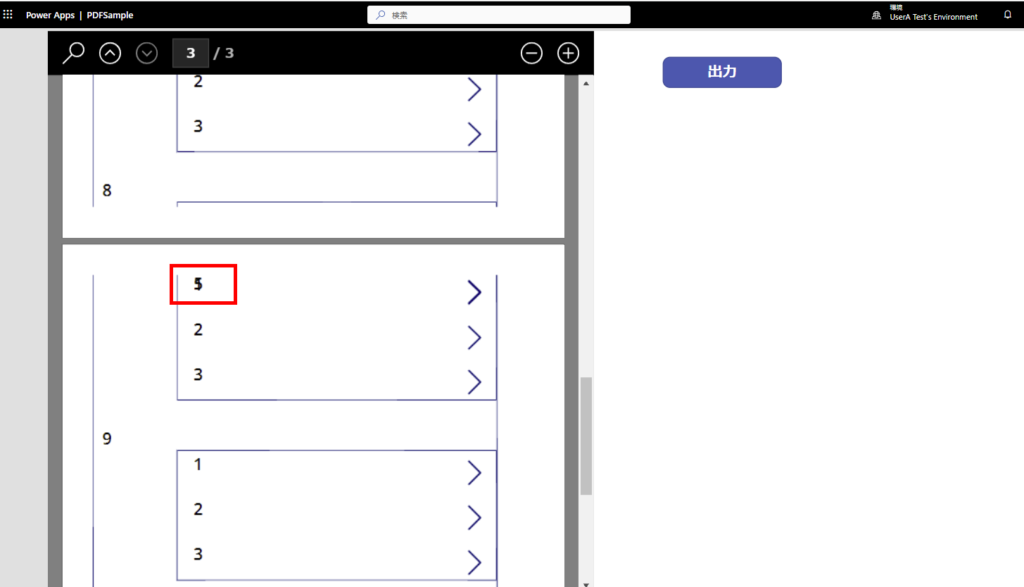
When trying to convert Gallery2 (containing numbers up to 5) with nested elements like this:
The output is generated but with display distortions.
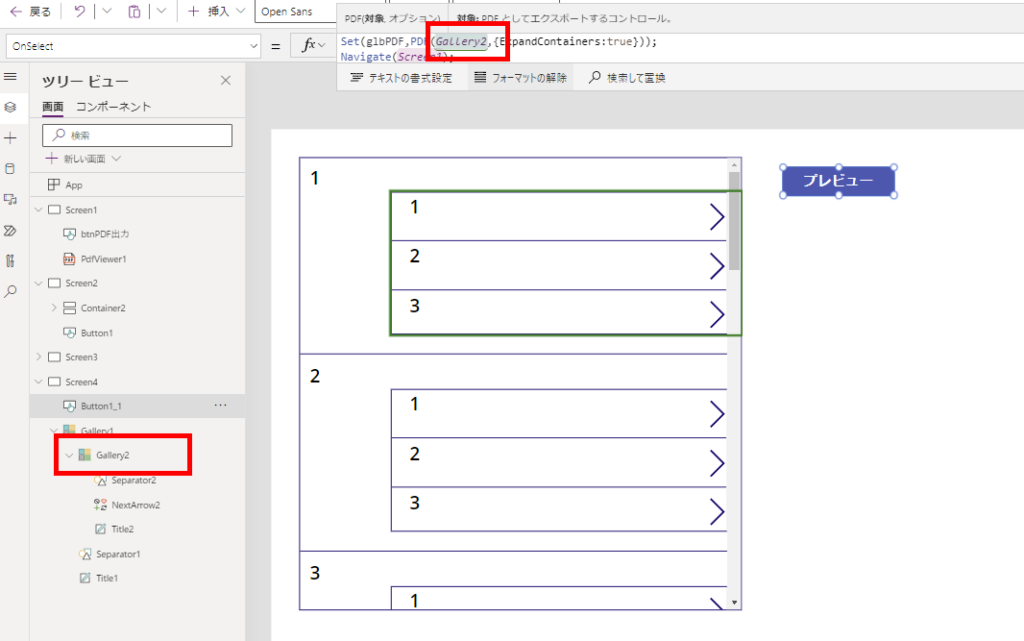
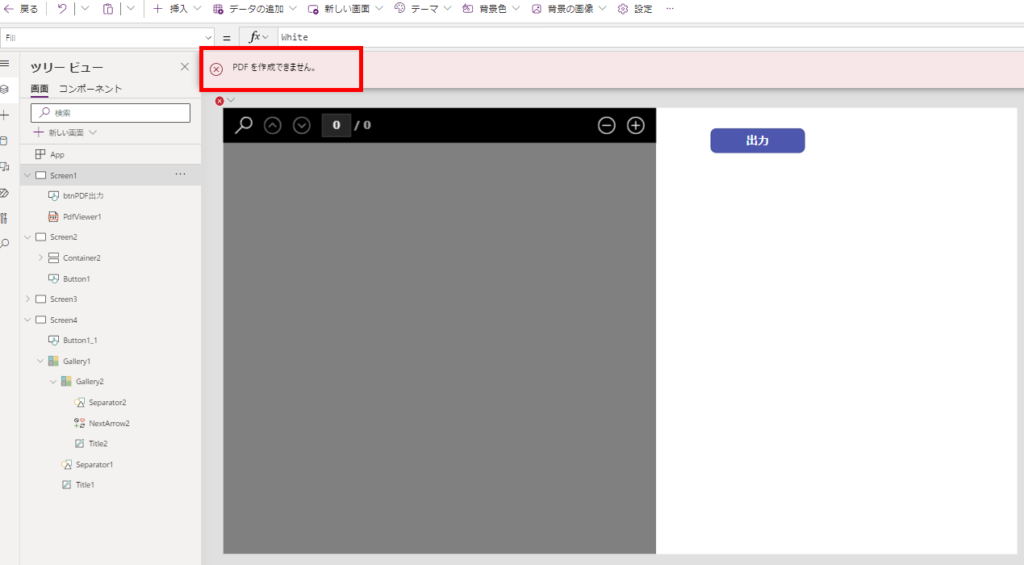
Furthermore, when attempting to convert Gallery2 itself:
An error occurs.
Relaetd Article

コメント