When I set up a Power Automate HTTP request trigger with “Any user in my tenant” authentication, I wasn’t sure how to call this flow from other flows. Here’s what I discovered through my investigation.
Objective
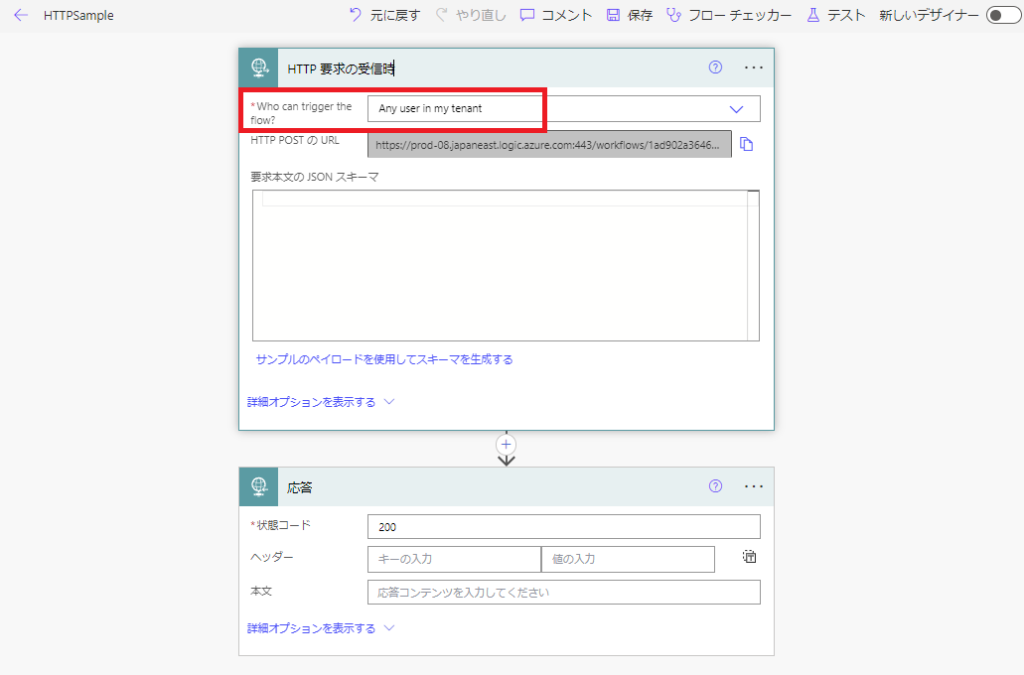
I wanted to create a flow with the “When a HTTP request is received” trigger set to “Any user in my tenant”:
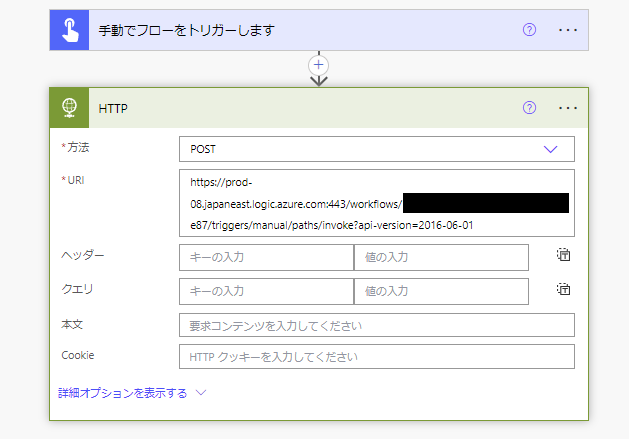
When trying to call this flow from another flow using the standard method:
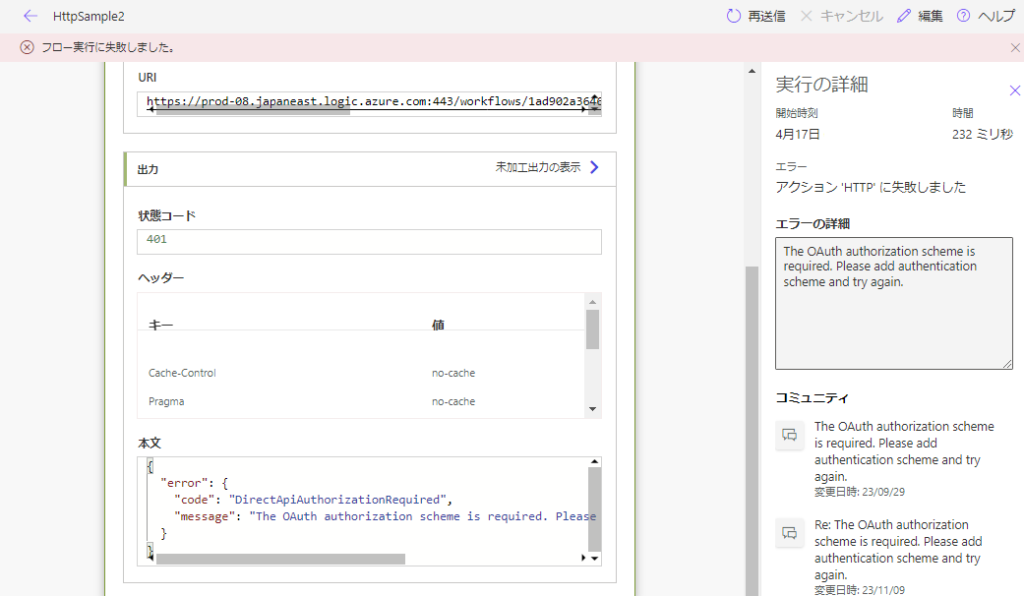
It results in this error:
The goal is to enable this flow to be called from any other flow within my tenant.
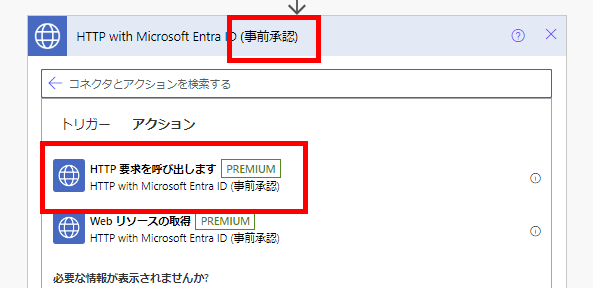
Method 1: Using Entra ID’s “Send an HTTP request” Action
The first method involves using the “Send an HTTP request” action from Entra ID.
Select the action with “(pre-authorized)” from the Entra ID actions:
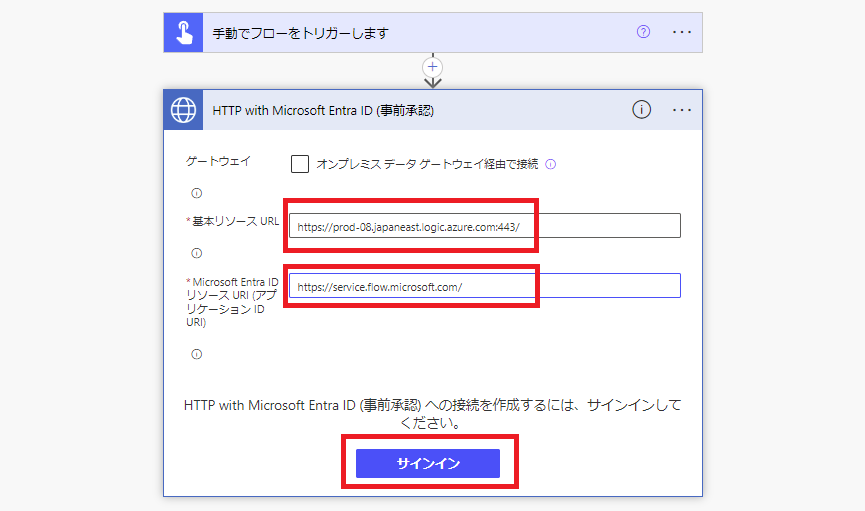
Create a connection as shown in the image:
Base Resource URL: The beginning part of the HTTP request trigger URL
Entra ID Resource URI: https://service.flow.microsoft.com/
Base Resource URL: The beginning part of the HTTP request trigger URL
Entra ID Resource URI: https://service.flow.microsoft.com/
Note: If you don’t see the “Create Connection” option, you might already have an Entra ID connection for other purposes. In this case, create a new connection from “Add new connection”:

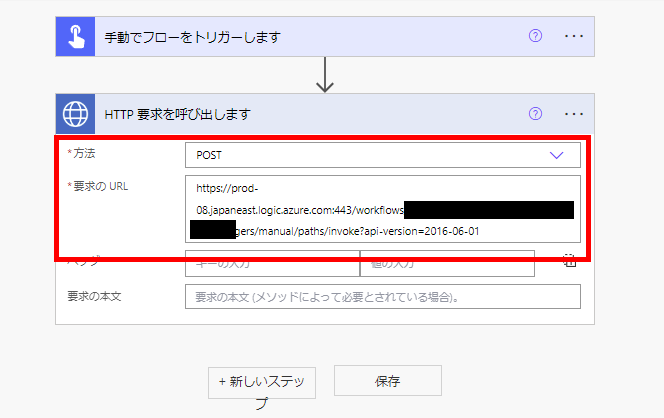
Once the connection is successfully created, set the trigger URL in the [Request URL] field and run the flow:
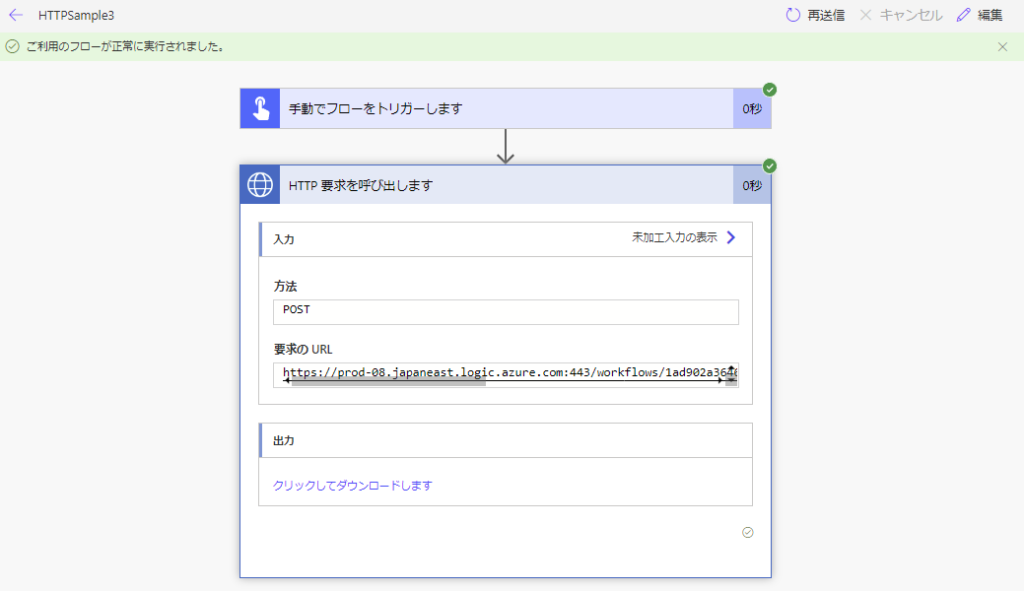
The flow will execute successfully:
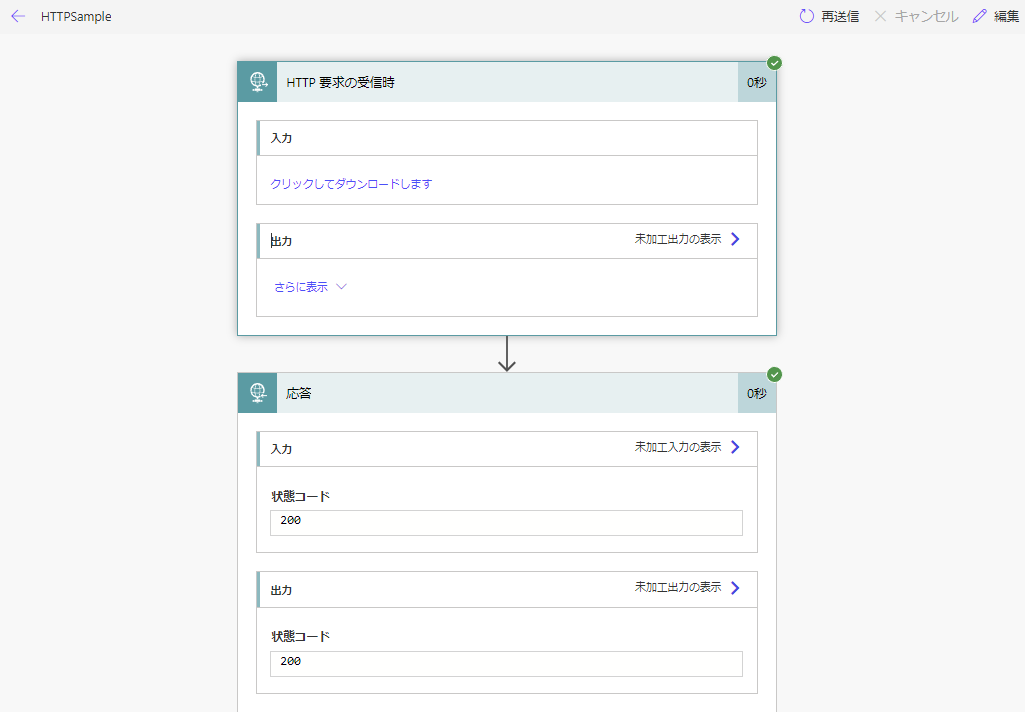
You can confirm the successful execution on the receiving end as well:
Method 2: Using HTTP Action
When using the HTTP action, you need to first register an application in Entra ID.
Prerequisite: Entra ID Application Registration
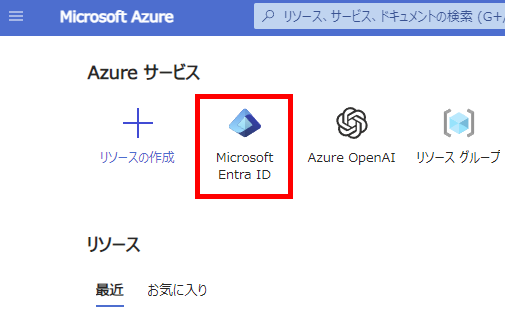
First, access Azure Entra ID:
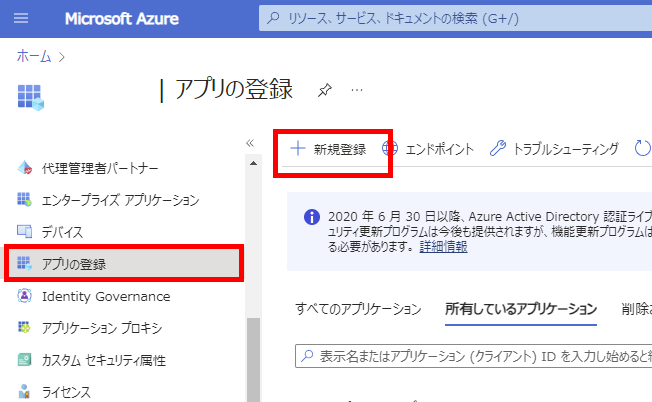
Click on [App registrations] and then [New registration]:
Register the application with your preferred name:

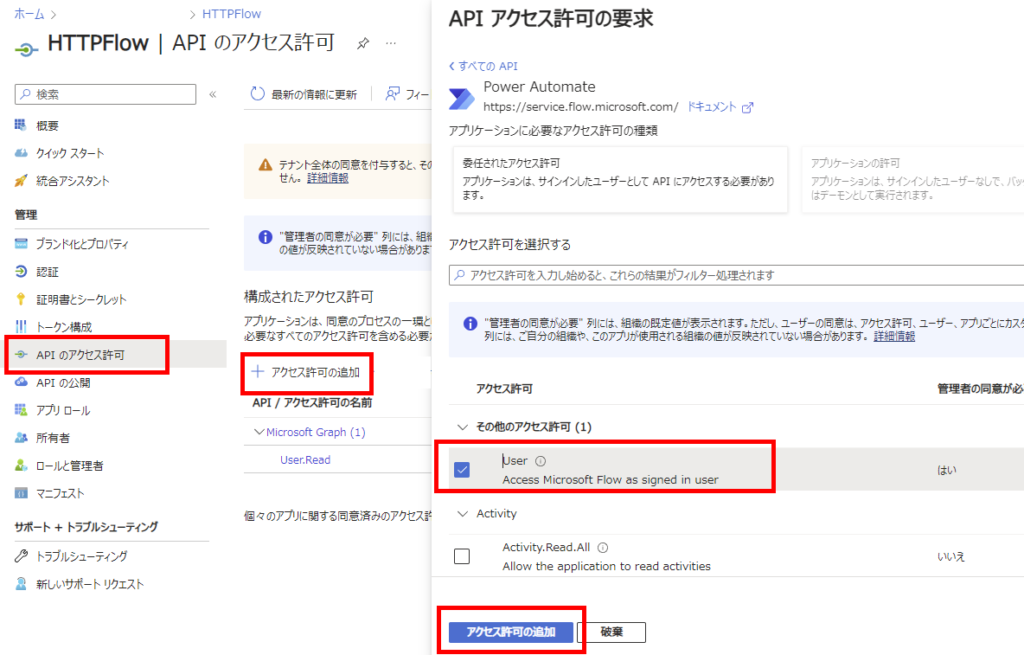
Then go to [API permissions] → [Add a permission] and add [User] permissions:
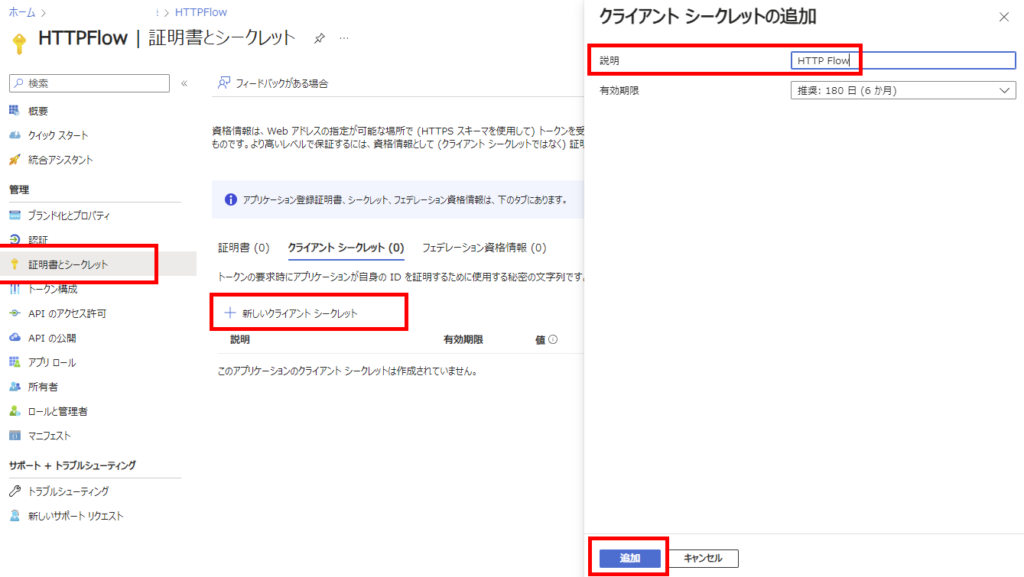
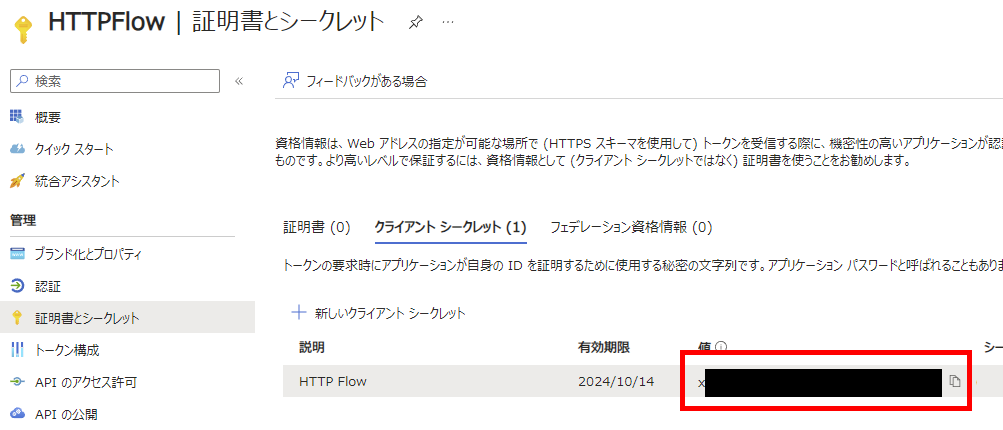
Finally, add a [New client secret] from [Certificates & secrets]:
Take note of the client secret value:
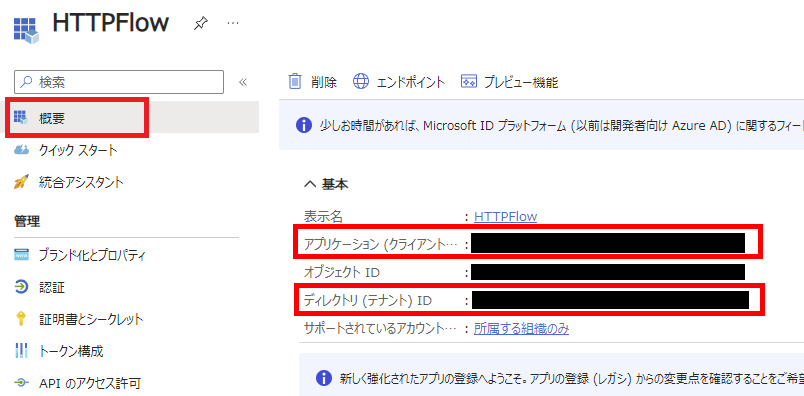
And record both the client ID and tenant ID:
Calling from HTTP Action
Once the Entra ID registration is complete, configure the HTTP action with these values:
Note: The target audience is “https://service.flow.microsoft.com/”
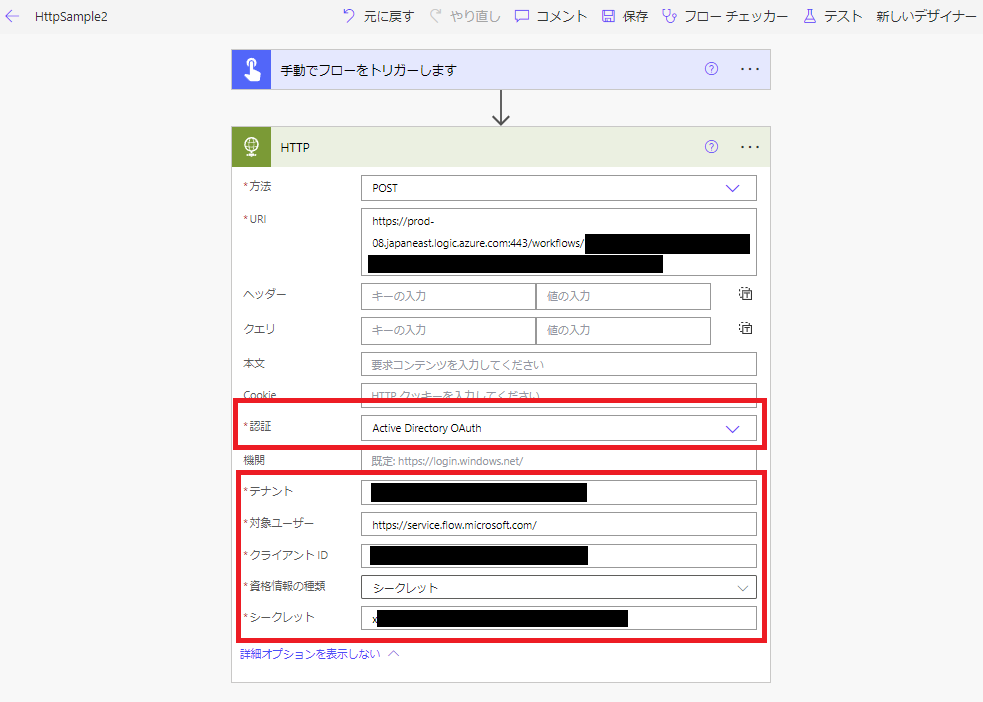
Note: The target audience is “https://service.flow.microsoft.com/”
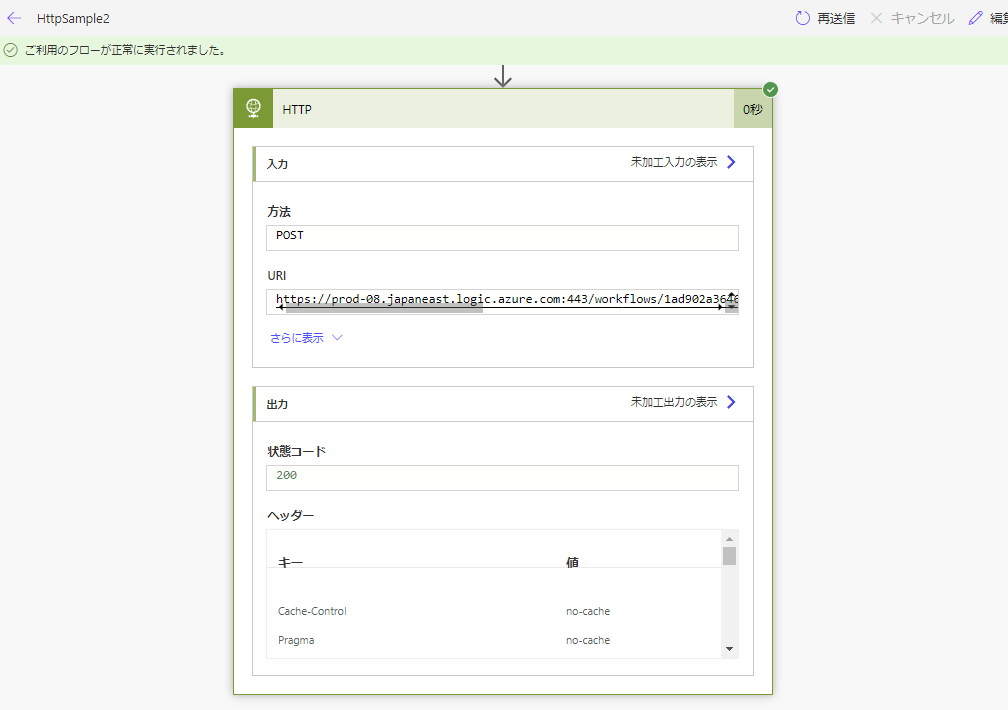
The call will execute successfully:
コメント