⚠️ License Requirement (Updated 2025)
The “Word Online (Business)” connector discussed in this article requires a Power Automate Premium license (formerly Per User plan).
It is not available with standard (free/seeded) licenses.
The Word Online connector is often overlooked because it requires a Premium license. However, it is an incredibly powerful tool for business automation, especially when you need to generate documents or create PDFs automatically.
I recently had the opportunity to implement these actions in a project, so I’ve compiled a guide on how to use them—specifically for creating invoices with dynamic line items.
Overview of Word Online Actions
Currently, there are two main actions available in the Word Online (Business) connector. Both require a paid license.
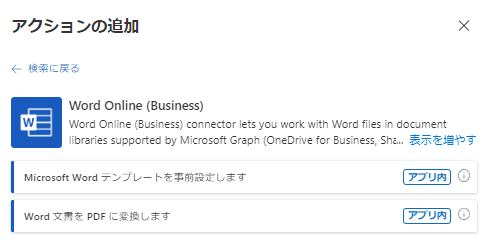
In this guide, we will use these two actions to generate an invoice in Word format using Power Automate and then convert it to a PDF.
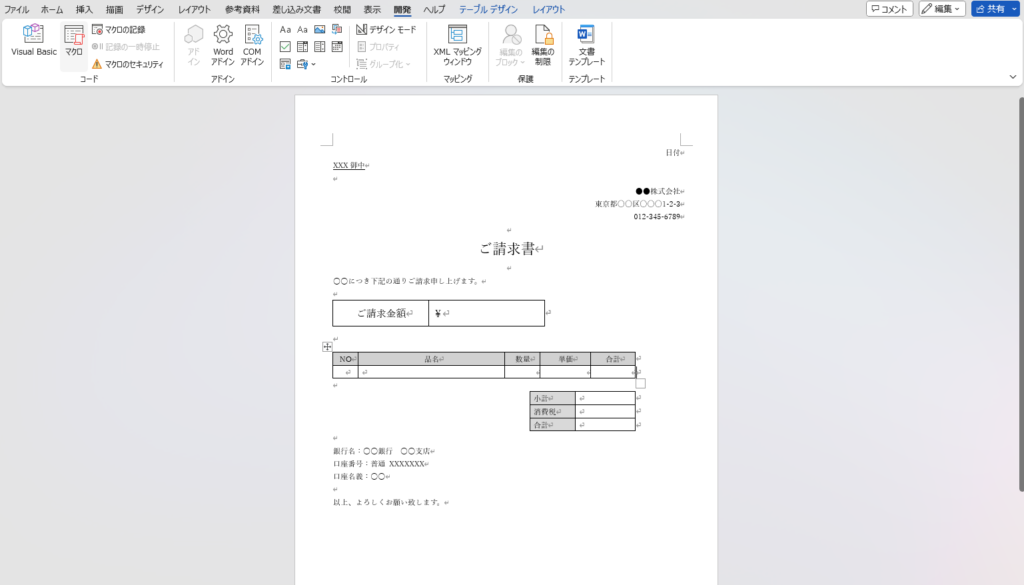
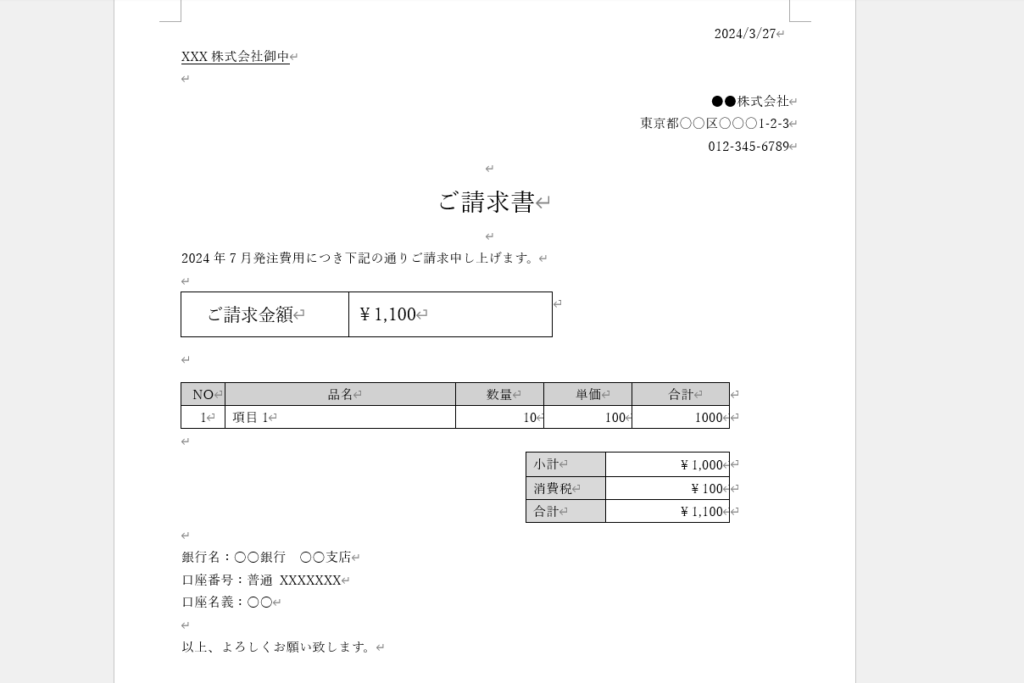
Step 1: Create a Template in Word Desktop
We will create a template using this invoice-style Word document.
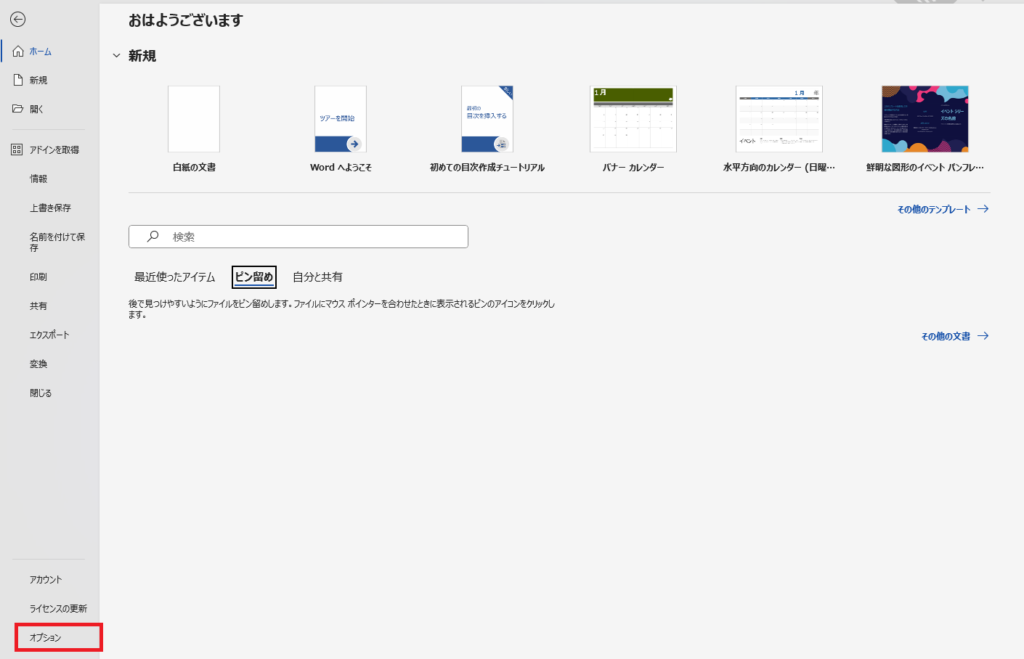
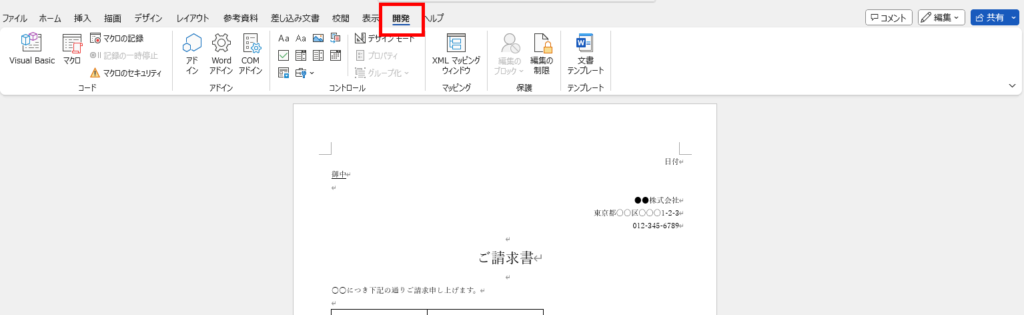
Preparation: Enable the [Developer] Tab
First, open the Word desktop application. Go to
File >
Options.
Under
Customize Ribbon, check the box for
[Developer] in the right-hand pane.
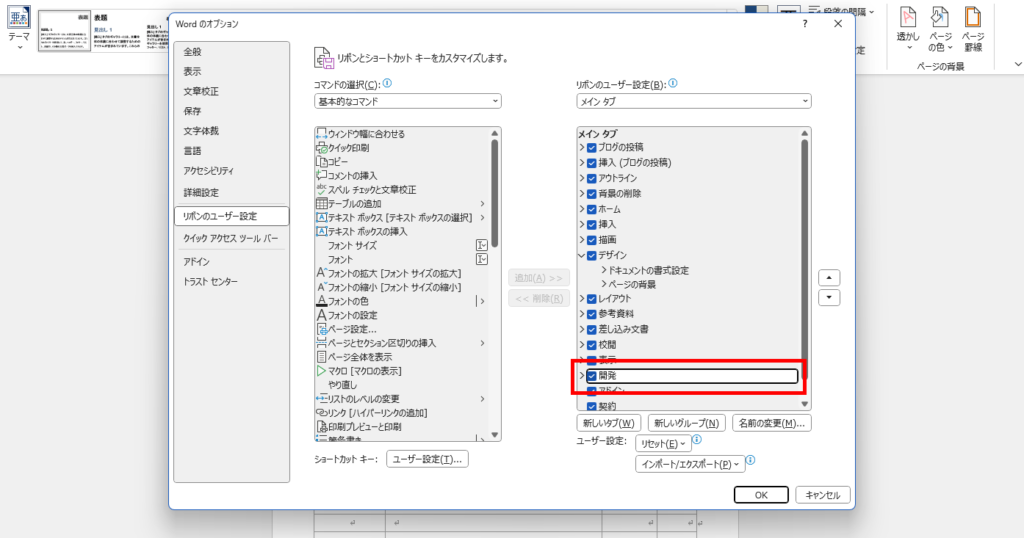
Once the
[Developer] tab appears in your ribbon, you are ready to proceed.
Step 2: Define Text Placeholders
Next, we set up placeholders in the Word template where text will be replaced (e.g., Company Name, Total Amount).
Select the text you want to make dynamic (e.g., “Company name” in the image) and click
[Plain Text Content Control] from the Developer tab.
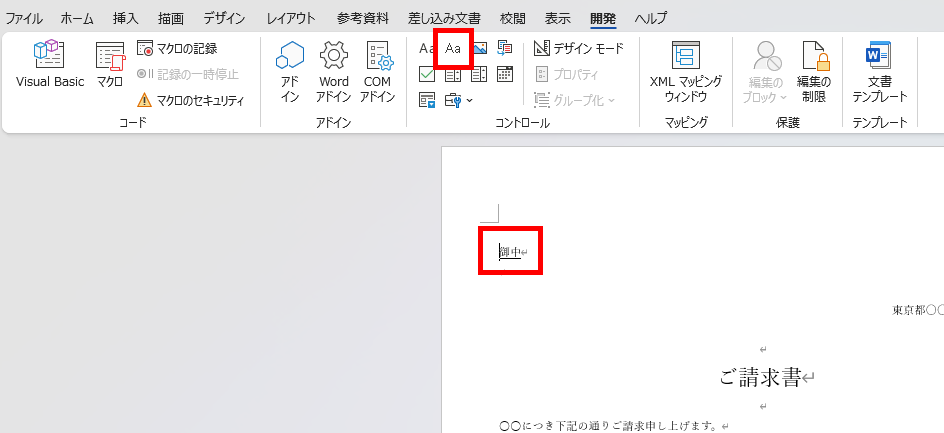
It will look like the image below.
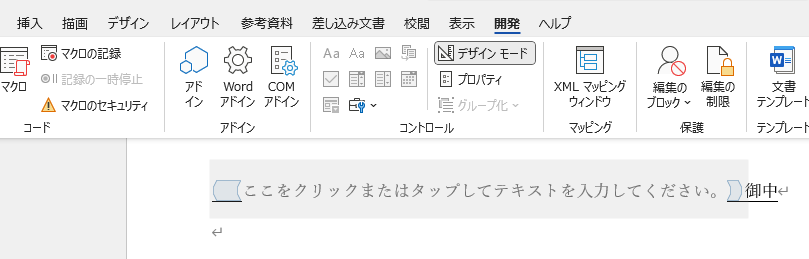
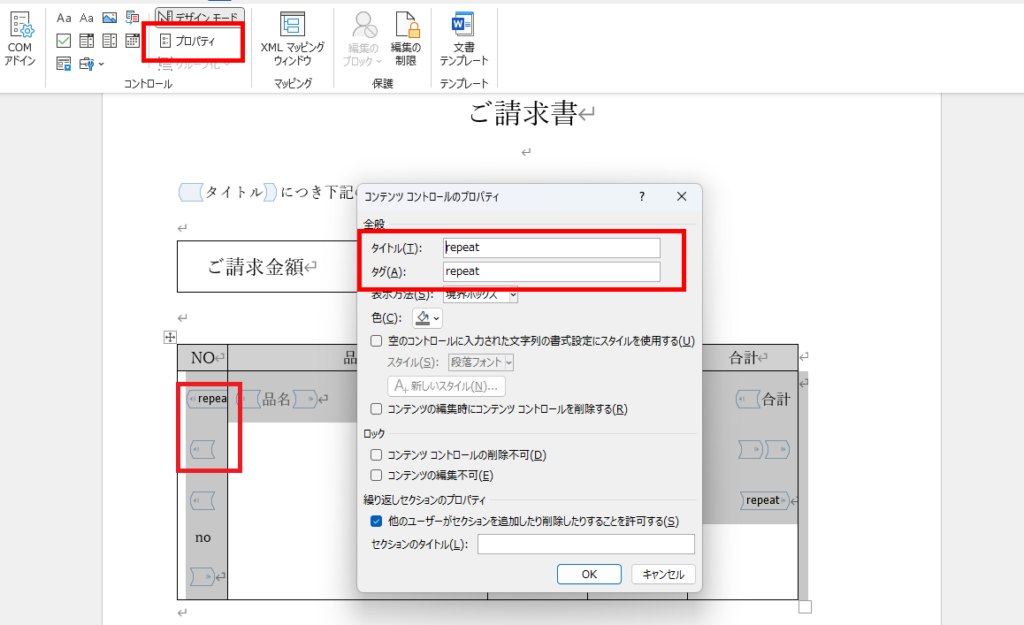
Click on “Properties” and enter a meaningful
Title (e.g., “ClientName”). This title will be displayed in Power Automate later.
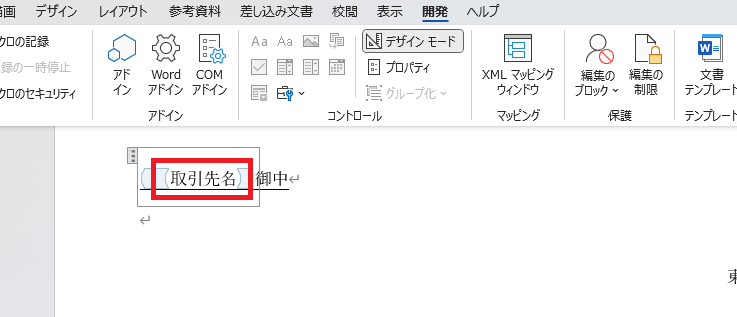
Repeat this process for all text fields you want to replace.
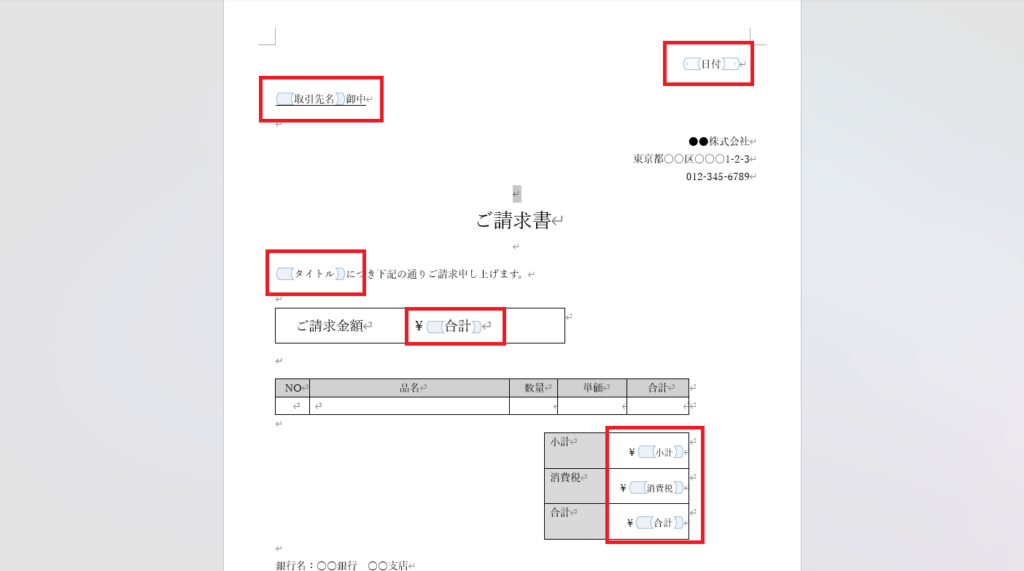
Step 3: Define Dynamic Rows (Repeating Items)
Now, let’s set up the section for dynamic items (e.g., invoice line items).
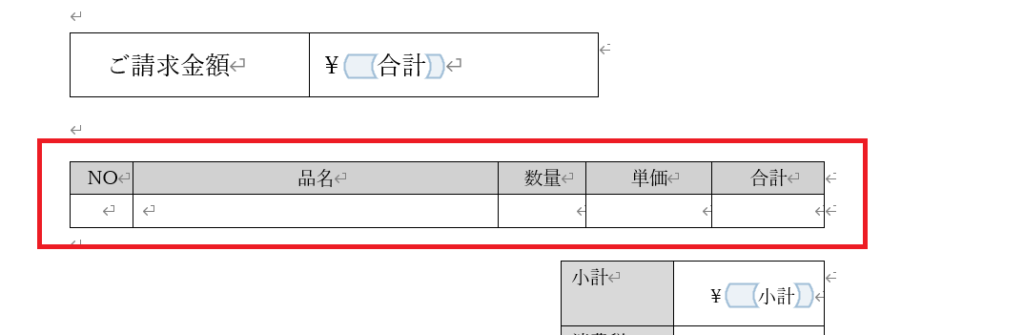
First, insert
[Plain Text Content Control] into each cell of the first row, just like we did for the text fields.
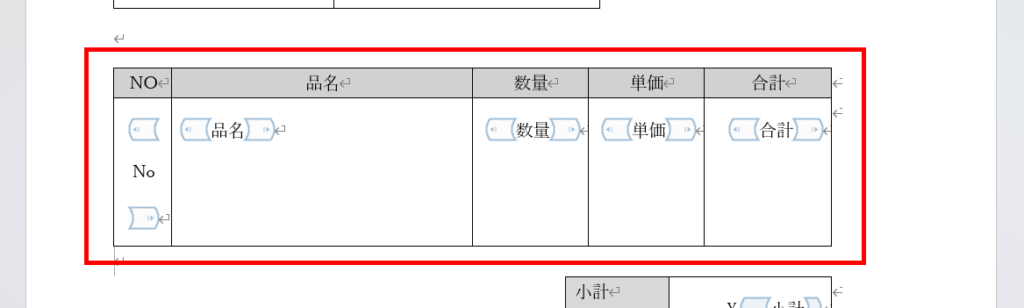
Next, select the
entire row (including the row marker outside the table). Then, click
[Repeating Section Content Control] in the Developer tab.
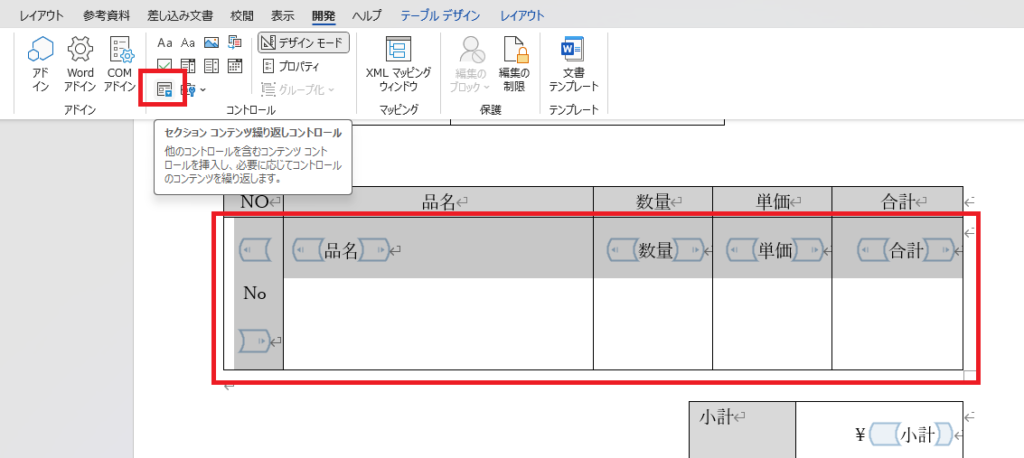
With the entire row selected, click
Properties, set a Title and Tag, and press OK.
The Word template is now ready. Save this file to OneDrive or SharePoint.
⚠️ Important Note:
Once you have set up the [Repeating Section Content Control], avoid editing or deleting the Text Content Controls inside it. Doing so can break the template.
If the generated Word document looks corrupted, try deleting the entire Repeating Section and recreating it from scratch.
Step 4: Build the Flow in Power Automate
Populating Text Fields
Add the
[Populate a Microsoft Word template] action. Select the location where you saved your template file.
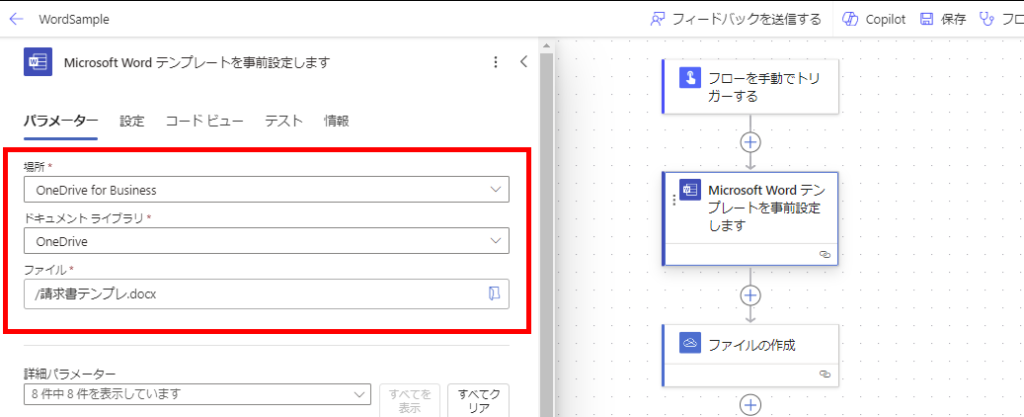
The action will automatically detect the content controls you created. Enter the text you want to insert.
*You can enter static text or map dynamic values from previous steps (e.g., SharePoint list items).
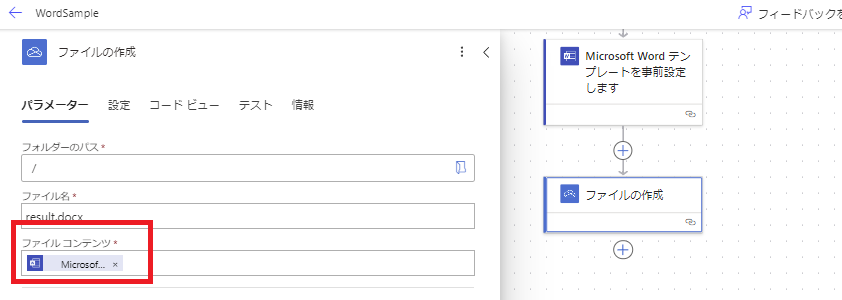
Use a
[Create file] action to save the populated content as a new Word document.
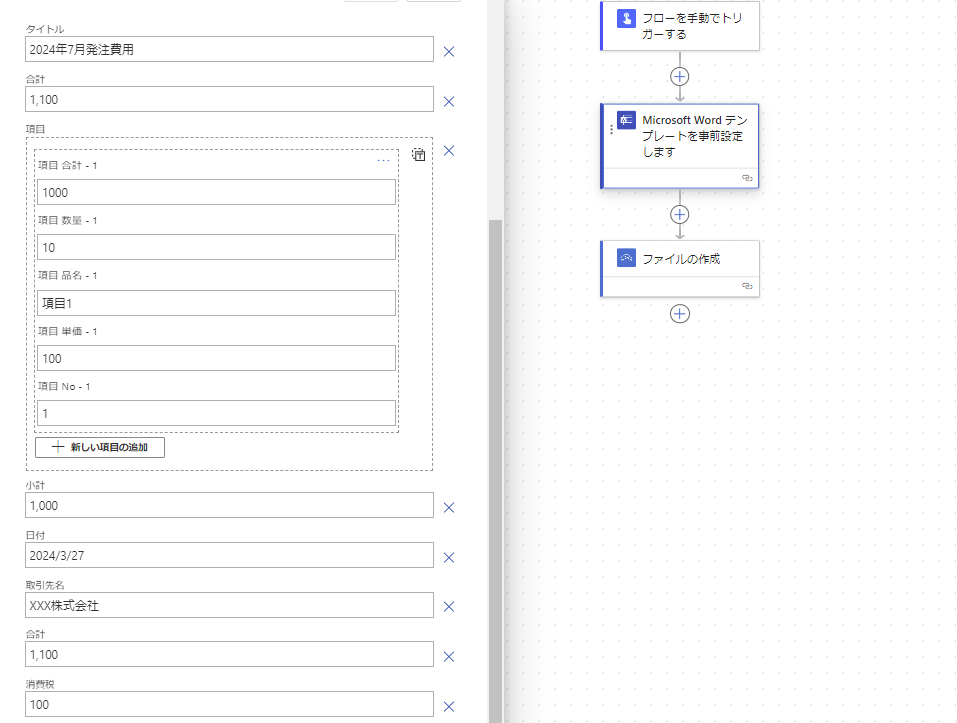
If you run the flow now, the text fields will be replaced as shown below.
Adding Dynamic Rows (Line Items)
Now, let’s add multiple line items dynamically.
*Scenario: You have a SharePoint list and want to add these items to the invoice table.
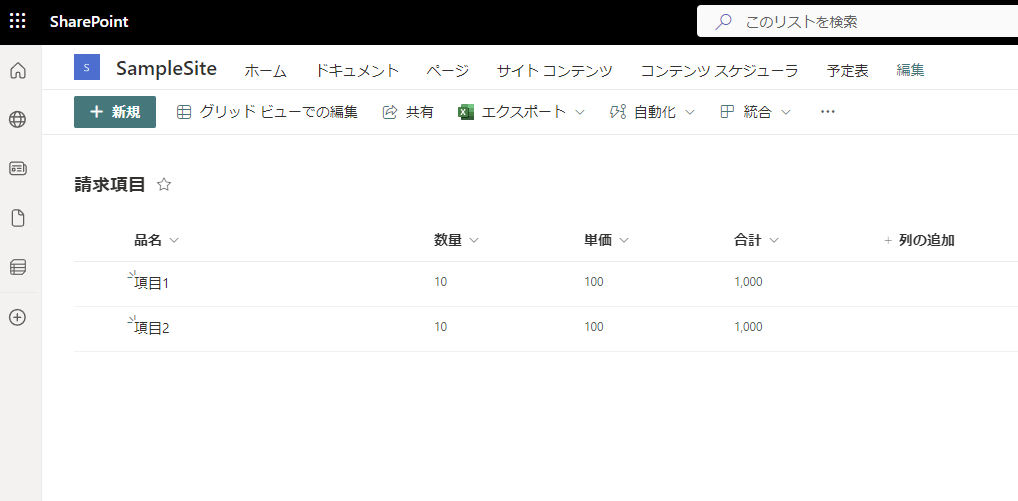
In the Word action, find your Repeating Section field. Click the icon in the top-right corner to switch to “input entire array” mode.
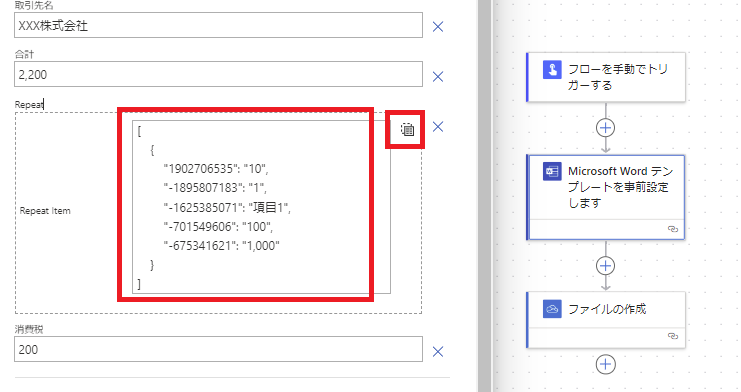
You need to prepare an
Array that matches the structure of your Word template. Use
[Get items] and
[Select] (or variables) to construct this array.
*The keys in your JSON array must match the Titles of the Content Controls in your Word template.
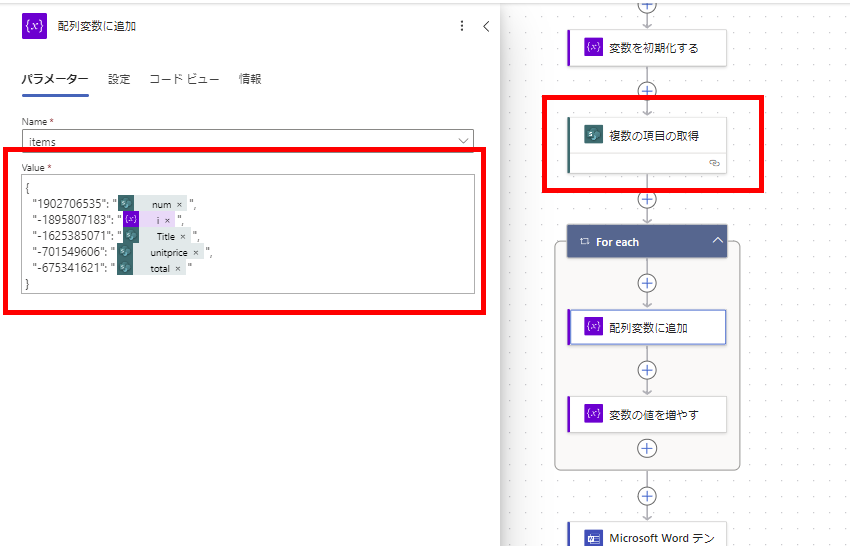
Pass the constructed array to the Repeating Section field.

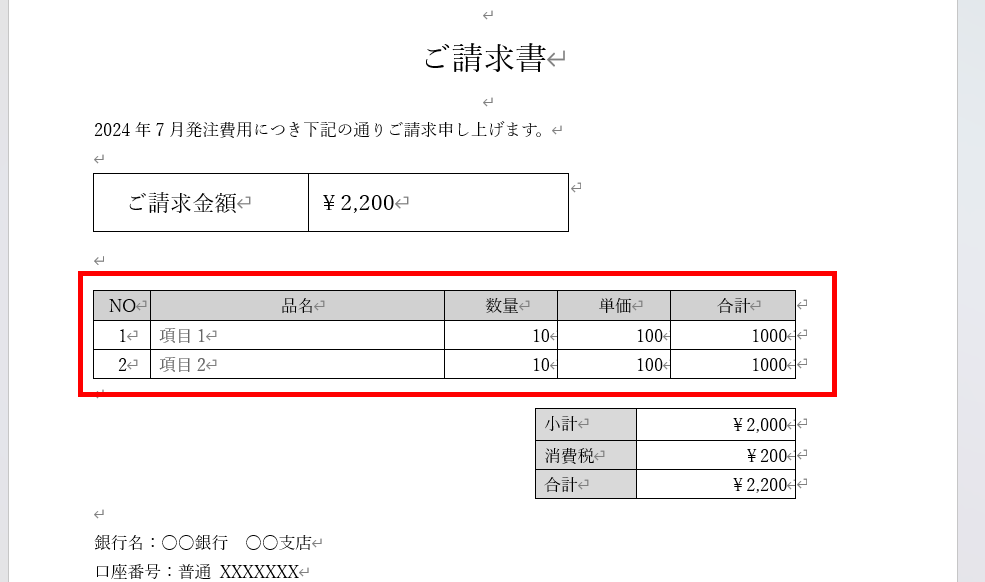
When executed, the table rows are dynamically generated!
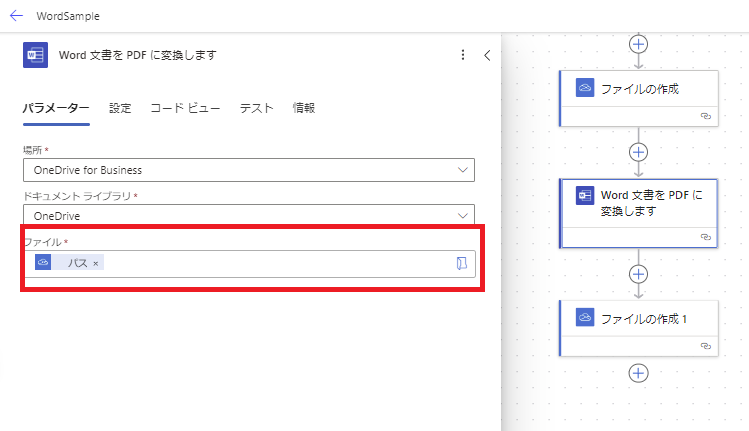
Step 5: Convert the Invoice to PDF
Finally, let’s convert the generated Word invoice into a PDF using the [Convert Word Document to PDF] action.
Set the
Location and
Name of the Word file you just created (from the “Create file” step).
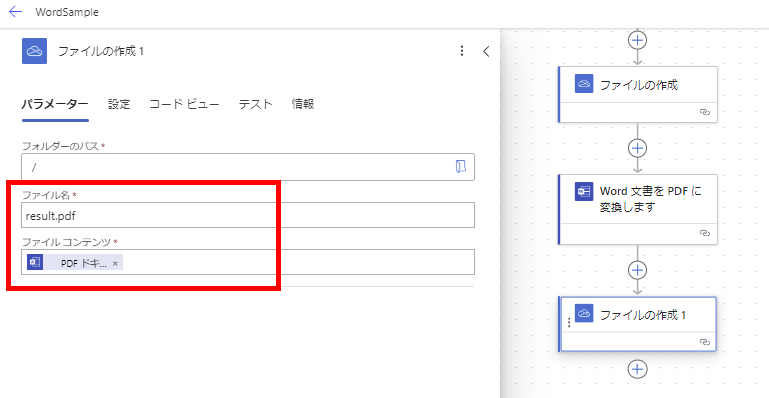
Use another
[Create file] action to save the PDF content.
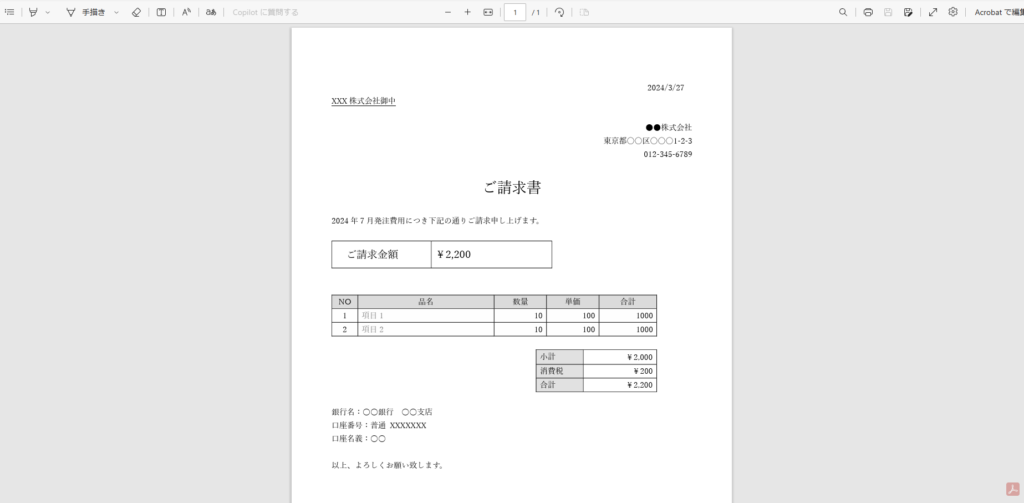
The final output is a perfectly formatted PDF invoice.
Although these actions require a Premium license, they are essential for professional document generation workflows. Highly recommended!
Related Articles
https://ippu-biz.com/en/development/powerplatform/powerapps/preview-officefiles/
https://ippu-biz.com/en/development/powerplatform/powerapps/convert-pdf/