Power Apps Component Frameworkを使うとTypeScriptでPower Appsのコンポーネントを作成できるとのこと。
ということで、今回はこちらのサイトの通りにコンポーネントを作ってみた。
![]()
![]()

Microsoft Dataverse の Power Apps Component Framework を使用して最初のコンポーネントを作成する - Power Apps
Power Apps Component Framework を使用してコード コンポーネントを実装する方法について説明します
docs.microsoft.com
開発に必要なものたち
前提として以下が必要。
- Visual Studio Code
- node.js(LTSが推奨)
- Microsoft Power Platform CLI(インストール方法は後述)
- Visual Studio 2019 または Visual Studio 2019用のビルドツール
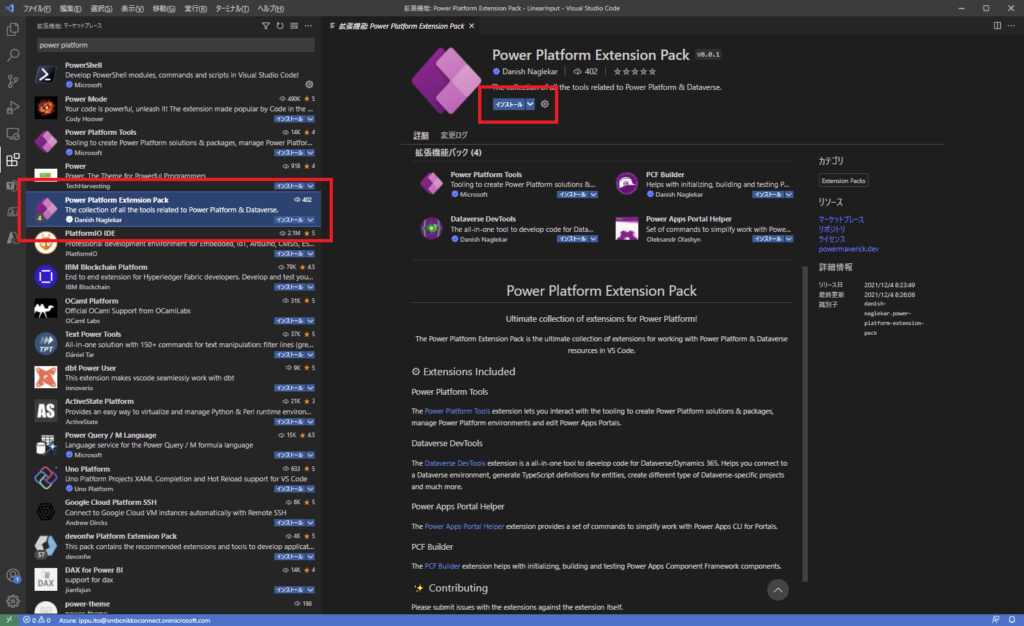
VSCode用のMicrosoft Power Platform CLIのインストール手順
VSCodeを開いて左側のタブから拡張機能を選択、検索窓に「Power Platform」と入れるとこんな感じで見つかるので「インストール」を押下。
早速Power Appsのコンポーネントを作ってみる!
上のツールが全部準備できたので、早速コンポーネントを作成して。
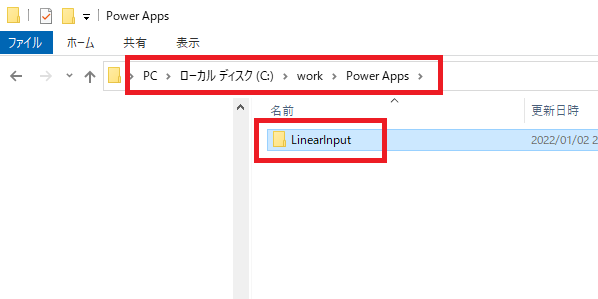
手順1:開発するフォルダを作成してそこにプロジェクトを作成する
まずは適当な開発用フォルダを作成して、
VSCodeのターミナルでそのフォルダまで移動して、こんな感じでコマンドを実行。
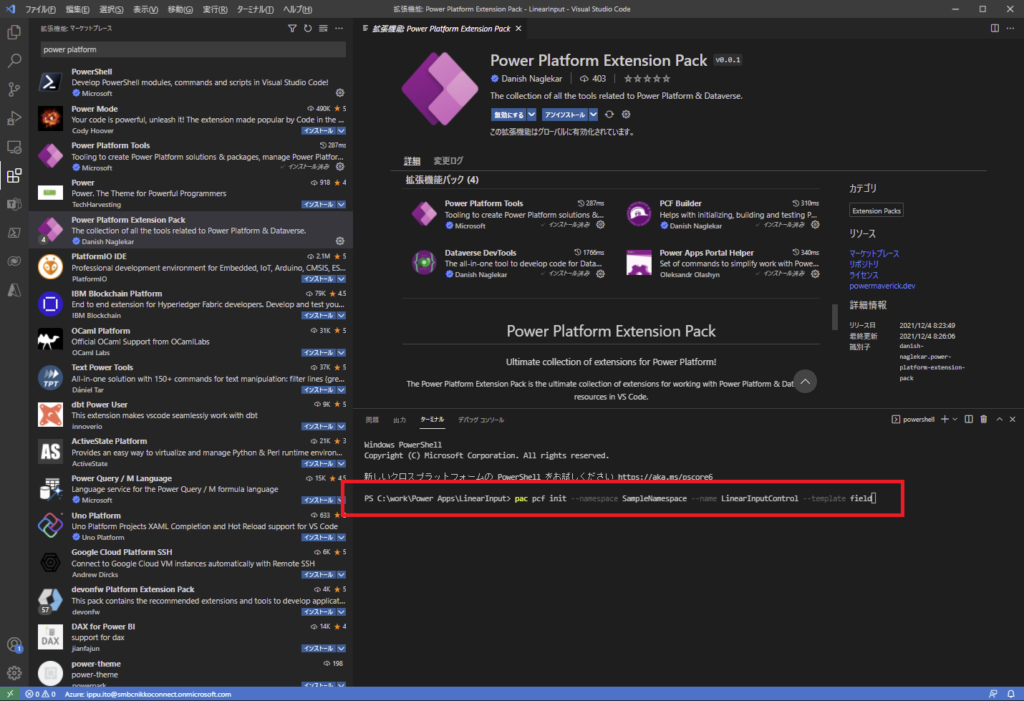
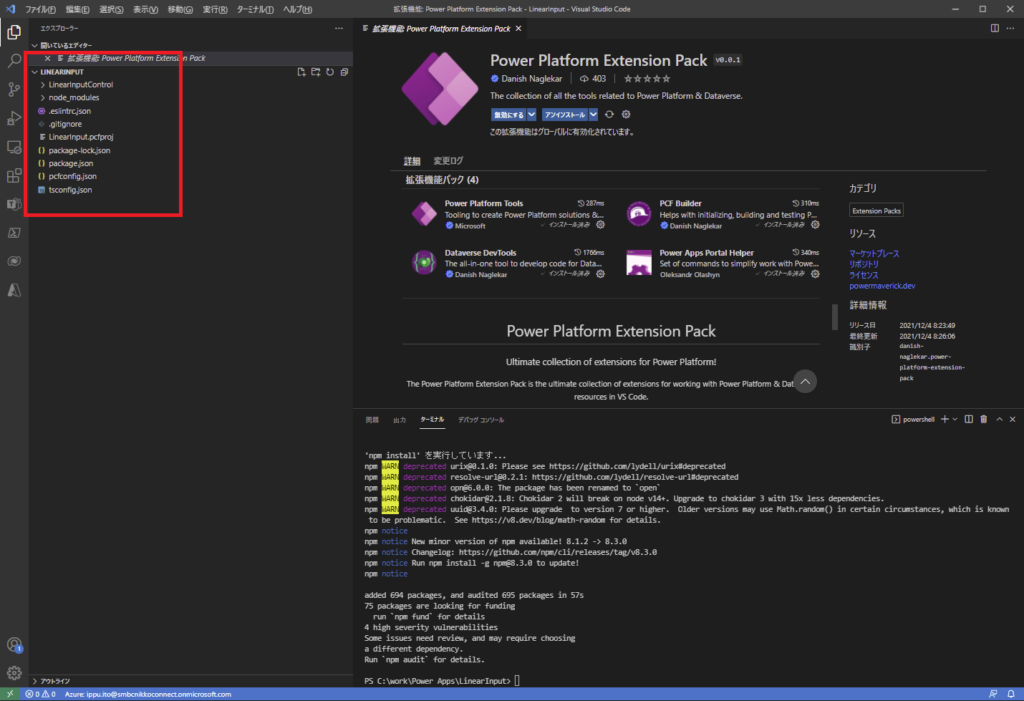
すると開発用フォルダにプロジェクトができる。
手順2:マニフェストファイルの編集
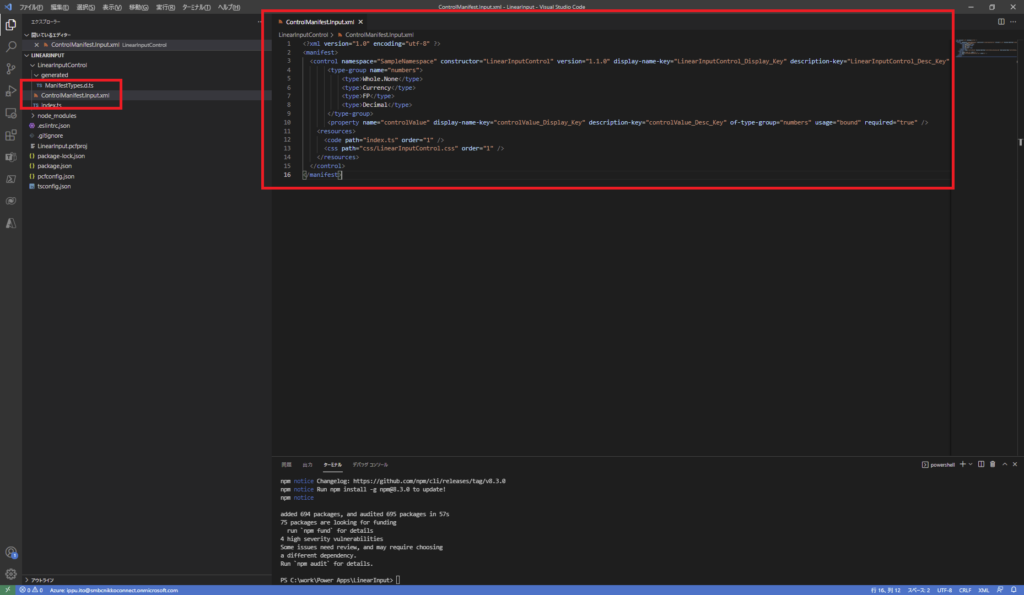
そしたら展開されたプロジェクトの中の「ContorolManifest.Input.xml」を開いて、
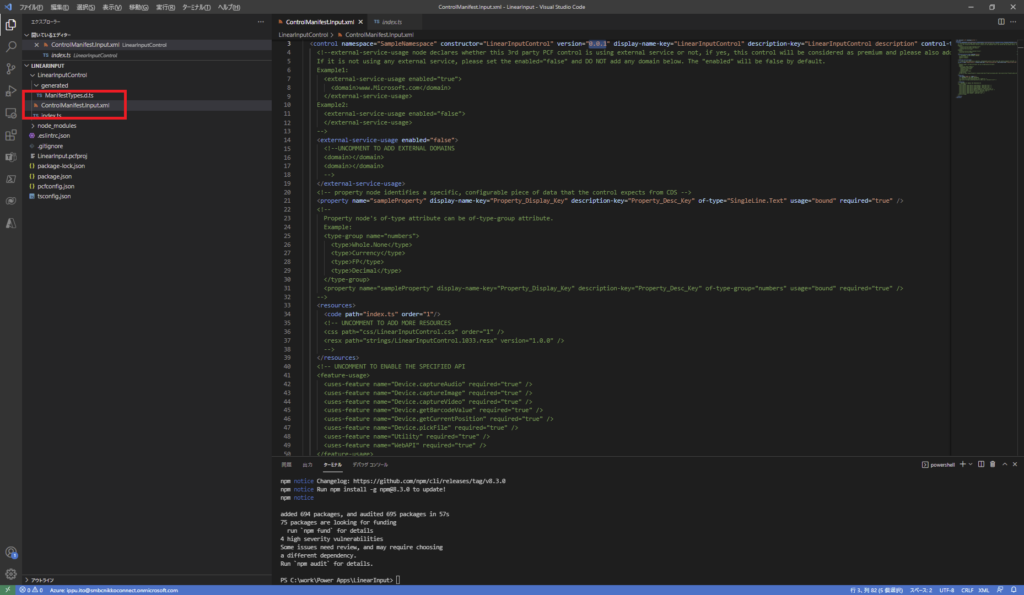
マニュアルの通り、こんな感じに書き替える。
手順3:ロジックの実装
マニフェストファイルを編集したら次は「index.ts」ファイルを開いて、
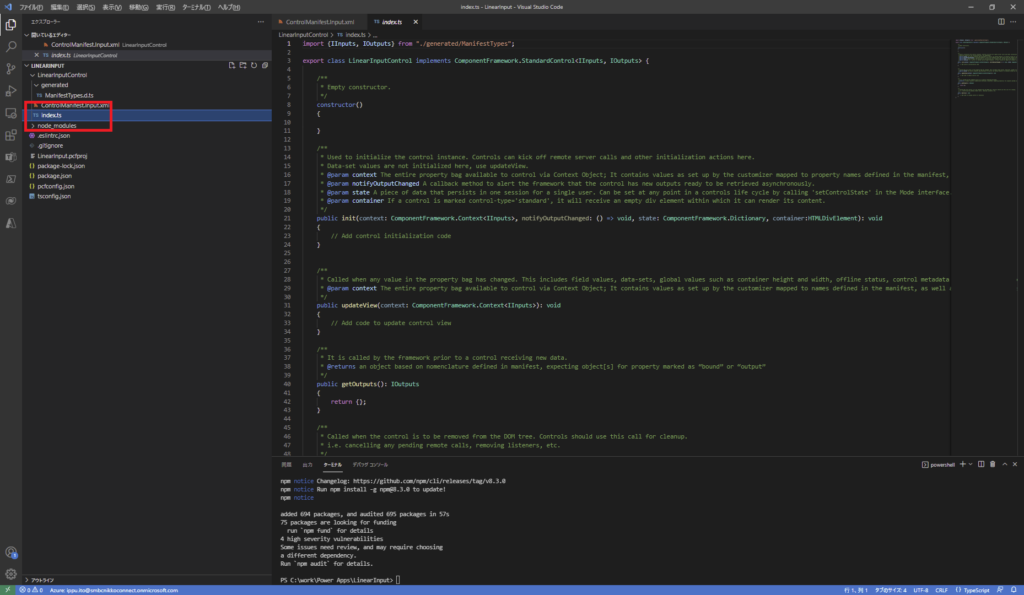
こんな感じで書き替える。
※エラーがたくさん出るけど無視してOK
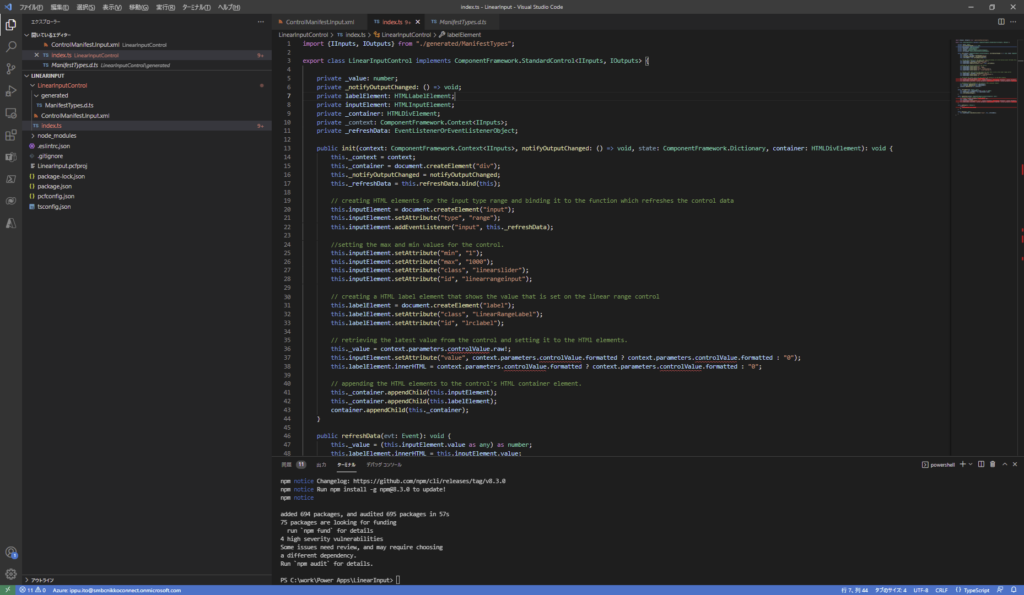
※エラーがたくさん出るけど無視してOK
手順4:CSSの作成
作業をしているフォルダの直下に「css」という名前のフォルダを作成し、そこに「LinearInputControl.css」を作成する。
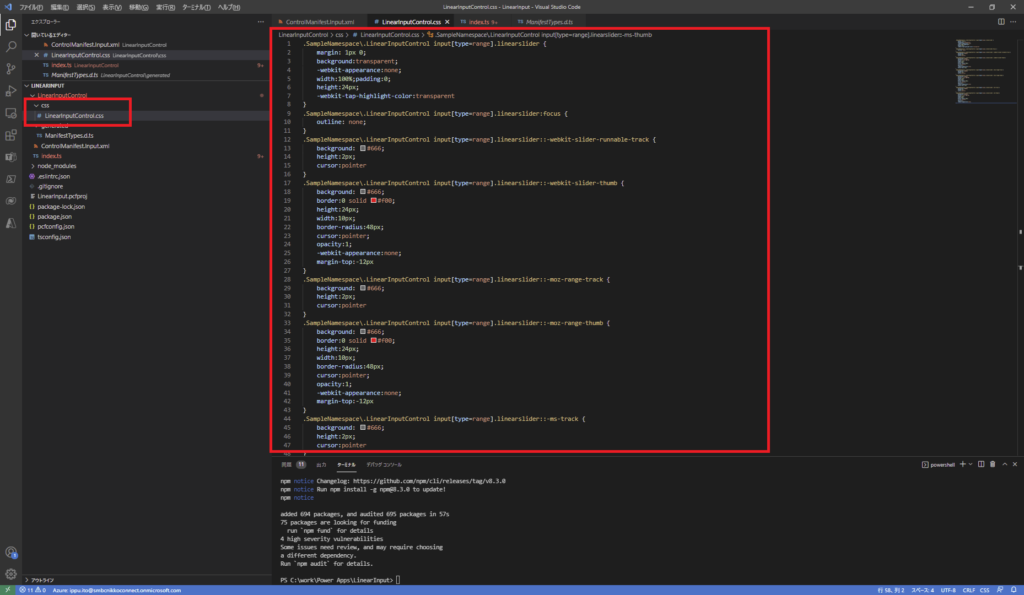
※CSSの中身はここでコピペ可能
https://docs.microsoft.com/ja-jp/powerapps/developer/component-framework/implementing-controls-using-typescript#adding-style-to-the-code-component
※マニフェストファイルのコピペをミスってなければ大丈夫だけど、念のためcssファイルまでのパスが正しく設定されているか、さっきのControlManifestInput.xmlを確認。

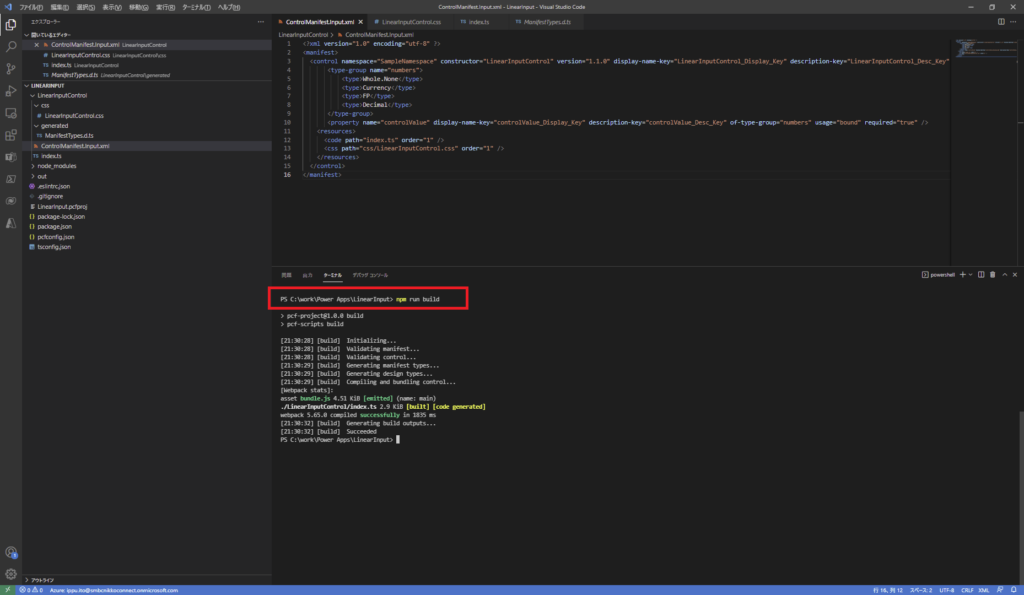
手順5:ビルドして動作確認
ここまでできたら一旦動くか確認。
こんな感じでコマンドを実行してビルドして、
ビルドが成功したらこのコマンドを実行、
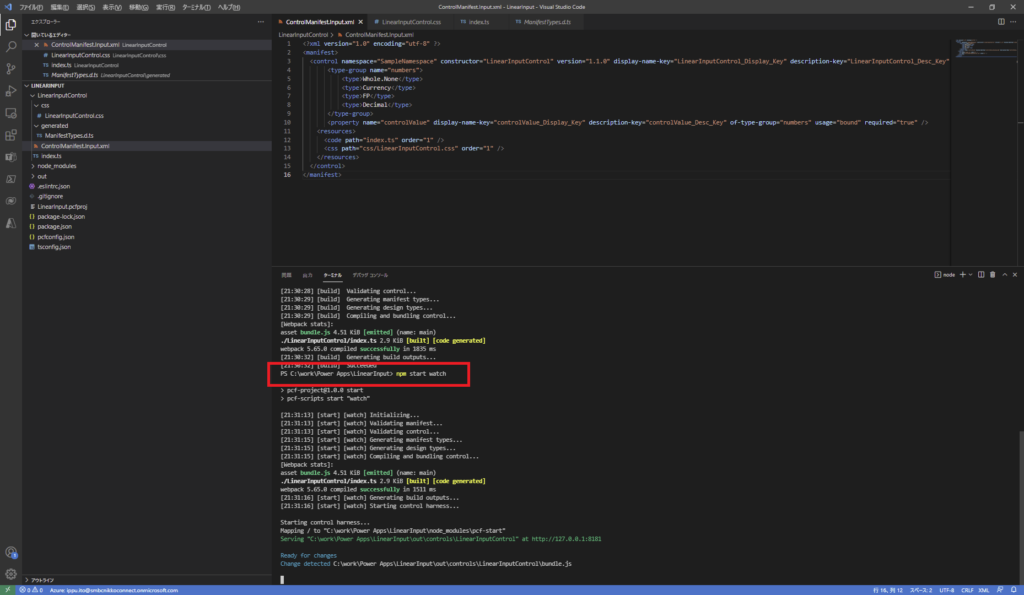
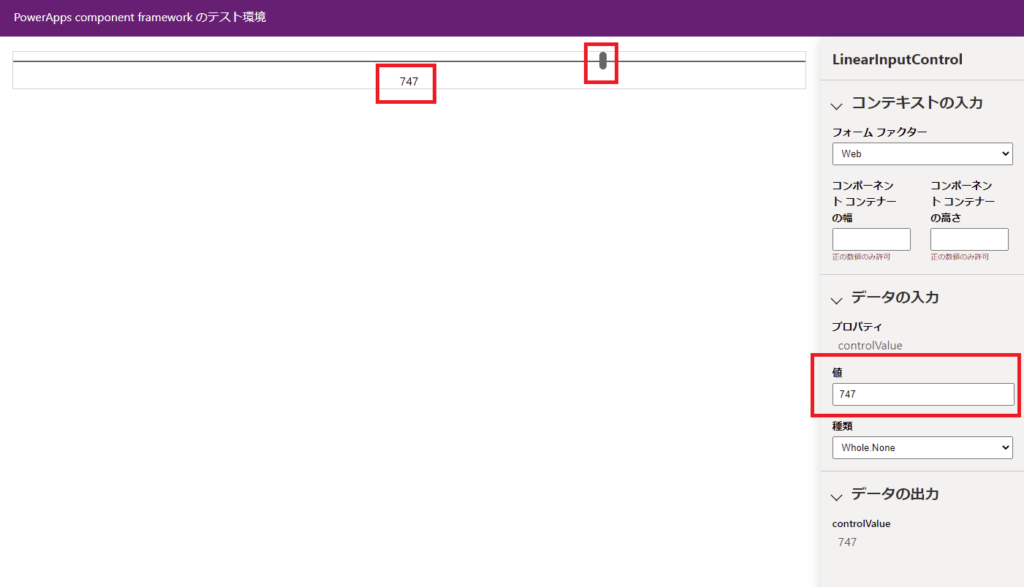
するとブラウザが立ち上がってこんな感じで動作確認が実施できる!
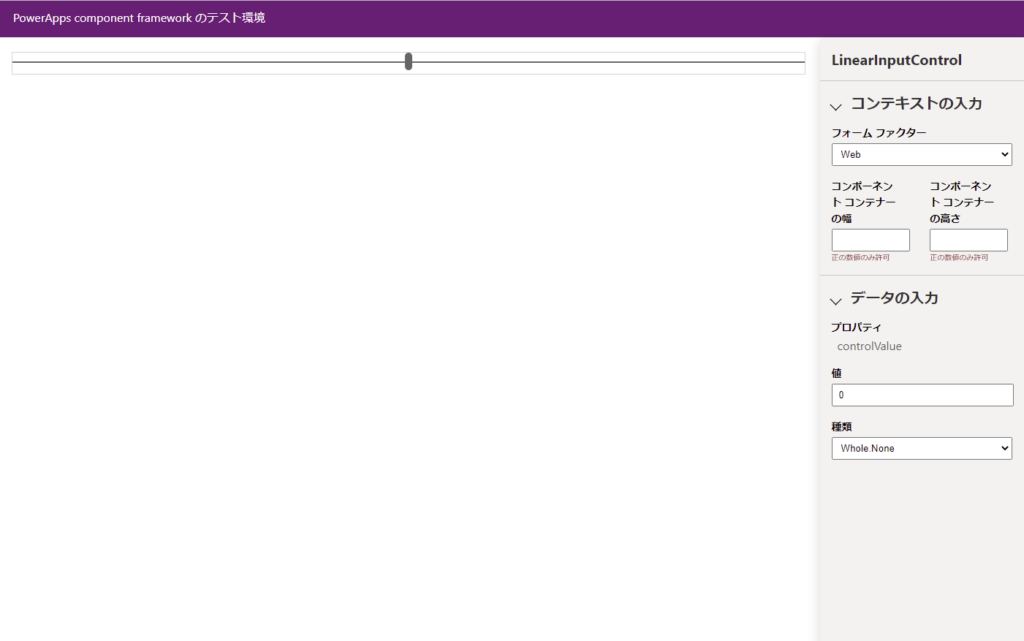
スライダーを動かすとちゃんと数字も動く!
手順6:ソリューションファイルを作成
動作で問題がなければソリューションファイルを作成していく。
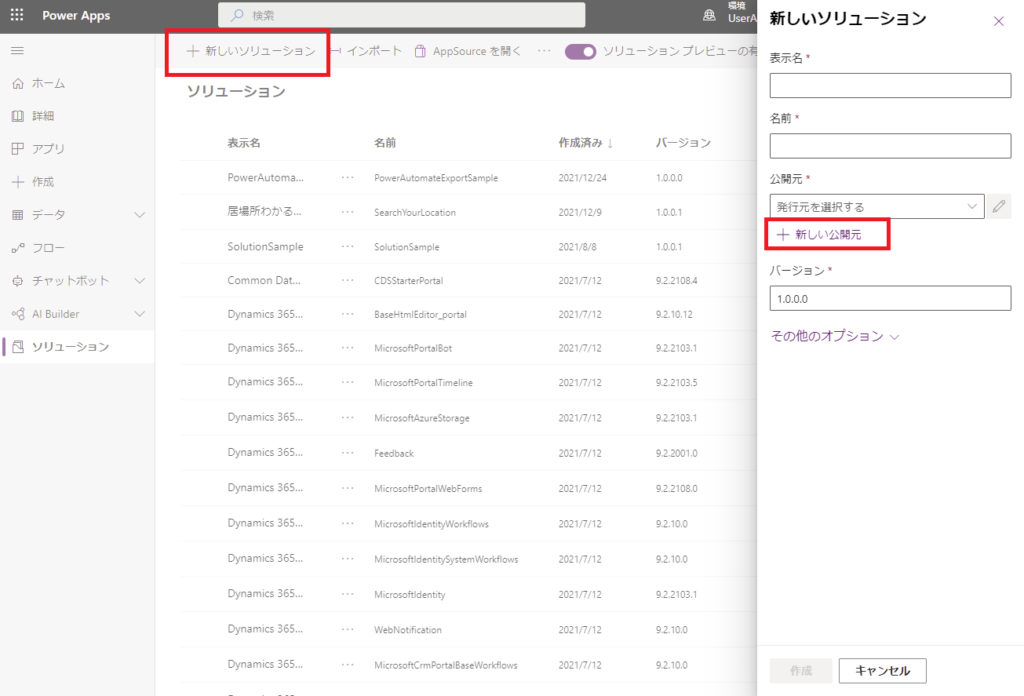
ここでいったんPower Appsに移動して、[ソリューション]→[新しいソリューション]→[新しい公開元]を選択。
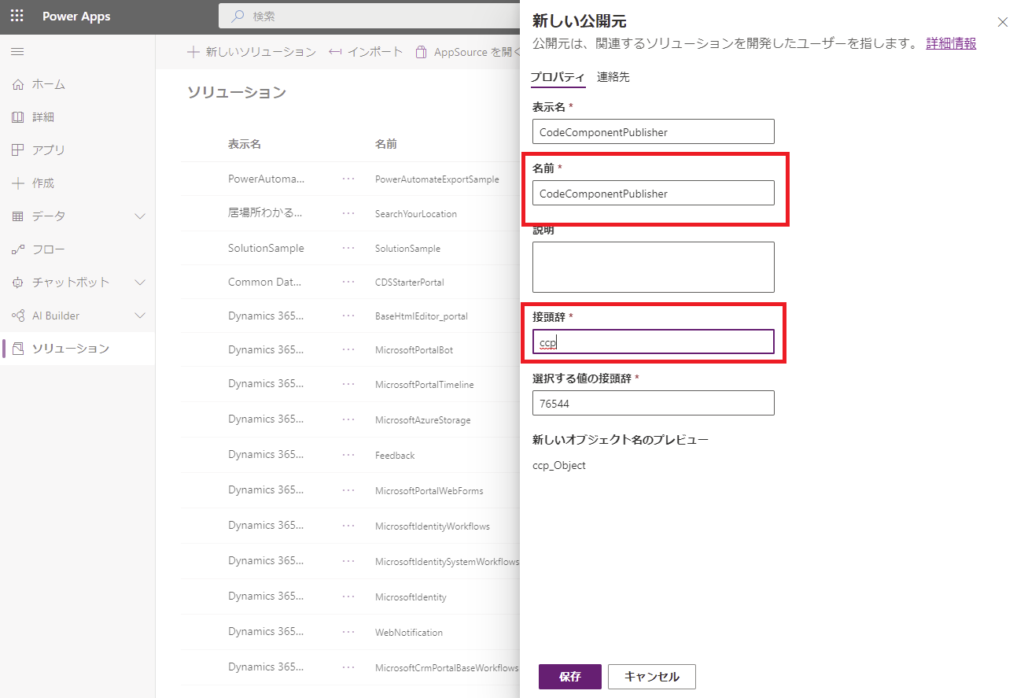
適当な名前で公開元を作成し、その「名前」と「接頭辞」をどこかにメモっておく。
そしたら再びVSCodeに戻り、作業をしているフォルダの下に「solution」フォルダを作成、
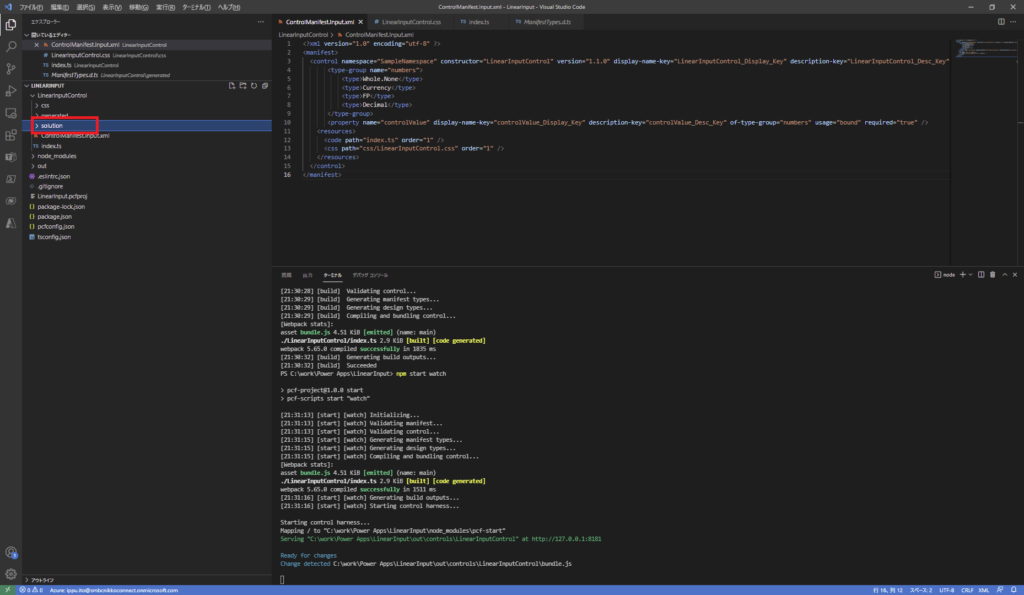
ターミナルでそこまで移動して、
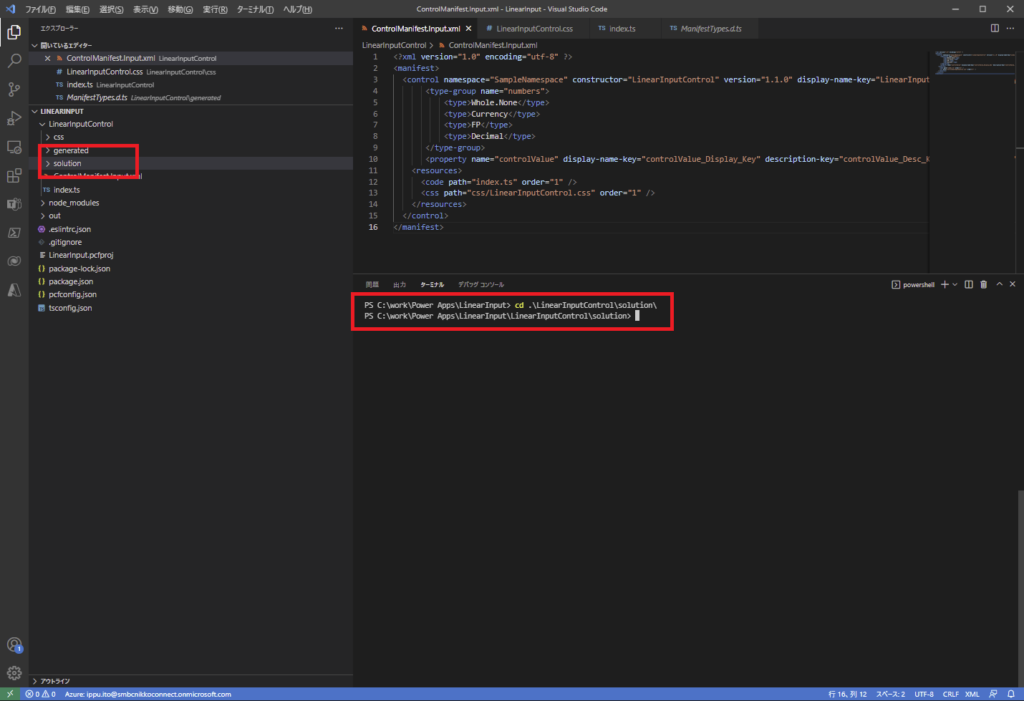
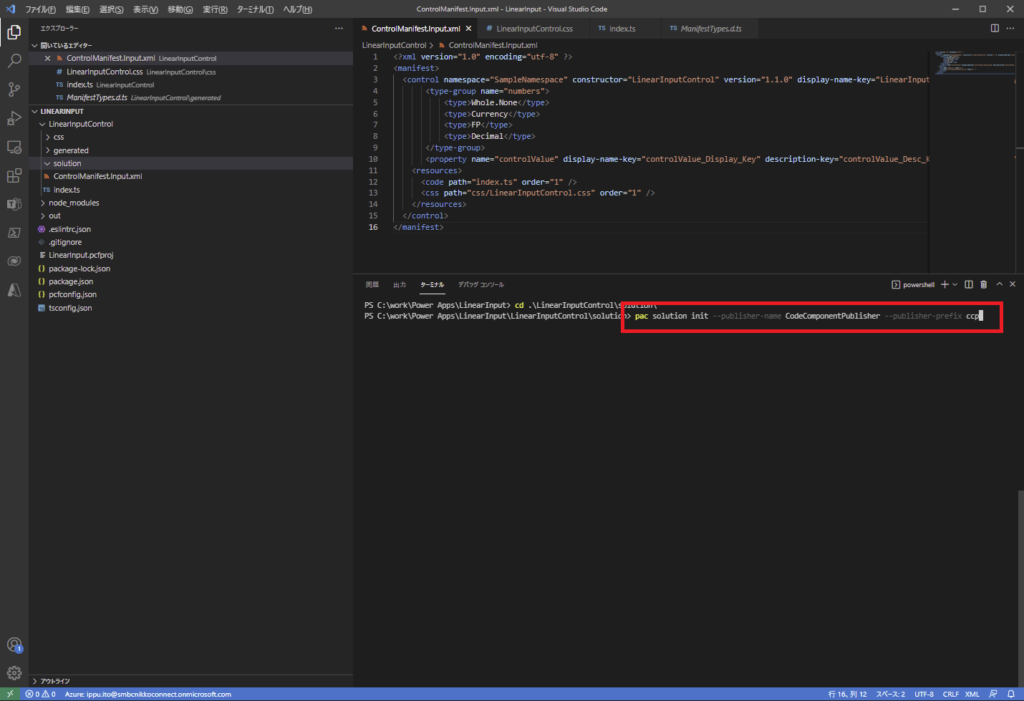
こんな感じでコマンドを実行する。
このとき「–publisher-name」の後ろと「–publisher-prefix」の後ろには、それぞれさっきメモした「名前」と「接頭辞」を入力する。
このとき「–publisher-name」の後ろと「–publisher-prefix」の後ろには、それぞれさっきメモした「名前」と「接頭辞」を入力する。
コマンドが成功し「solution」フォルダの中に色々できたら、

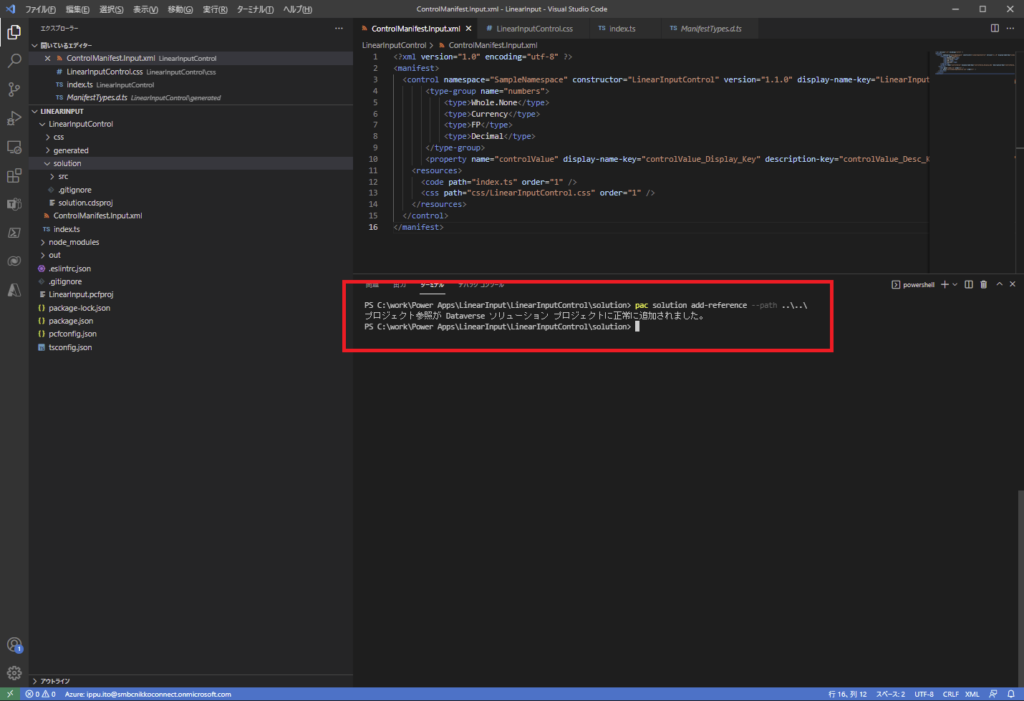
こんな感じでコマンドを入力し、プロジェクト参照を追加。
そしたら以下どちらかのコマンドを実行し、zipファイルを作成する。
- msbuild /t:restore
- dotnet build
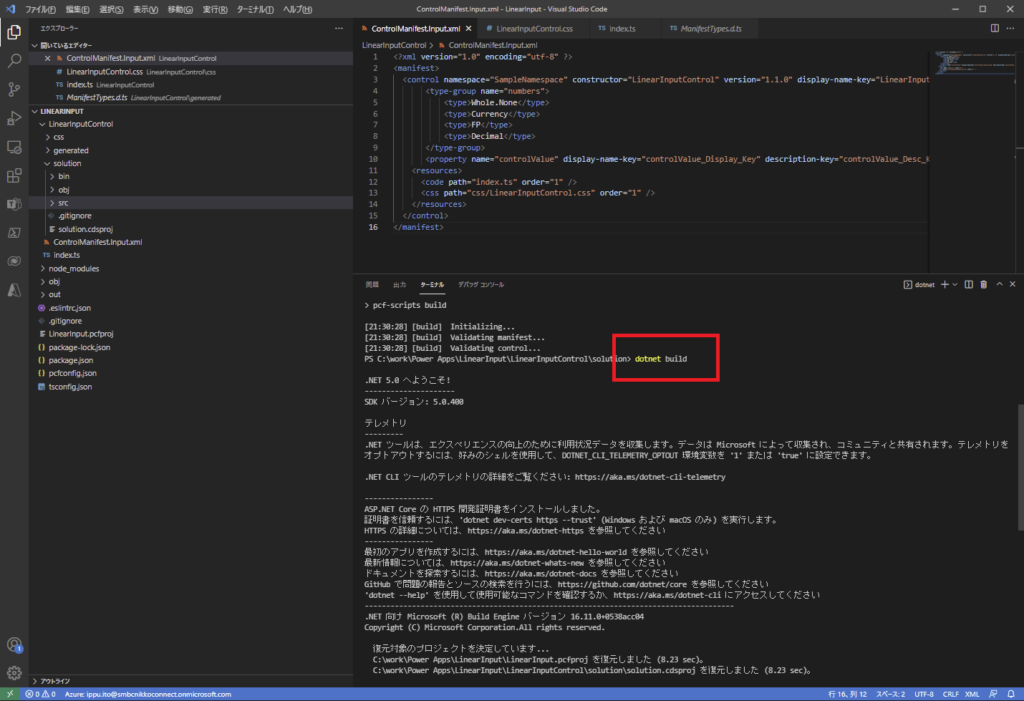
無事にビルドが成功すると、こんな感じでzipファイルが作成されているはず!

※コマンドは全部ここでコピペ可能
https://docs.microsoft.com/ja-jp/powerapps/developer/component-framework/implementing-controls-using-typescript#packaging-your-code-components
今回はここまで
思ったより記事が長くなってしまったので今回はここまで。
次回、作成したソリューションzipファイルをPower Appsの中で使ってみる。

コメント