TeamsのリアクションをPower Automate側で取得する方法を聞かれたので、メモ。
やりたいこと
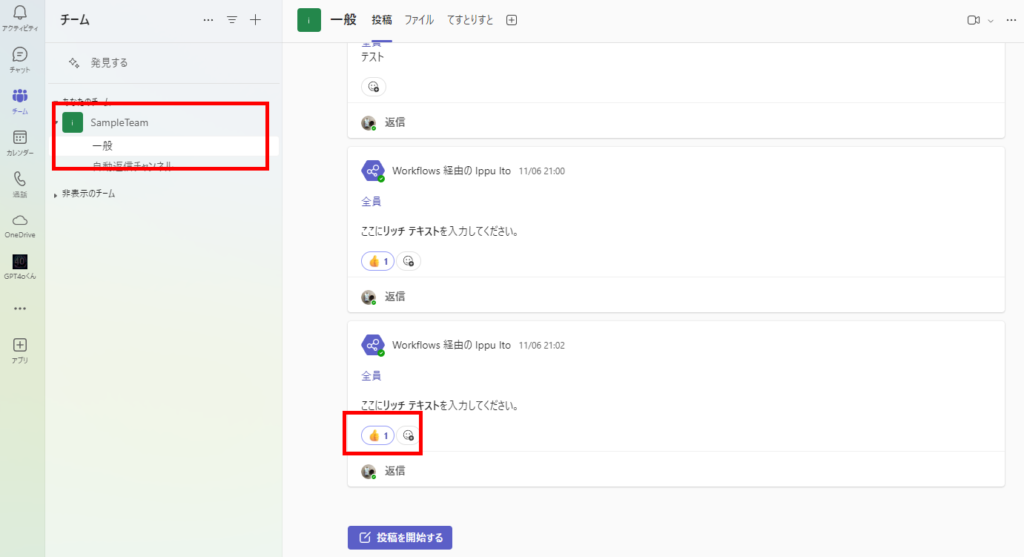
TeamsのチャネルへのリアクションをPower Automateで取得し、Power Apps側に表示したいときのお話。

Power Automateの構築
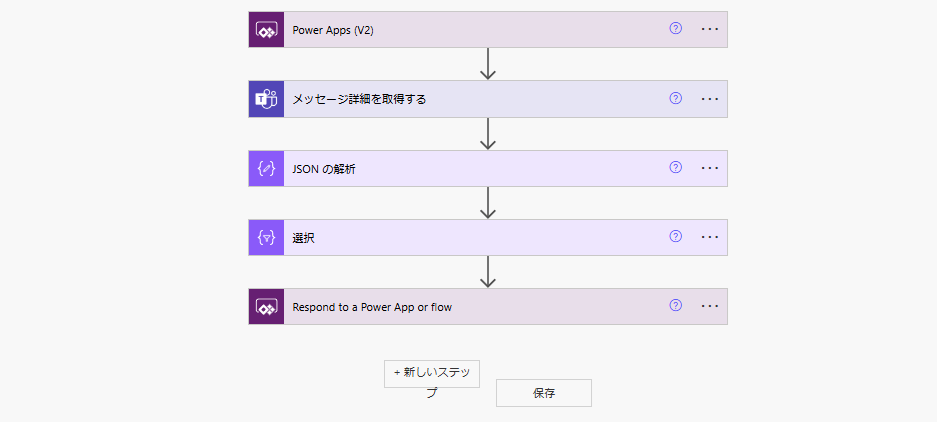
まずはPower Automateの構築から。最終的にこんなフローになる。

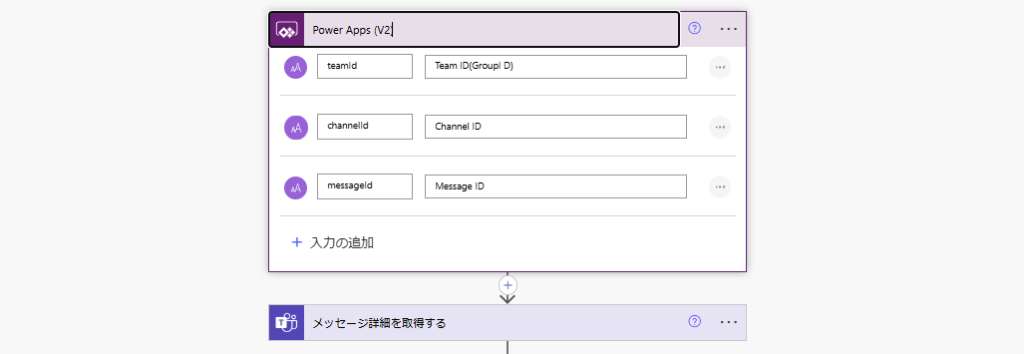
まずは引数として「チーム(グループ)ID」と「チャネルID」「メッセージID」を受け取る。

続いて「メッセージ詳細を取得する」アクションと受け取った引数を使用し、メッセージの詳細を取得。


そしたら、メッセージに含まれる「reactions」プロパティを「JSONの解析」アクションにかけてあげる。
※コンテンツに入れる式は↓
※コンテンツに入れる式は↓
outputs('メッセージ詳細を取得する')?['body/reactions']
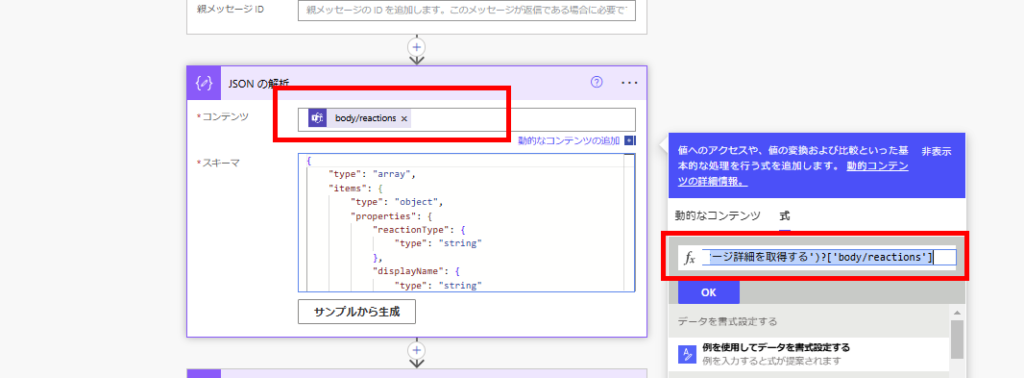
※スキーマはこちら。うまく動かない場合はフローを一度動かし、「メッセージ詳細を取得する」アクションの出力から作成してください。
{
    "type": "array",
    "items": {
        "type": "object",
        "properties": {
            "reactionType": {
                "type": "string"
            },
            "displayName": {
                "type": "string"
            },
            "reactionContentUrl": {},
            "createdDateTime": {
                "type": "string"
            },
            "user": {
                "type": "object",
                "properties": {
                    "application": {},
                    "device": {},
                    "user": {
                        "type": "object",
                        "properties": {
                            "@@odata.type": {
                                "type": "string"
                            },
                            "id": {
                                "type": "string"
                            },
                            "displayName": {},
                            "userIdentityType": {
                                "type": "string"
                            }
                        }
                    }
                }
            }
        },
        "required": [
            "reactionType",
            "displayName",
            "createdDateTime",
            "user"
        ]
    }
}
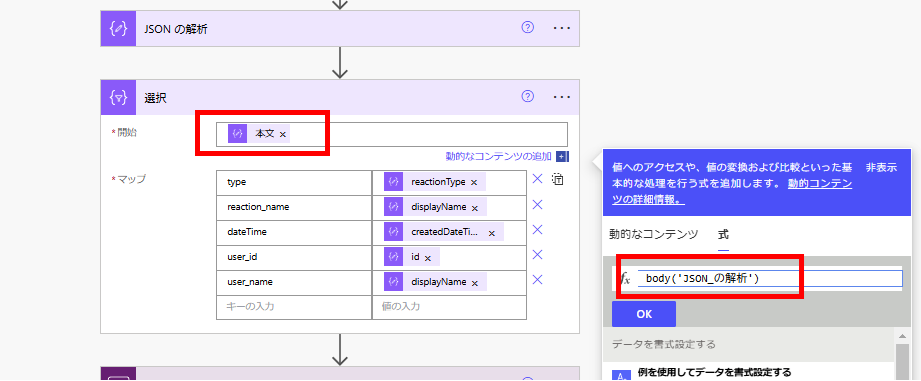
最後に取得したリアクションのオブジェクトをPower Appsで扱いやすい形に変えるため、「選択」アクションを使用。(任意)

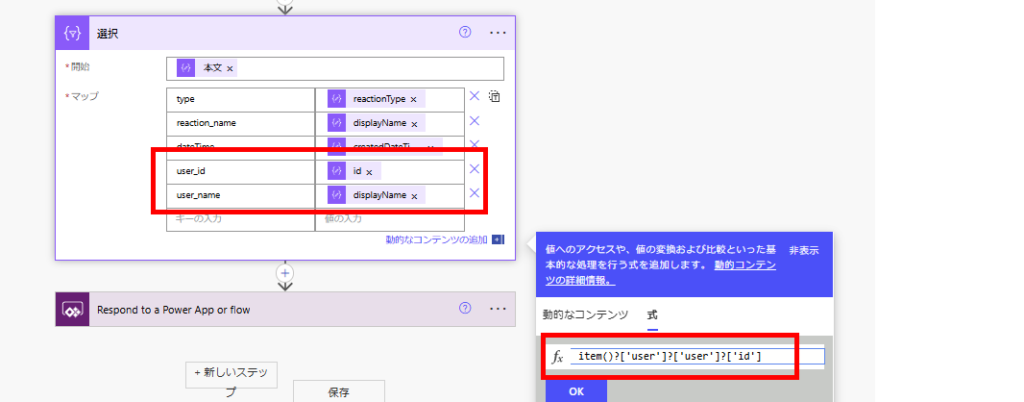
user_idとuser_nameはオブジェクトの深い位置にあるので、間違えないよう注意。
// リアクションしたユーザーのID
item()?['user']?['user']?['id']
// リアクションしたユーザーの名前
item()?['user']?['user']?['displayName']
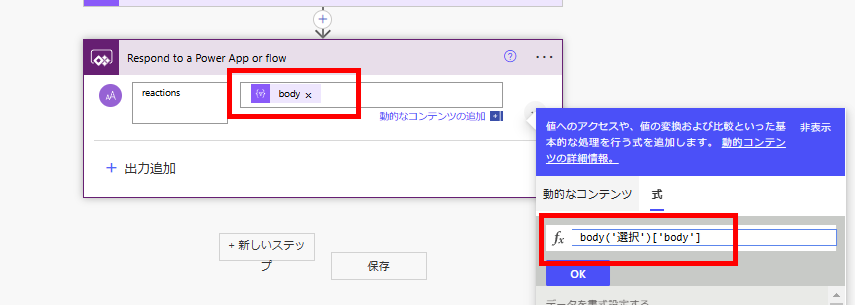
最後に「選択」アクションのbodyをPower Apps側に戻す。
body('選択')['body']
以上でPower Automateの構築は完了。
Power Appsの構築と動作確認
Power Appsはこんな感じで「チーム」「チャネル」を選択し、一覧に「メッセージ」を表示するよう構築。
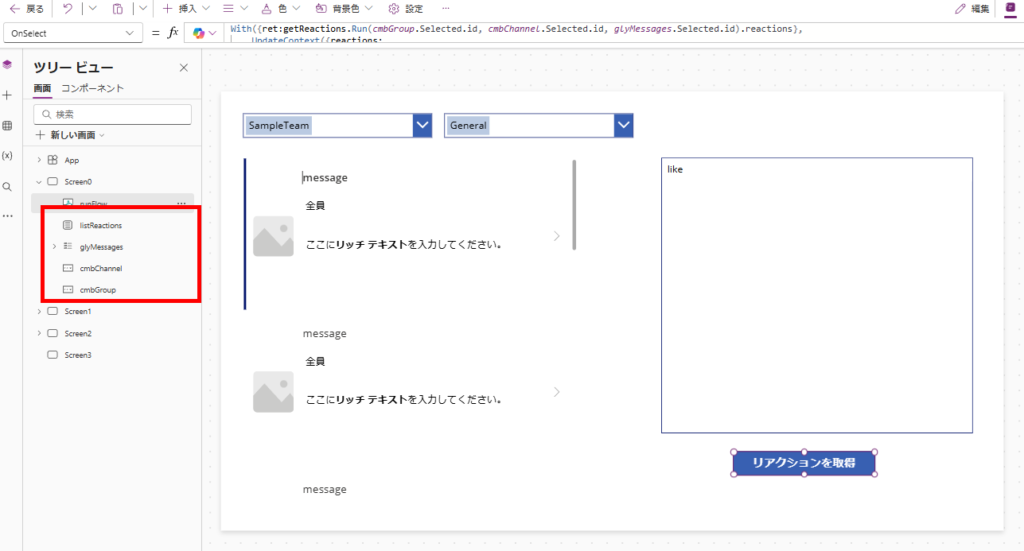

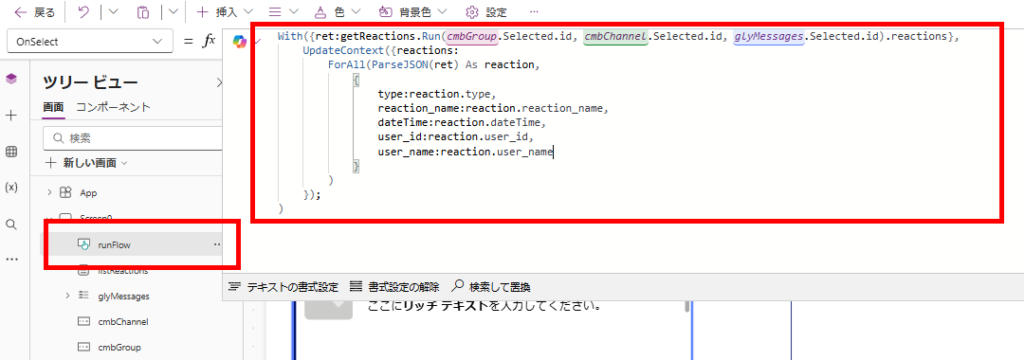
リアクションを取得するためのボタンではPower Automateを呼び出し、戻り値のJSONを解析してテーブル変数「reactions」に代入する。
With({ret:getReactions.Run(cmbGroup.Selected.id, cmbChannel.Selected.id, glyMessages.Selected.id).reactions},
    UpdateContext({reactions:
        ForAll(ParseJSON(ret) As reaction,
            {
                type:reaction.type,
                reaction_name:reaction.reaction_name,
                dateTime:reaction.dateTime,
                user_id:reaction.user_id,
                user_name:reaction.user_name
            }
        )
    });
)
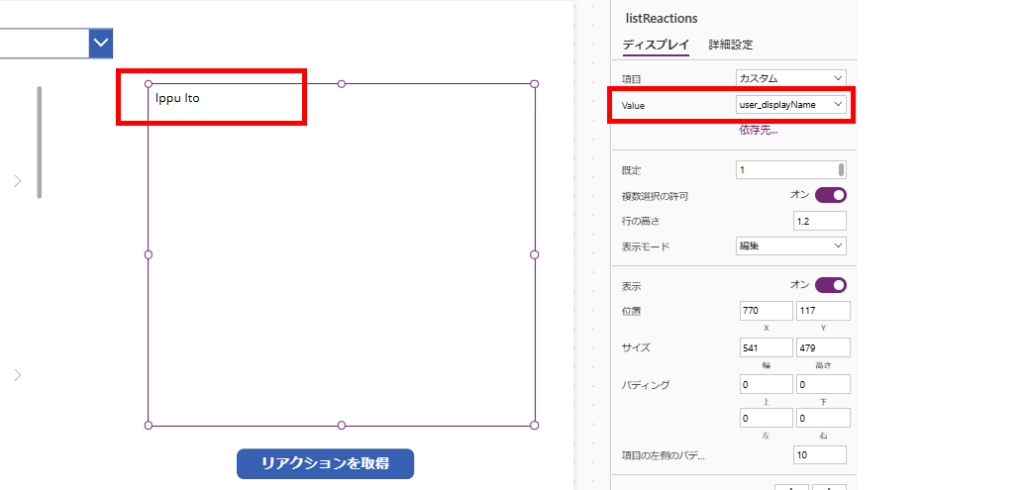
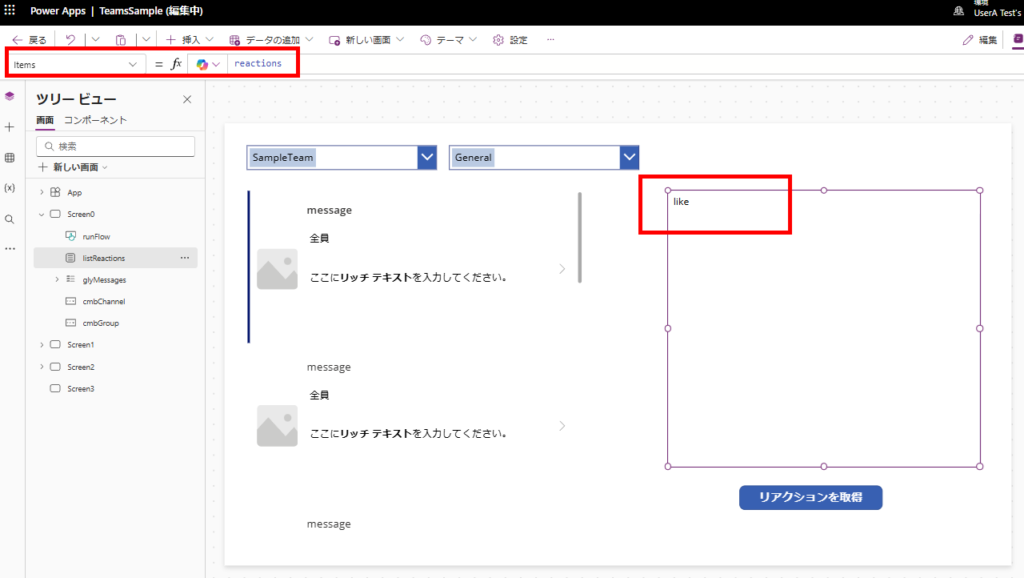
あとはreactionsの中身をリストボックスとかギャラリーに表示すれば、こんな感じでリアクションを取得することができる。

おまけ:リアクションしたユーザーの詳細が欲しい場合
ユーザーIDはこんな感じでEntraIDのGUIDの取得になる。
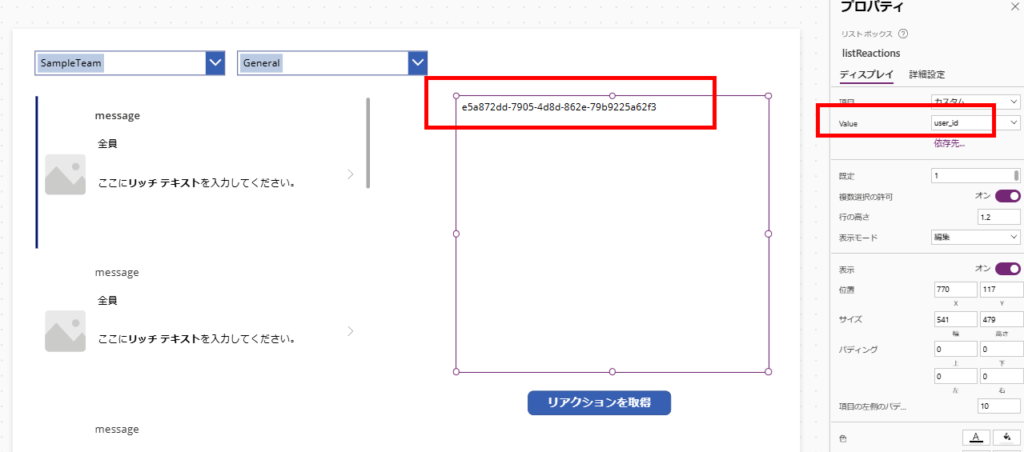

user_nameプロパティとかは設定されないこともあるため、ユーザーの詳細を取得したい場合はPower Apps側かPower Automate側でOffice365ユーザーコネクタのUserProfileV2関数を使用し、取得する必要がある。
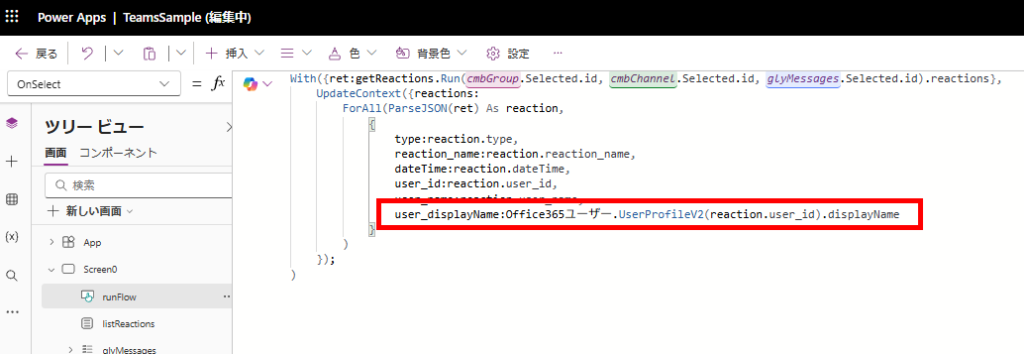

こんな感じでユーザー名が取得できる
