Power Automateの「複数の項目を取得」で使うフィルタークエリ(OData)の書き方を忘れがちなので、コピペで使える実例をまとめました。
2024/2/14追記:最近は自分でクエリ式を書くことが減り、GPTに式を作ってもらうことが増えたので、そちらの内容も記事にしました。
![]()
Power Automate ODataフィルタークエリ式やトリガー条件式の作成はGPTに任せるととても楽|生成AI
最近Power PlatformでもGPTと一緒に開発する機会が増えたので、特に助けてもらっているポイントをメモ。AIとPower Platform最近色々とPower Platformの細かいところでAIに助けてもらうことが増えてきた。そ...
ippu-biz.com
2024.02.14
【コピペ用】ODataフィルタークエリ演算子・記述例の早見表
比較演算子 早見表
| 演算子 | 意味 | 記号イメージ | 記述例(コピペ用) | 補足 |
|---|---|---|---|---|
| eq | 等しい | = | Title eq '完了' | 文字列は ' で囲む |
| ne | 等しくない | ≠ (<>) | Status ne '中止' | |
| gt | より大きい | > | Price gt 1000 | 指定値は含まない |
| ge | 以上 | ≧ | Price ge 1000 | 指定値を含む |
| lt | より小さい | < | Price lt 1000 | 指定値は含まない |
| le | 以下 | ≦ | Price le 1000 | 指定値を含む |
論理演算子テーブル
| 演算子 | 意味 | 記述例 | 解説 |
|---|---|---|---|
| and | かつ | Price gt 1000 and Price lt 5000 | 両方の条件を満たすもの |
| or | または | Status eq '完了' or Status eq '保留' | どちらか一方でも満たすもの |
| ( ) | 優先処理 | (A or B) and C | かっこ内を先に評価する |
補足:SharePointリストの列を日本語で作った場合
もしSharePointの列を日本語で作ってしまった場合は、Odataクエリに直すには少し工夫が必要。
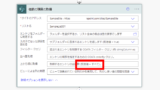
まずSharePointのリストの設定へとアクセスして、
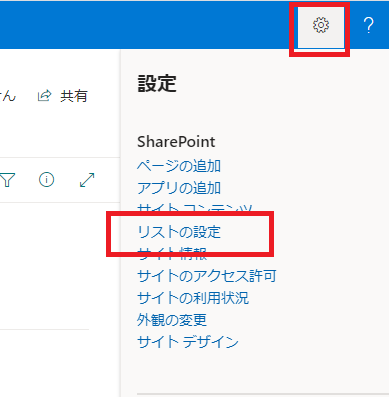
日本語で作った列をクリックする。
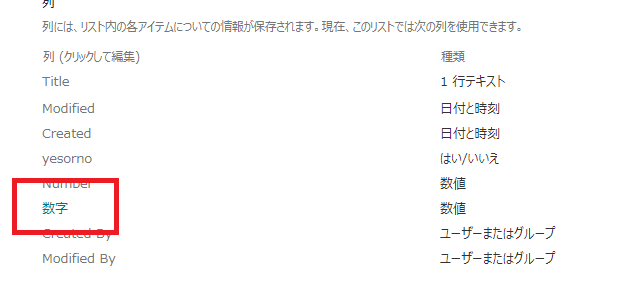
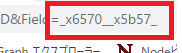
すると、その列のページへと遷移するので、アドレスバーのFieldIDの中身をコピーする。
この値の頭に「OData_」を付けてあげた文字列が、その列名になる。
この値の頭に「OData_」を付けてあげた文字列が、その列名になる。
今回のサンプルリストの「数字」列の値でフィルターをかけたいときは、このような式になる。
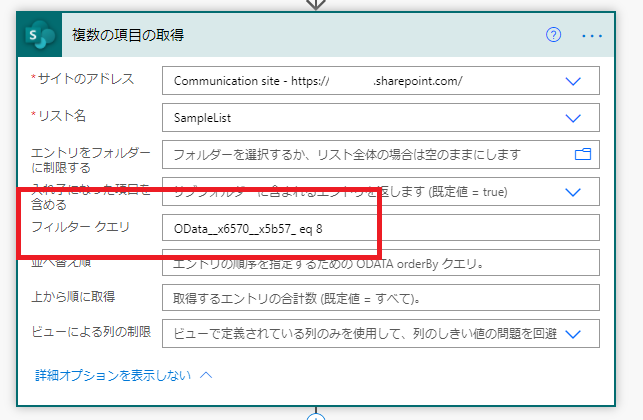
「数字」列が8のやつだけ持ってきているので、結果は成功。
日付に関するフィルター式実例
2024/10/20追記:日付や日時に関するフィルター式の実例はこちらで紹介。
以下、詳しい動作検証。興味のある方はぜひ。
詳細な動作検証
実際にSharePoint OnlineのリストとPower Automateを作って、実際に「複数の項目を取得」アクションでフィルターをかけてみる。
今回使用するリストはこんな感じで、
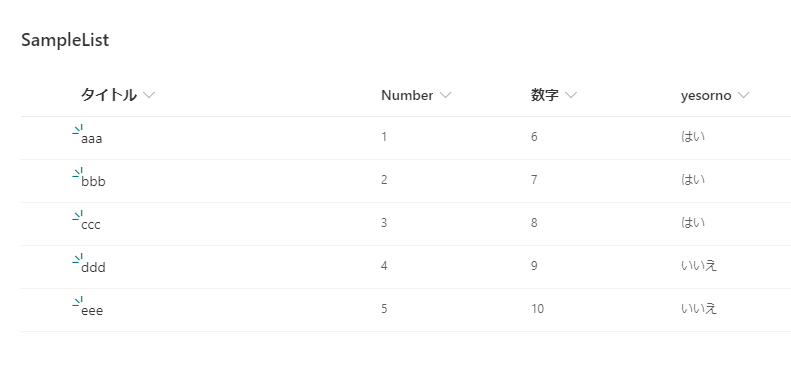
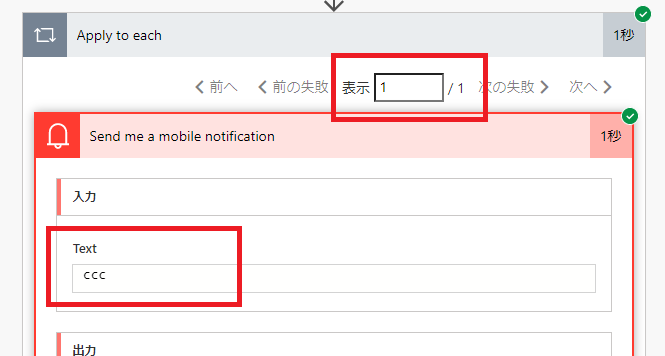
こんなPower Automateを準備して、順にフィルターをかけていく。
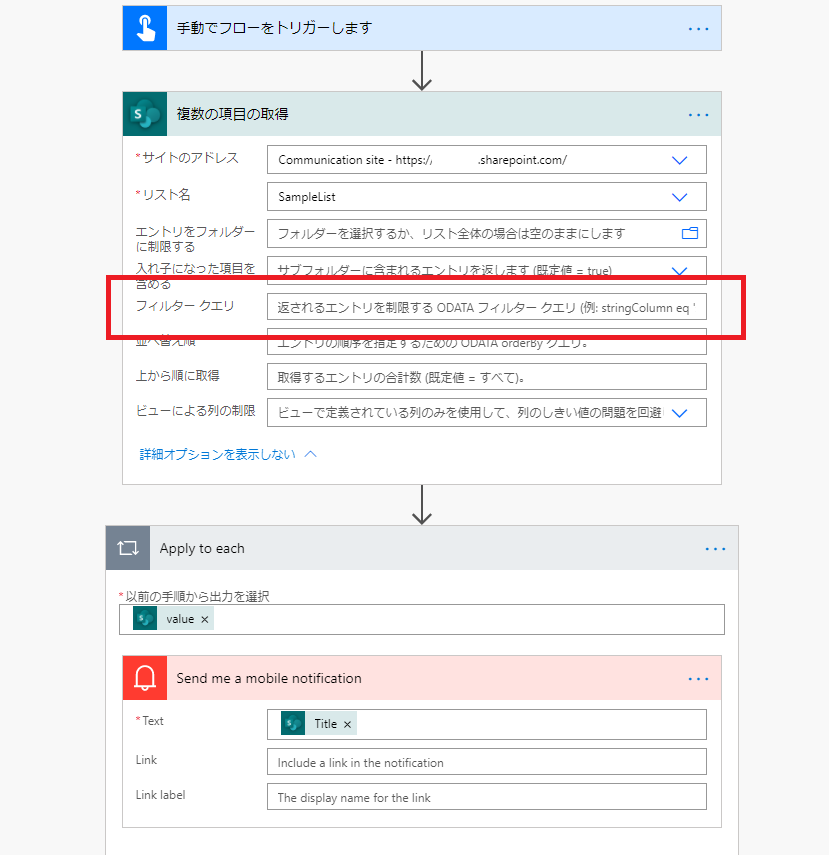
※最後のApply to eachは、フィルターがうまく動作しているかを見るためだけのものなので無視してOK。
比較演算子の詳細な動作検証(スクリーンショットつき)
まずは比較演算子。
- eq : 等しい
- ne : 等しくない
- ge : 以上
- gt : より大きい
- le : 以下
- lt : より小さい
以下実例。
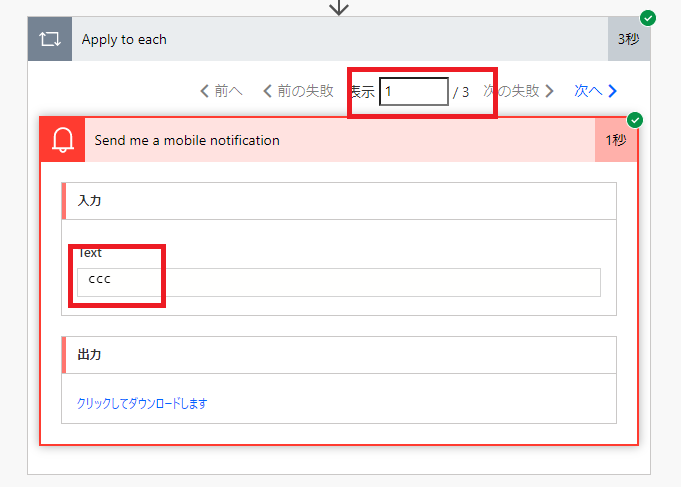
等しい:eq
リストからNumber列が3のアイテムを持ってきたい場合は、こんな感じ。
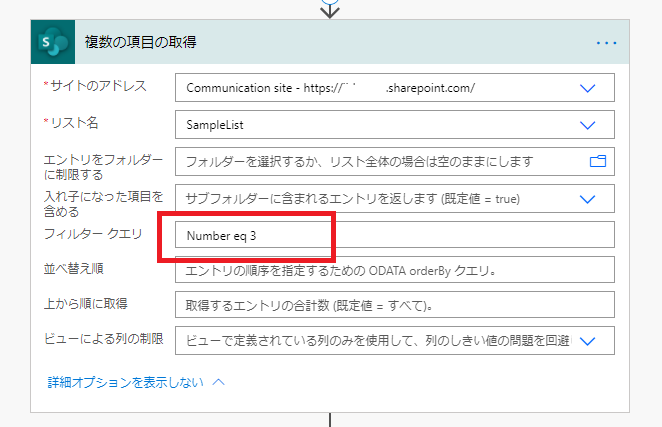
すると結果はこんな感じで、Number列が3のやつだけ持ってこれている。
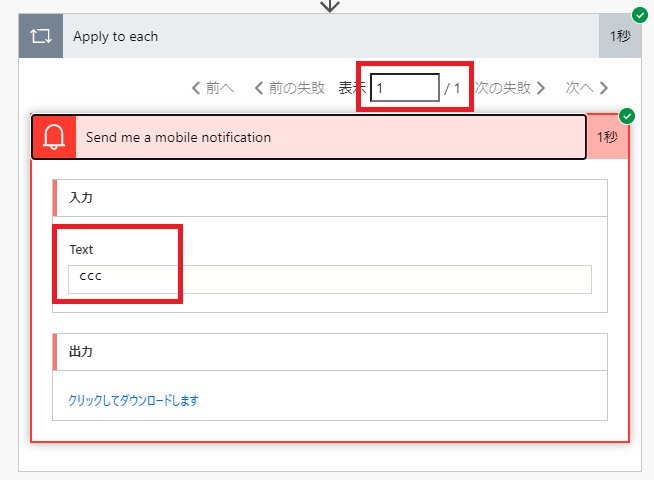
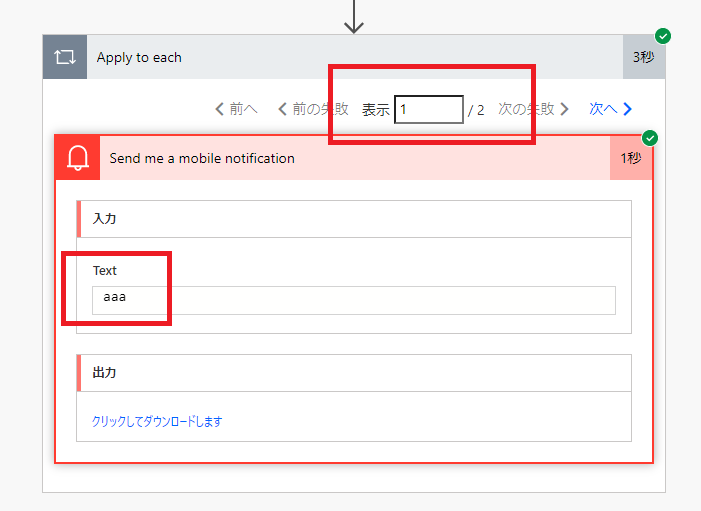
等しくない:ne
逆にリストからTitle列がccc以外のアイテムを持ってきたい場合は、こんな感じ。
※数字比較のときはあってもなくてもよい「”」だけど、文字列や日付を比較する際は必須
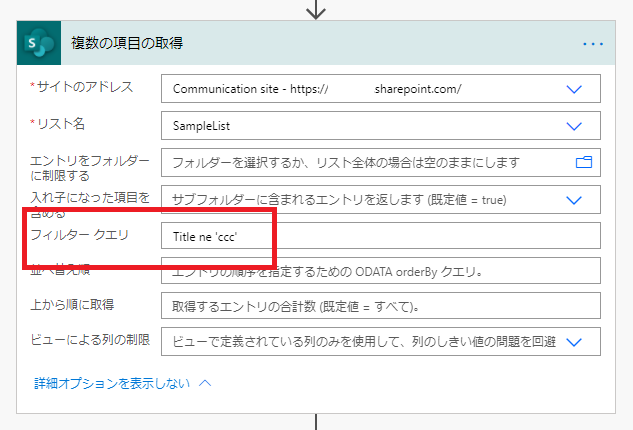
※数字比較のときはあってもなくてもよい「”」だけど、文字列や日付を比較する際は必須
結果はこのようになる。4つのアイテムが取得できて、タイトル「ccc」のアイテムだけはじいてくれる。
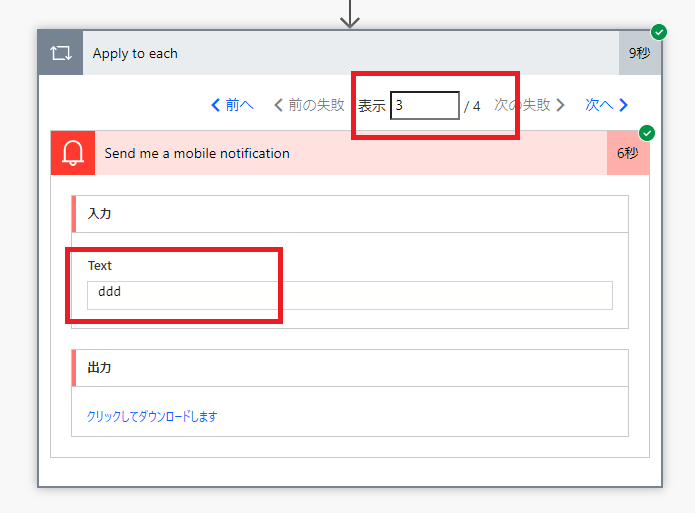
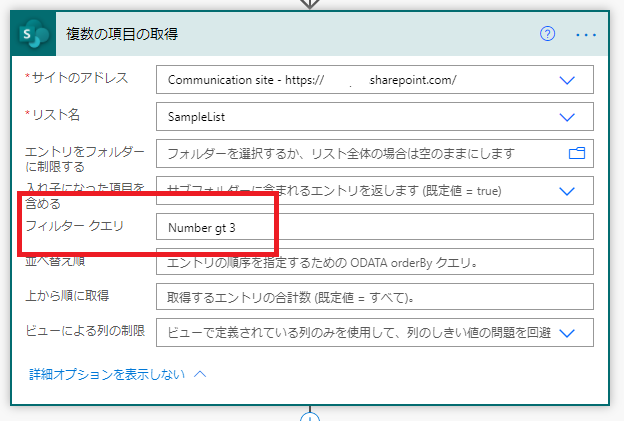
より大きい:gt
Number列が3より大きいものが欲しいときはこのような式になる。
結果はこんな感じで、2つだけアイテムが取得できる。
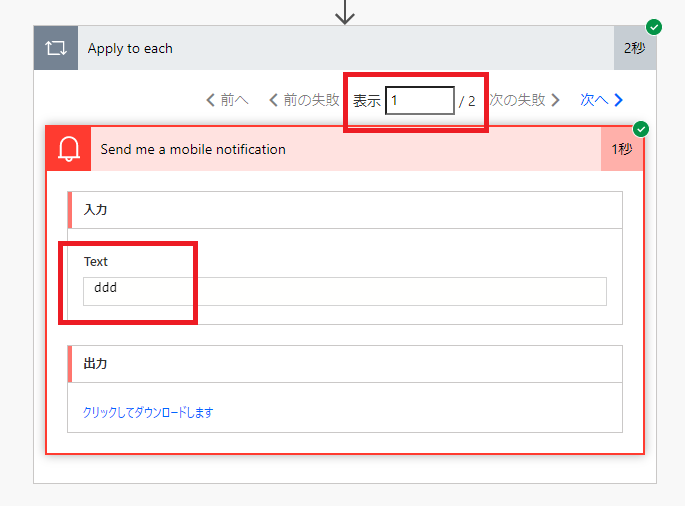
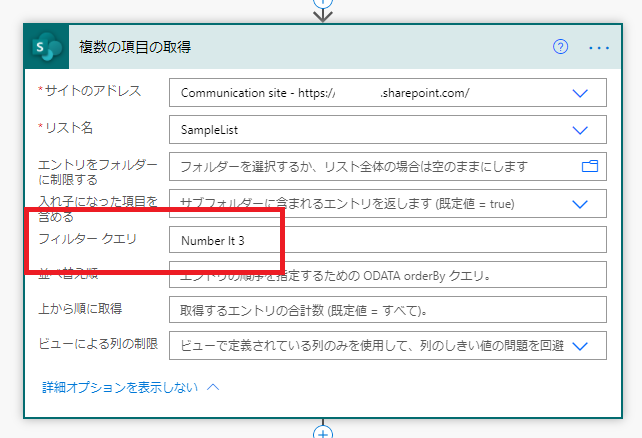
より小さい:lt
3より小さいものが欲しいときはこのような式。
結果は、Number列が1と2のアイテムだけ取得できる。
以上:ge
続いてNumber列が3以上のアイテムを取得。

結果はこんな感じで成功。
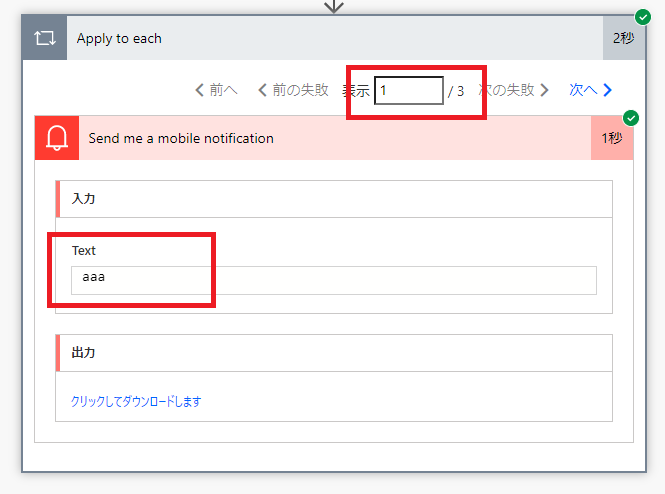
以下:le
最後はNumber列が3以下のアイテムを取得。
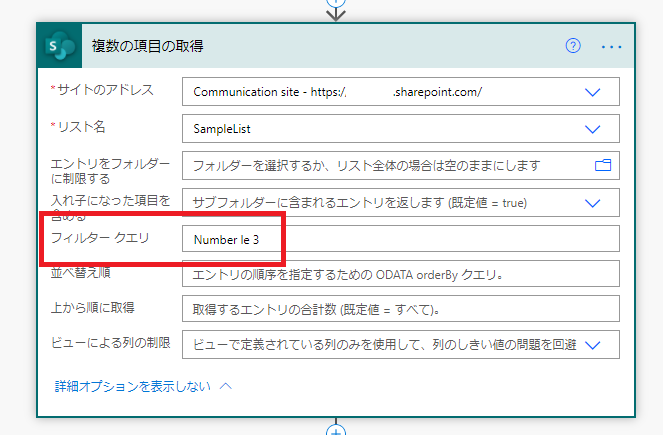
結果はこんな感じで成功。
論理演算子の詳細な動作検証(スクリーンショットつき)
条件が複数ある場合は、論理演算子で結合する。
- and : かつ
- or : または
- () : かっこ(優先)
以下実例。
かつ:and
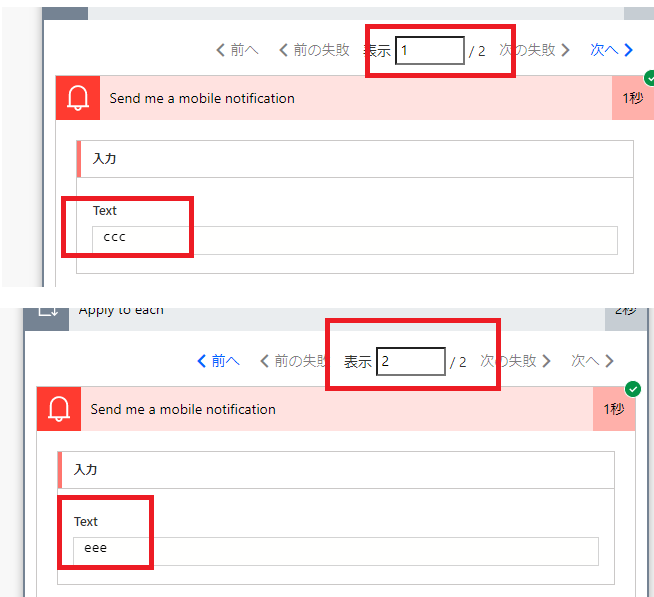
Number列が3以上かつTitle列が「ddd」以外のアイテムが欲しい場合は、このような式。
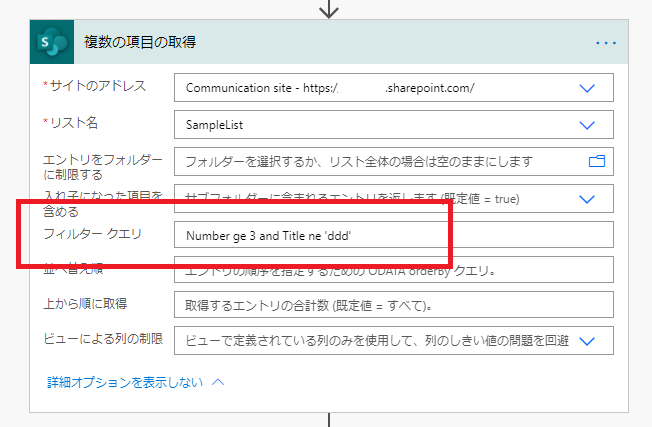
とれたのは「ccc」と「eee」なので成功。
or
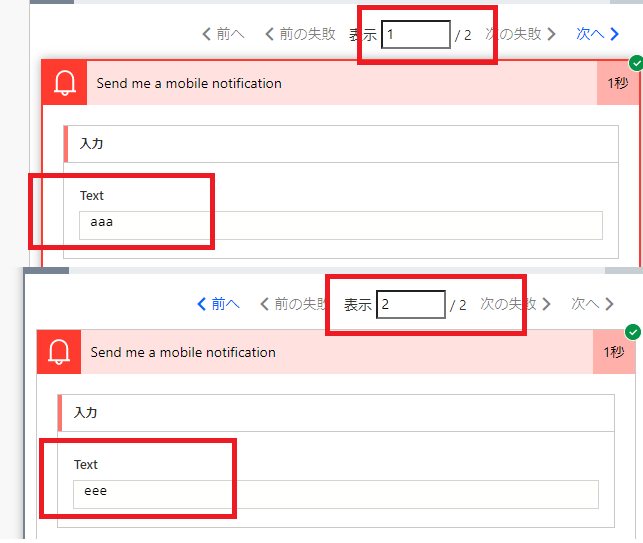
Number列が4より大きい、またはTitle列が「aaa」のアイテムが欲しい場合は、こんな感じ。
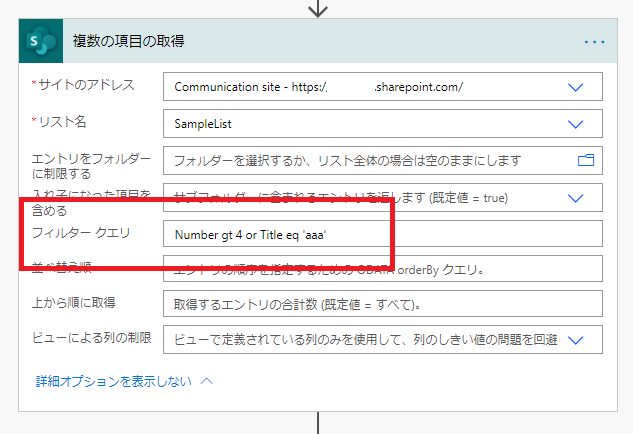
結果は以下の通りで、Numberが5のアイテムと、Titleがaaaのやつが取れているので成功。
かっこ()
フィルタークエリにはかっこ()も使える。
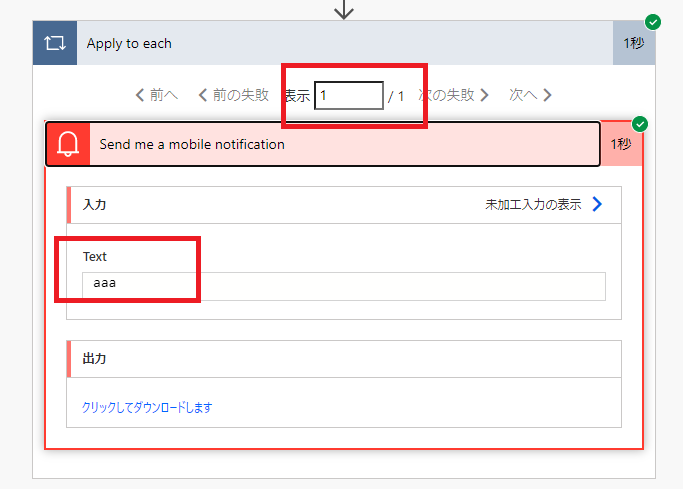
例えば、(Number列が1または4)かつ(Titleが「aaa」または「ccc」のアイテム)といった指定はこのような式になる。
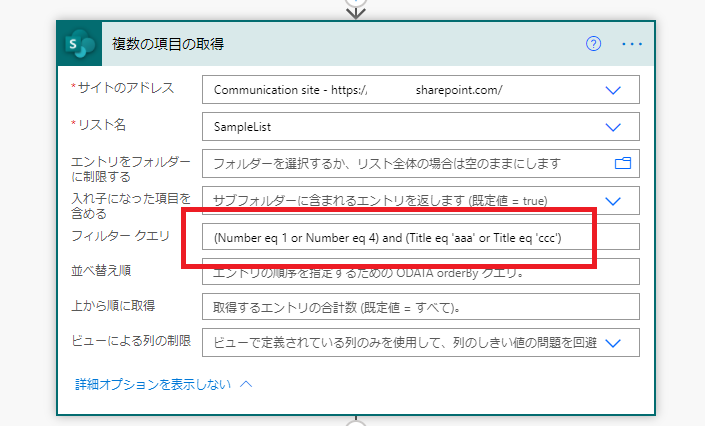
結果は以下の通りで、この条件に当てはまるアイテムは1個だけなので成功。
おまけ:ODataとは
ODataとはOpen Data Protocolの略で、HTTPを使ってやり取りするときに使うプロトコルのこと。
ODataを使ったフィルターの仕様(書き方)は、公式の情報が最も詳細に説明してくれている。
![]()
![]()

OData の filter リファレンス - Azure AI Search
Azure AI Search クエリでフィルター式を作成するために使用される OData 言語リファレンスと完全な構文。
docs.microsoft.com

コメント