Copilo Studioについて勉強を始めたので、その内容をメモ。今回は作成したエージェントにPower Automateで作成したアクションを追加する。

アクション
アクション(元々はプラグインという名前だった)は、エージェントに「機能」を登録するもの。
アクションとして以下を登録することが可能。
- コネクタ/カスタムコネクタ
- Power Automate
- AI Builderのプロンプト
- スキル(Azure Bot Framework
今回はPower Automateを使用したアクションの例として、「指定したユーザーのスケジュールを取得する」機能を「生成AIの利用」をONにしたエージェントに持たせてみる。
※2024/12/26時点で「生成AIの利用」をONにするためにはエージェントの言語を「英語」にする必要あり。
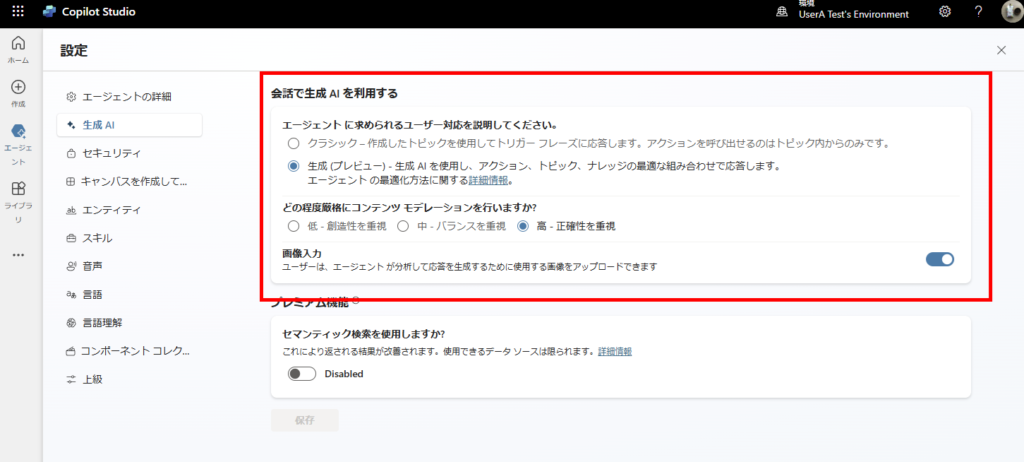
※2024/12/26時点で「生成AIの利用」をONにするためにはエージェントの言語を「英語」にする必要あり。
※コネクタを使用したアクションの構築はこちら。
![]()
Copilot Studio 生成AIを使用したエージェントにアクションを追加する|コネクタアクションでのカスタム
Copilo Studioについて勉強を始めたので、その内容をメモ。今回は作成したエージェントに「アクション」を追加する。ベースのエージェントの作成はこちらアクションアクション(元々はプラグインという名前だった)は、エージェントに「機能」を...
ippu-biz.com
2024.12.25
構築
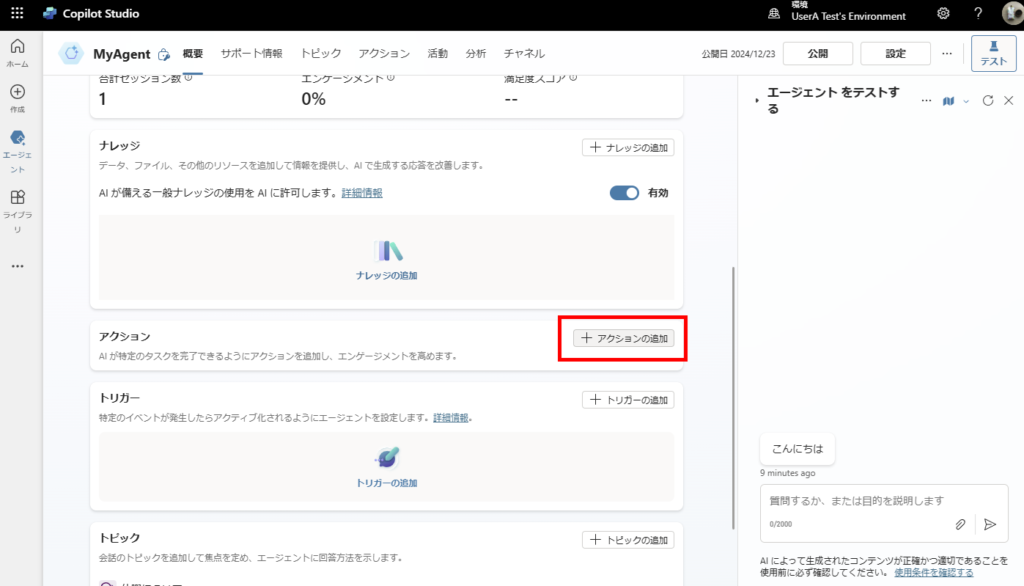
まずは生成AIの利用をONにしたエージェントを開き、[アクションの追加]を押す。
そしたら[アクションの追加]から[新しいPower Automateフロー]を選択。
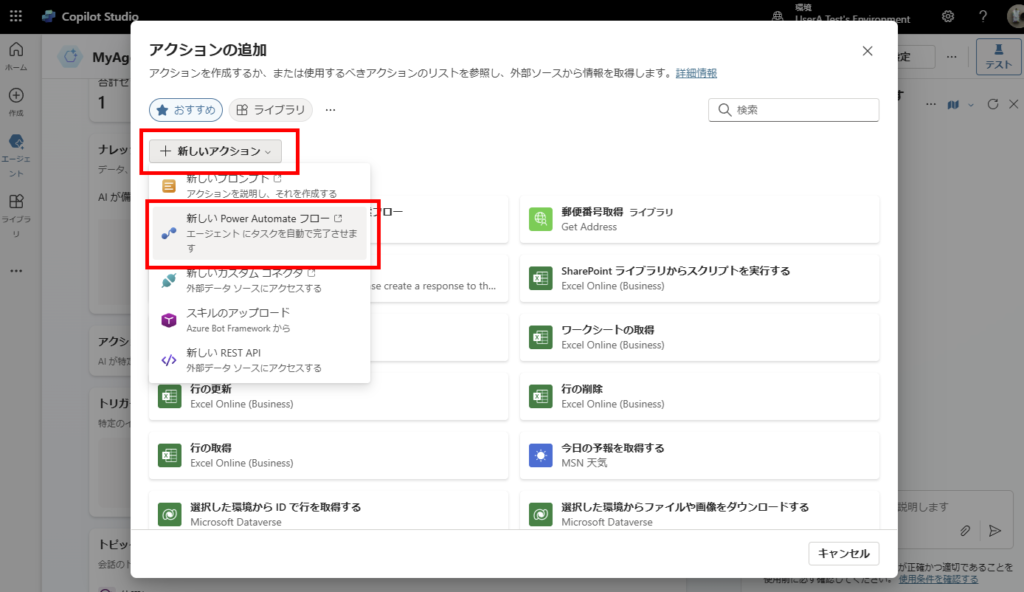
するとPower Automateの編集画面が開き、Copilotから呼び出されるトリガーと、Copilotへ応答を返すアクションが追加されたフローが表示される。
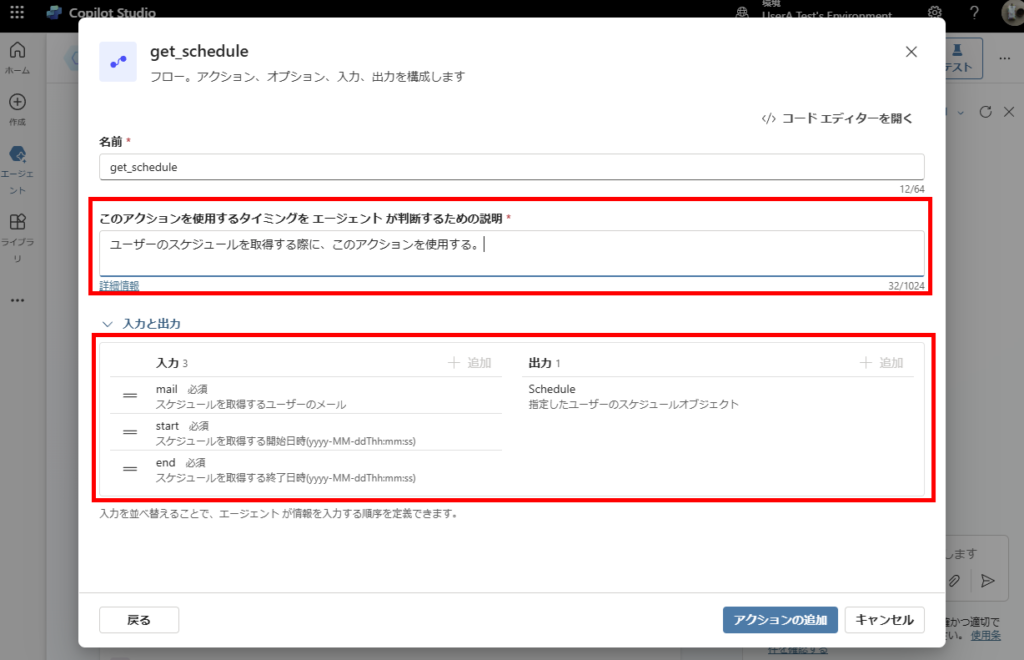
今回は「指定ユーザーのスケジュールを取得する」アクションを追加するので、トリガーの[入力を追加する]を押し、
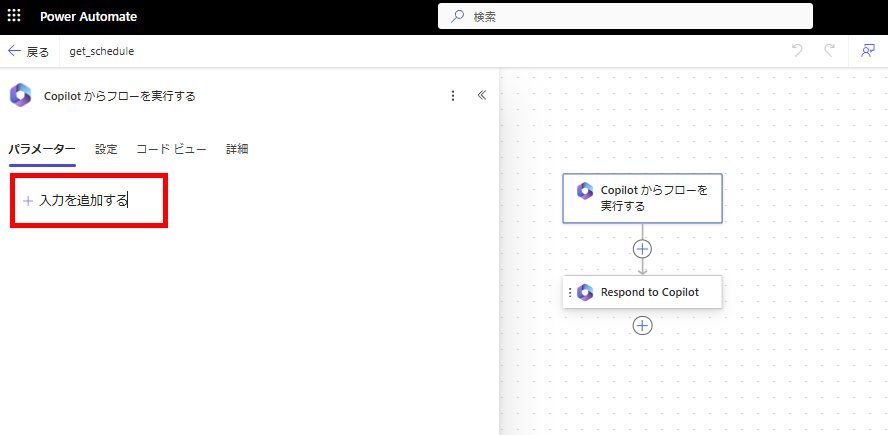
今回は「指定ユーザーのスケジュールを取得する」アクションを追加するので、トリガーの[入力を追加する]を押し、
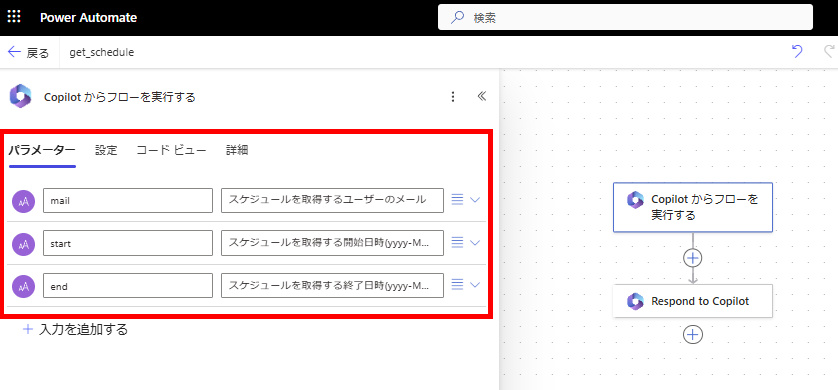
以下の引数を追加する。
このとき「生成AIの利用」をONにしたエージェントは引数の説明を読み取って、アクション呼び出し時に引数を自動で設定してくれるため、各引数の説明は丁寧に書く。
※今回はサンプルなのであっさり書いたけど、精度を高めたい場合はさらに説明を詳細に書くか、または工夫して引数を決めること。
このとき「生成AIの利用」をONにしたエージェントは引数の説明を読み取って、アクション呼び出し時に引数を自動で設定してくれるため、各引数の説明は丁寧に書く。
※今回はサンプルなのであっさり書いたけど、精度を高めたい場合はさらに説明を詳細に書くか、または工夫して引数を決めること。
- mail : 予定を取得するユーザーのメールアドレス
- start : スケジュールを取得する開始日時(yyyy-MM-dd)
- end : スケジュールを取得する開始日時(yyyy-MM-dd)
続いて指定されたユーザーの予定を取得するアクションを追加する。
※このAPIについては本題ではないので詳しい説明は省略。指定したユーザーの指定した開始~終了までの予定を取ってきてくれる。
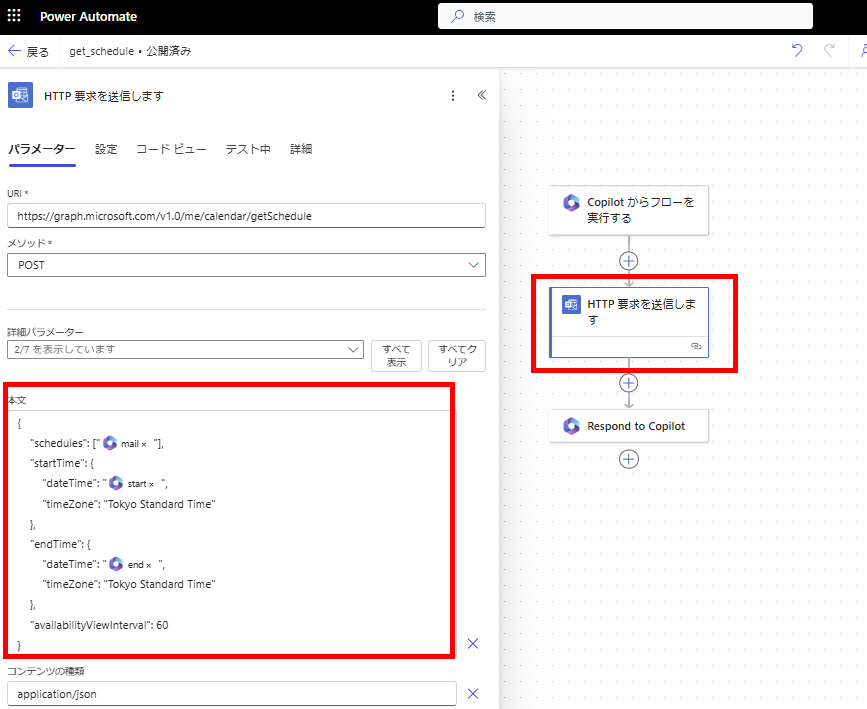
※このAPIについては本題ではないので詳しい説明は省略。指定したユーザーの指定した開始~終了までの予定を取ってきてくれる。
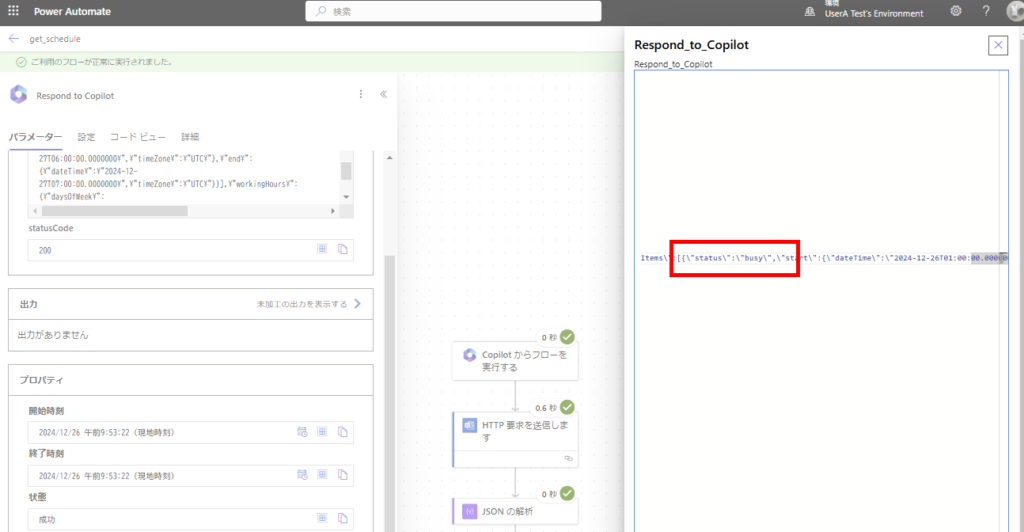
最後、予定を取得するアクションの結果をJSONの解析にかけて、
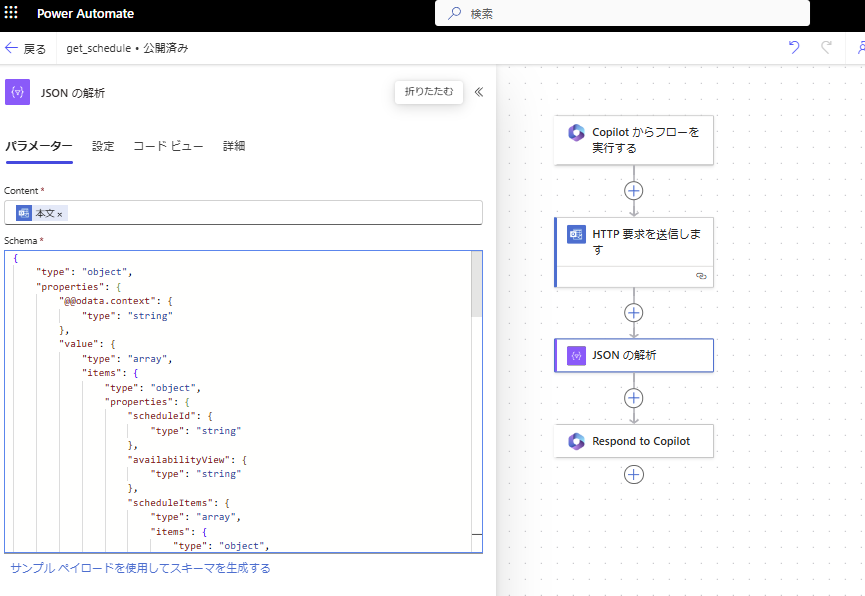
解析結果をCopilotに返す。
※本当は「その機能に対して必要最小限の情報を戻すべき」なんだけど、今回はサンプルなのでそのままCopilotに値を渡す。
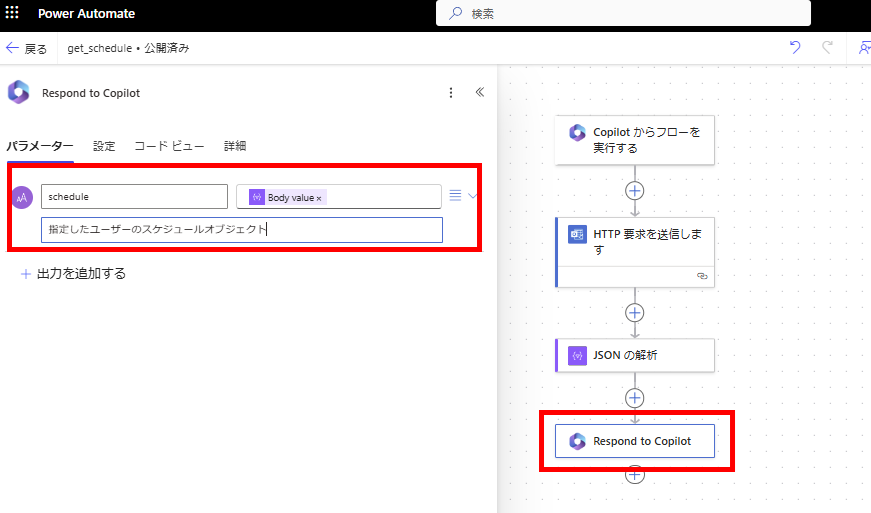
※本当は「その機能に対して必要最小限の情報を戻すべき」なんだけど、今回はサンプルなのでそのままCopilotに値を渡す。
いい感じの名前を付けて[保存]→[公開]したら、この画面を閉じる。
※本番の開発であればこの時点でフローの単体テストを実施する。
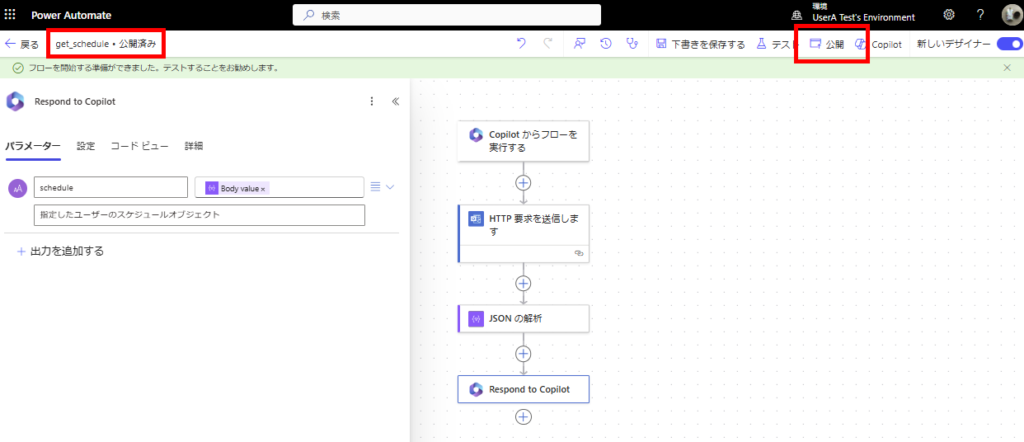
※本番の開発であればこの時点でフローの単体テストを実施する。
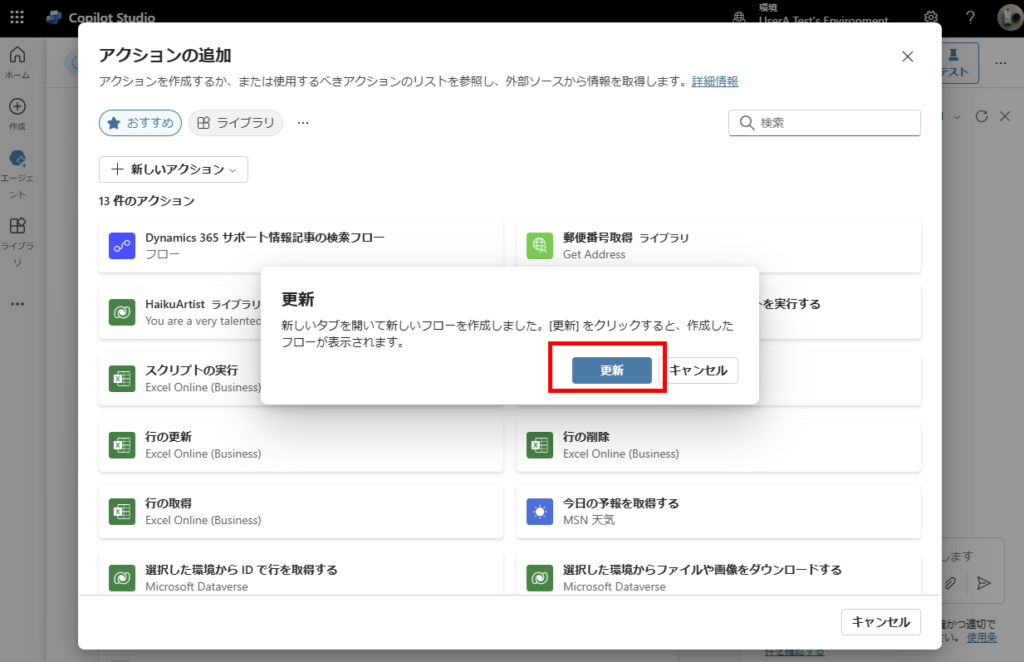
Copilotの画面に戻り[更新]を押して、
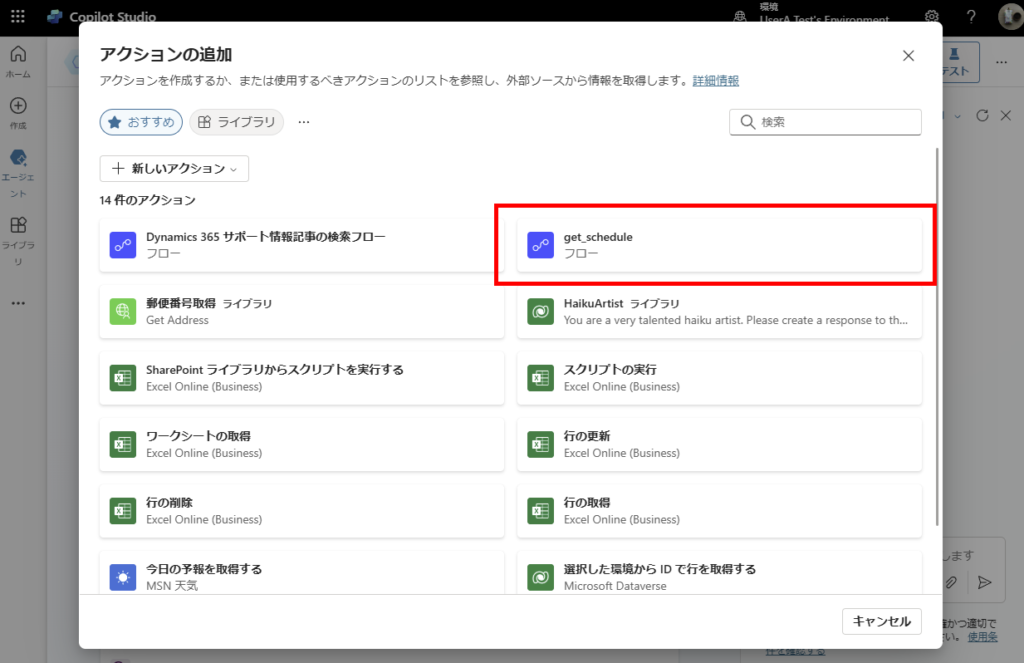
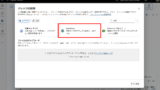
先ほど作成したフローを選択。
エージェント(生成AI)がどんなときにこの機能を使うか?を丁寧に書いて、引数と出力がきちんと反映されていることを確認したら、[アクションの追加]で構築完了。
※GPT系のモデルの「Tools(旧 Function calling)」と基本は同じ。
※GPT系のモデルの「Tools(旧 Function calling)」と基本は同じ。
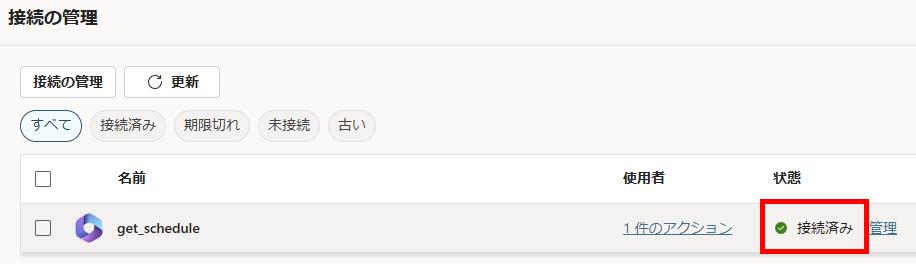
動作確認(接続の作成)
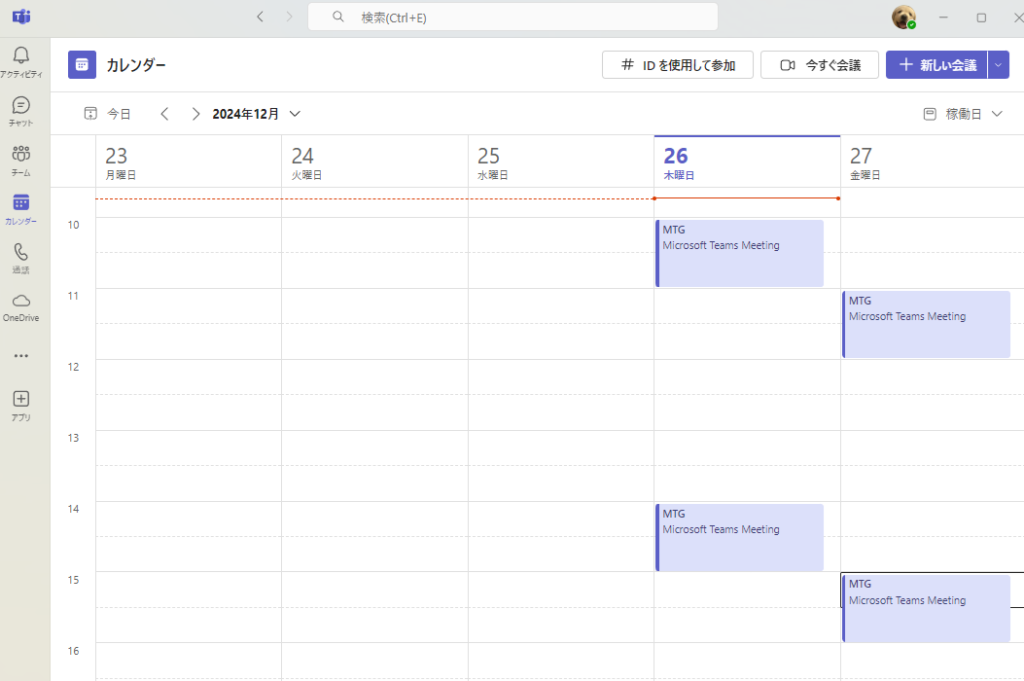
自分以外のユーザーの予定表に予定を適当に登録。
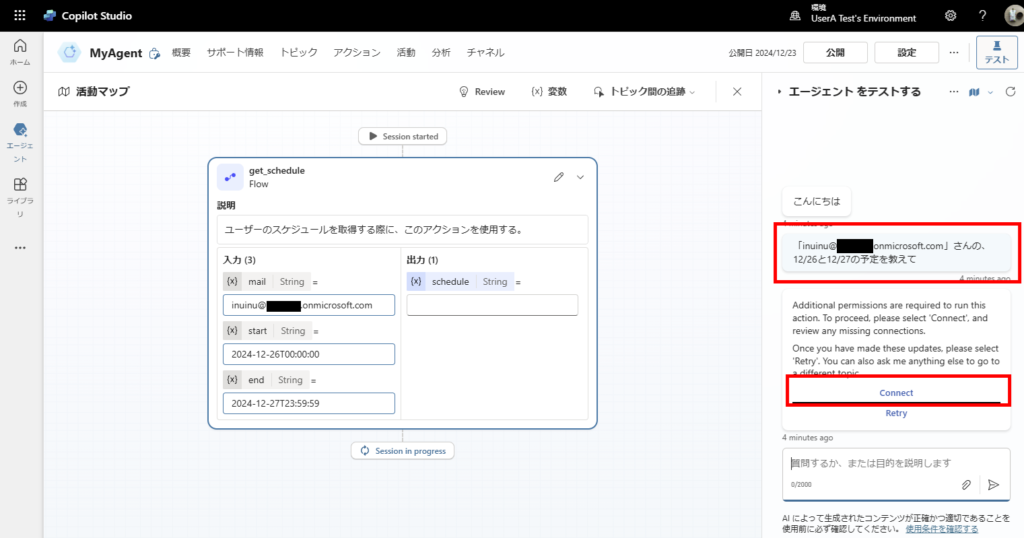
Copilotに対し該当ユーザーの予定を聞くと、接続を追加(更新)する旨のメッセージが表示されるので、[Connect]を押して、
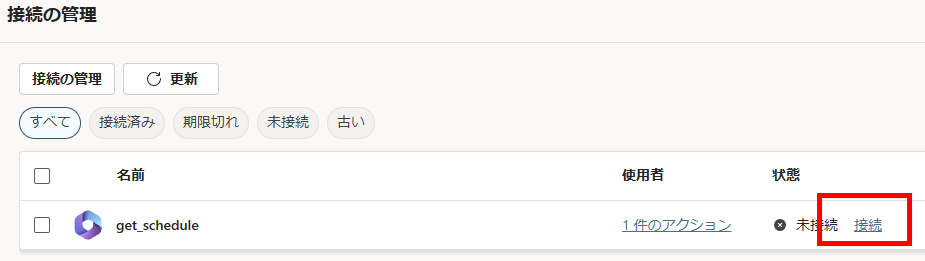
[接続の管理]から[接続]を押し、[接続済み]にする。
改めて同じ質問をしてみると、こんな感じで該当ユーザーの予定を答えてくれる。
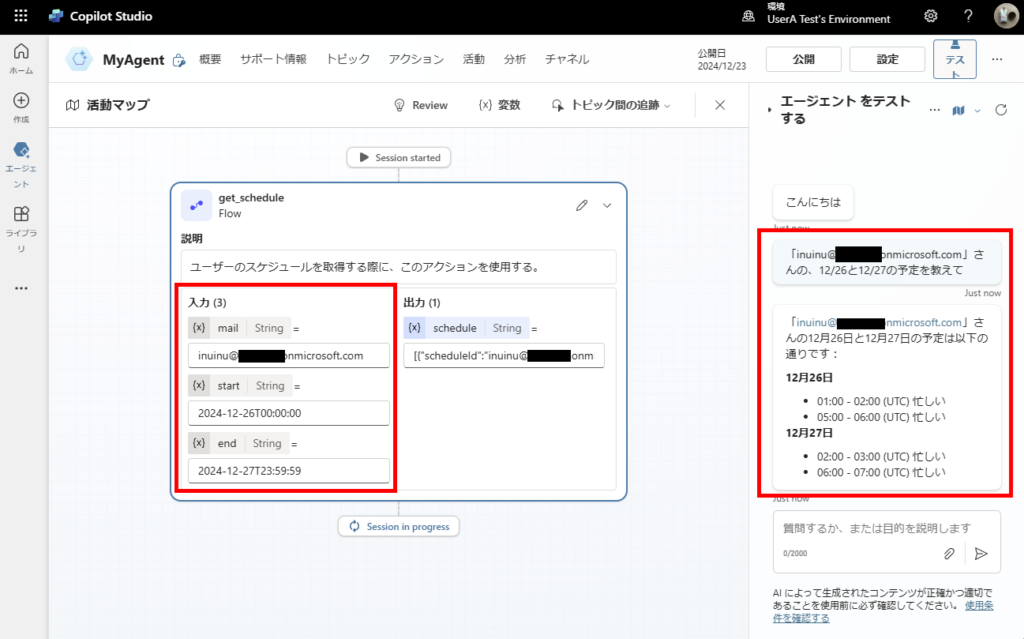
時刻がUTCになっていたり、予定の内容が「忙しい(Busy)」になっているのは、
- エージェントへの指示が足りない(システムプロンプトがいまいち)
- エージェントへの応答(出力)の内容を絞っていない(APIの結果をそのまま返してる)
- エージェントへの応答(出力)の説明不足
などいろいろな原因が考えられるので、本番の開発ではこの辺をきちんと設計/設定して精度を高める。
今回はCopilotに対しユーザーを指定するとき「メールアドレス」をわざわざこちら側で入力したけど、せっかくAIを使っているので「ユーザー名(日本語名)」から予定を取得してほしい。
ということで次回はオーケストレーション機能を使って、ユーザー名から予定を取得してみる。
![]()
Copilot Studio 生成AIのオーケストレーション機能で複数のアクションを組み合わせて回答を生成させる
今回はCopilot Studioのプレビュー機能「オーケストレーション」を使用して、複数のアクションを組み合わせて回答を生成させる。オーケストレーション機能生成AIをONにしたエージェントは、ユーザーからの質問に対し適切な「トピック」「ア...
ippu-biz.com
2024.12.27
コメント