I used to struggle with writing complex filter formulas for Power Apps galleries.
After a lot of trial and error—from nested If statements to using variables—I finally found the cleanest, most scalable way to handle multiple optional search criteria.
Here is a summary of my journey and the best practice solution I use today.
The Scenario (Setup)
Let’s assume we have a SharePoint list like this:
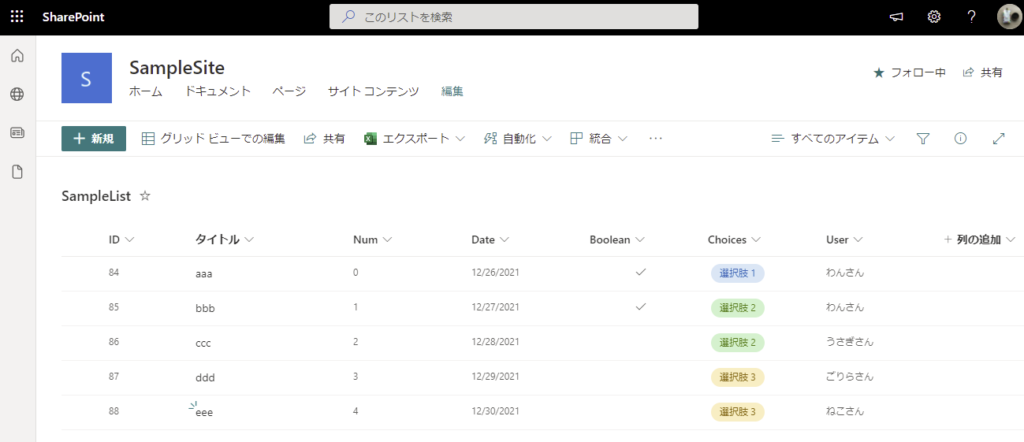
And we want to filter this list using multiple Combo Boxes in our app.
The requirement is: If a Combo Box is empty, do not filter by that column (treat it as “Select All”).
*For simplicity, all Combo Boxes in this example are single-select.

Attempt 1: The “If” Statement Nightmare
When I first started learning Power Apps, I tried to handle optional filters using nested If functions.
As you can see, the formula quickly became messy with just two criteria.
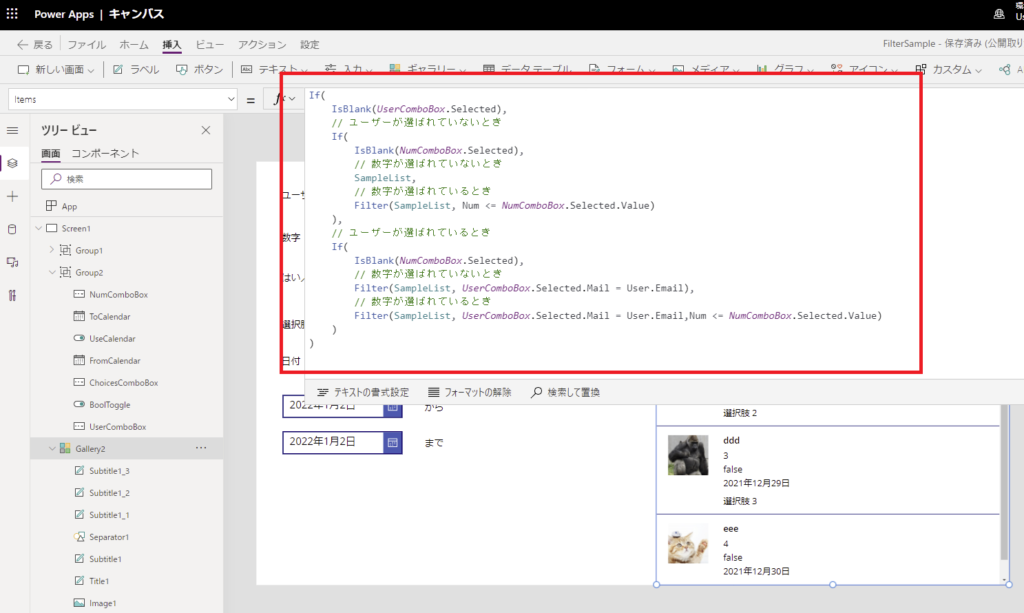
It works, but…
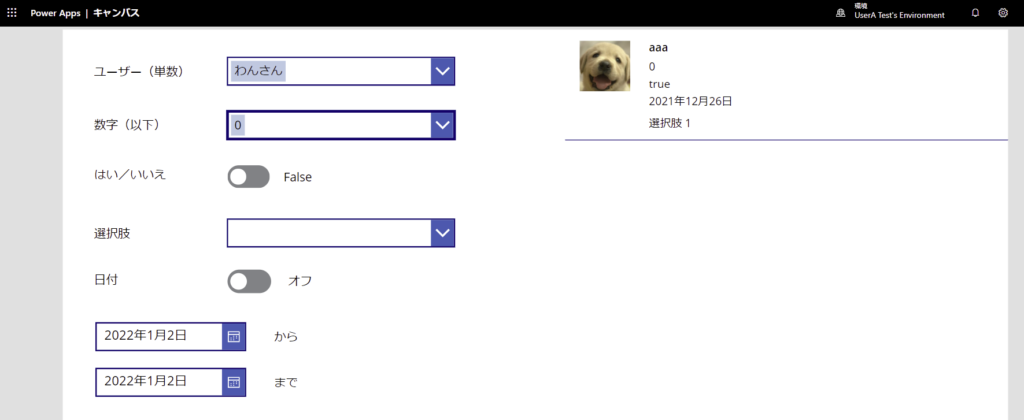
The Problem: Poor readability and maintainability.
The number of permutations grows exponentially with every new filter you add. Modifying this code later is a nightmare.
Attempt 2: Pre-filtering into Variables (Collections)
Next, I thought: “Why not filter the data sequentially into a variable or collection?”
I created a hidden button and added logic to OnSelect to filter the data step-by-step.
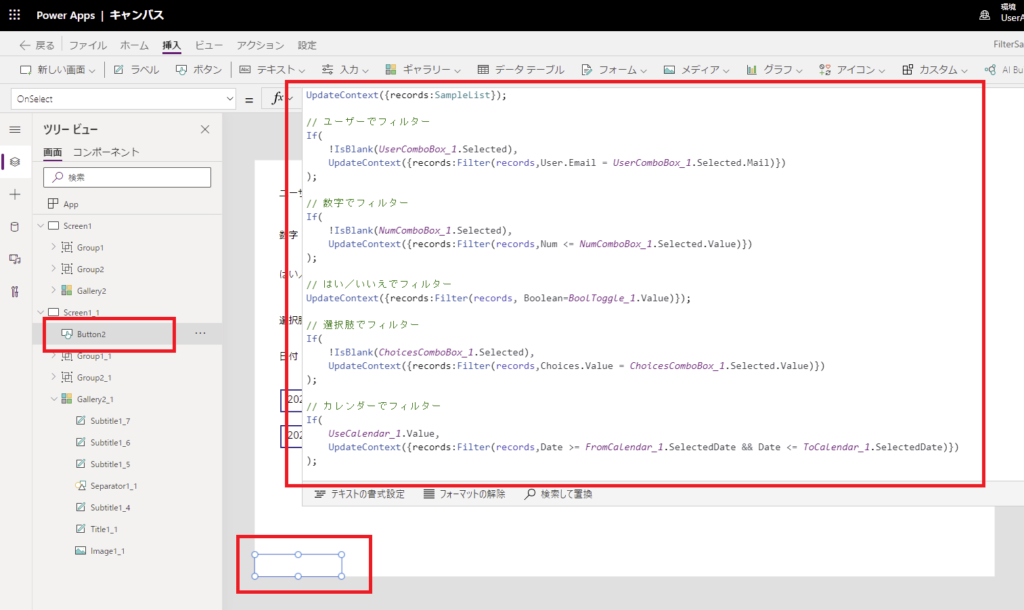
Then I set the resulting variable to the Gallery’s Items property.
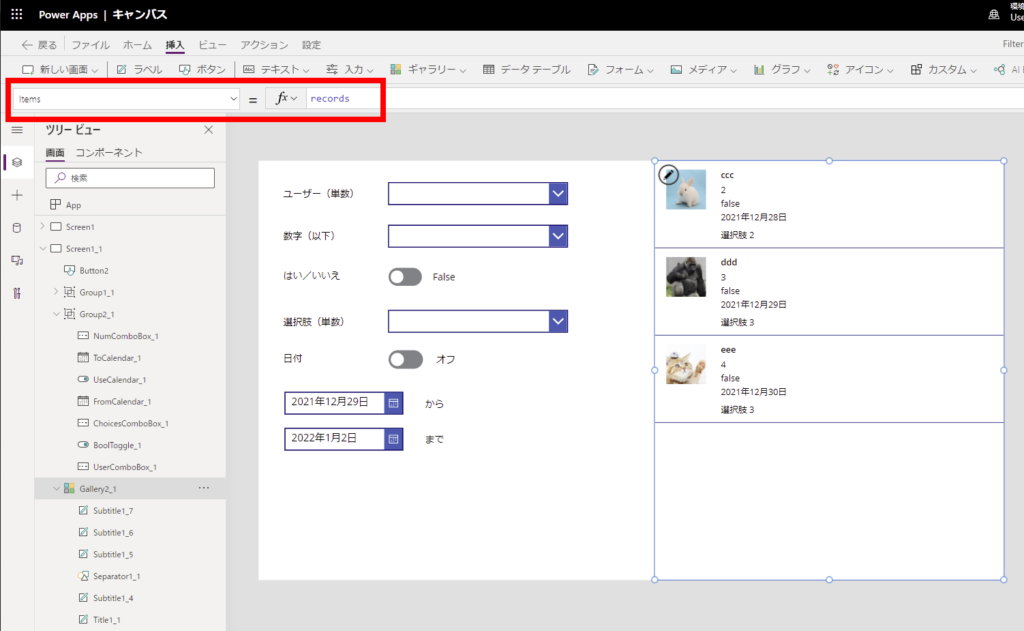
At first glance, this seemed cleaner. However, I realized this approach has a fatal flaw: Delegation.
The Problem: The Data Row Limit (Delegation).
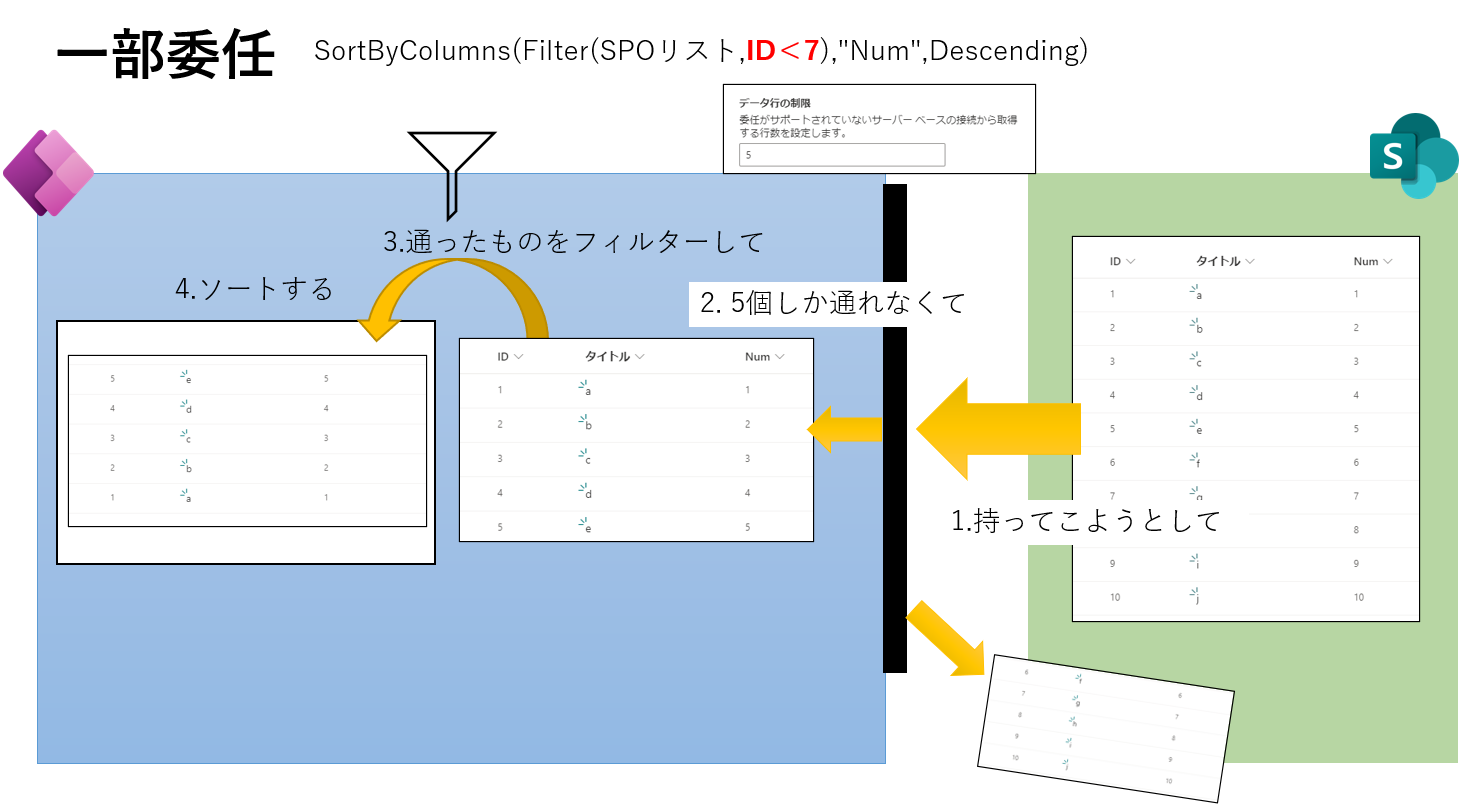
Once you assign data to a local variable or collection, you lose the ability to delegate queries to the server. By default, Power Apps will only retrieve the first 500 records (max 2000). If your SharePoint list grows beyond that, your search results will be incomplete.
The Best Practice: Logical “Short-Circuit” Filtering
Finally, I learned the correct way to handle optional parameters using the Filter function’s logic directly.
The Filter function evaluates a logical formula for each record. If the result is true, the record is included.
We can leverage this by using the OR (||) operator to check if a filter control is empty.
The Golden Formula
Filter(
    'Meal List',
    (IsBlank(UserComboBox.Selected) || UserColumn = UserComboBox.Selected.Value),
    (IsBlank(NumberComboBox.Selected) || NumberColumn = NumberComboBox.Selected.Value)
)
Here is how it looks in the editor:
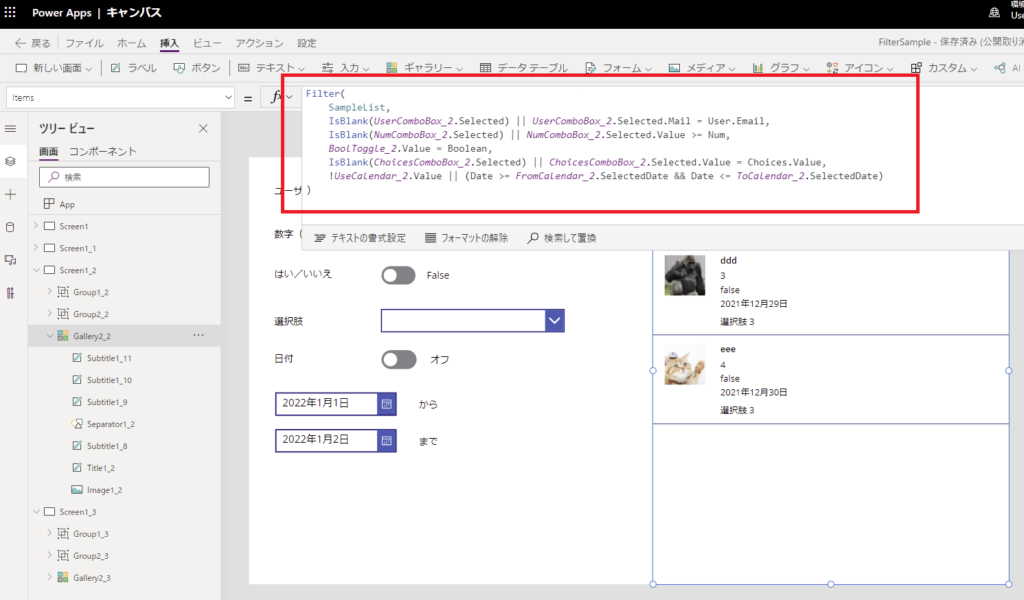
Why this works
Take the first condition: (IsBlank(UserComboBox.Selected) || ...).
- If the Combo Box is empty,
IsBlankreturnstrue. Because of the||(OR) operator, the entire expression becomestrueregardless of the second part. The filter is effectively ignored for that column. - If the Combo Box has a value,
IsBlankreturnsfalse. The formula then checks the second part: does the record match the selected value?
The Benefits:
- Clean & Readable: No nested Ifs.
- Scalable: Easy to add more criteria.
- Delegable: Since we are filtering the data source directly, this query can be delegated to SharePoint (no 500-row limit!).
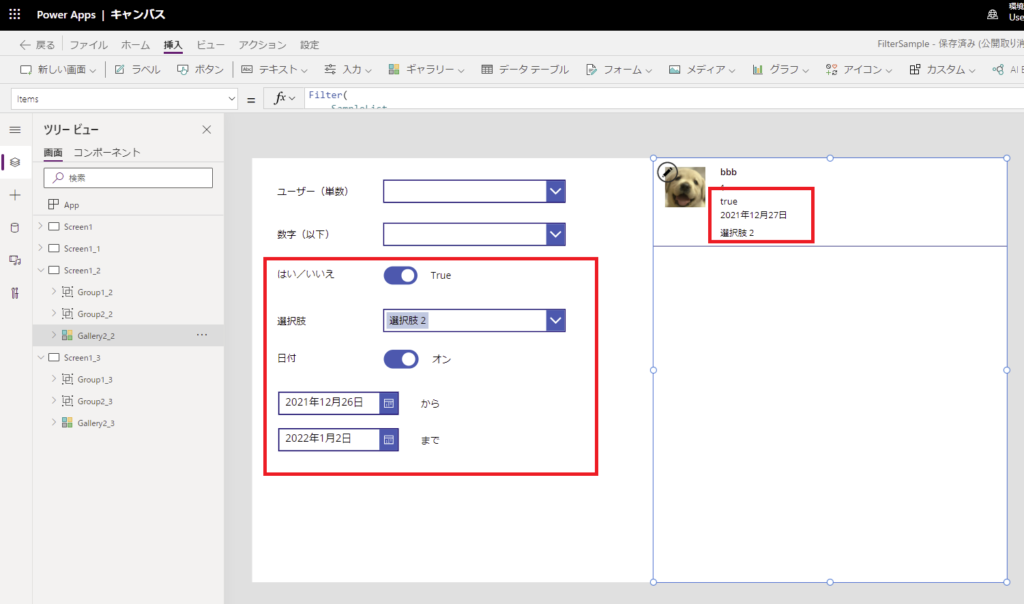
The result is a fully functional, multi-criteria search screen.


コメント