Copilo Studioについて勉強を始めたので、その内容をメモ。今回は作成したエージェントに「アクション」を追加する。

アクション
アクション(元々はプラグインという名前だった)は、エージェントに「機能」を登録するもの。
アクションとして以下を登録することが可能で、
- コネクタ/カスタムコネクタ
- Power Automate
- AI Builderのプロンプト
- スキル(Azure Bot Framework
今回は「コネクタを直接使うアクション」として、「ユーザーの予定を取得」するアクションを作ってみる。

※AI Builderのプロンプトについてはこちら
![]()
AI BuilderでGPT プロンプトが公開されたのでPower AppsやPower Automateから使ってみる|GPT-3.5が簡単に使える
AI Builderにプロンプトを登録する機能と、そのプロンプトを使用してGPTを呼び出す機能が提供されたので、実際に使ってみた。ソースはこちら基本的な使い方:用意されているプロンプトを使用事前に用意されているプロンプトがいくつかあるような...
ippu-biz.com
2024.01.17
構築
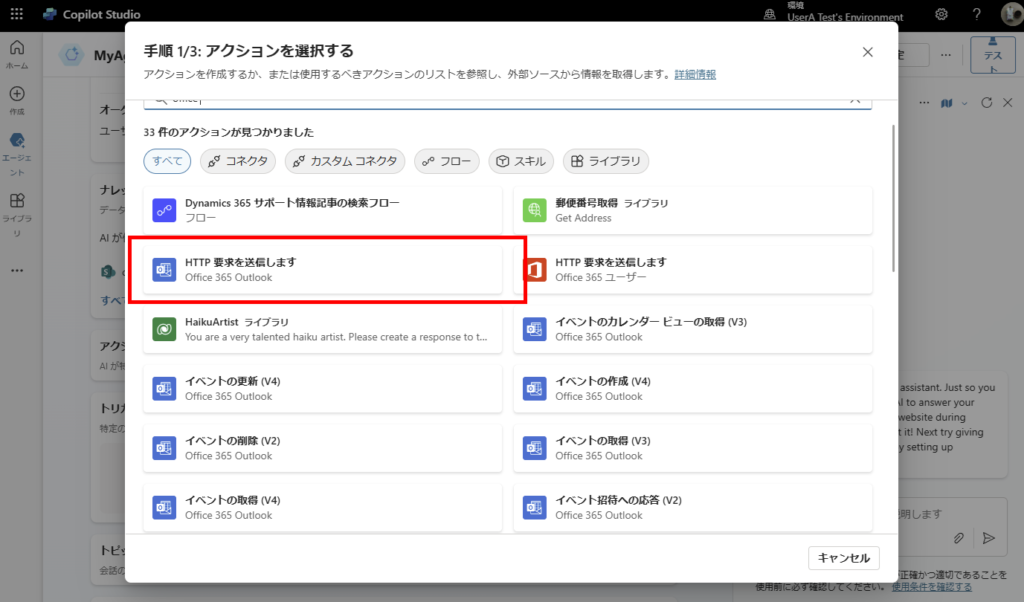
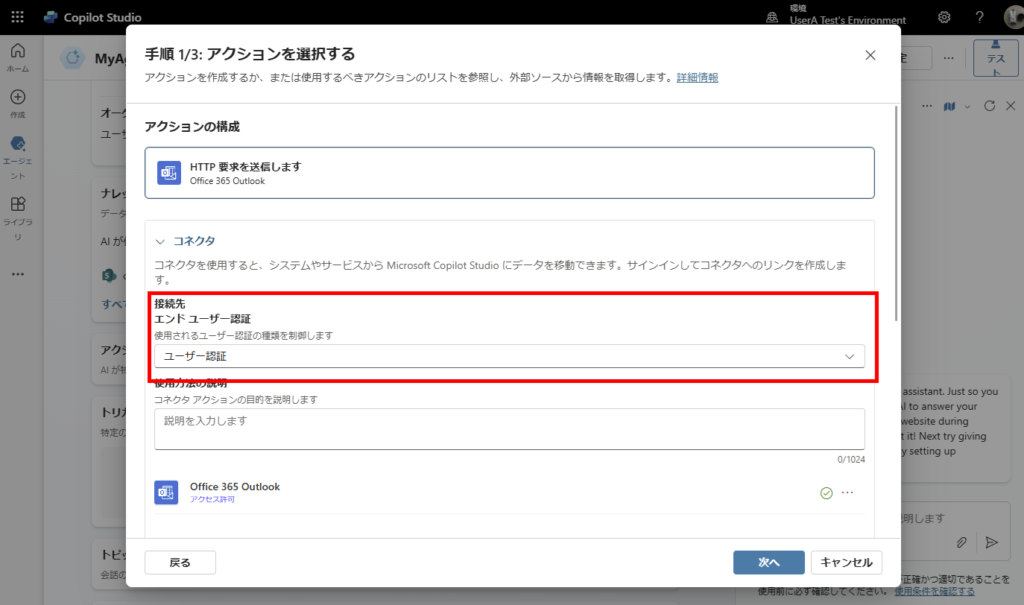
作成したエージェントの[アクションの追加]から、
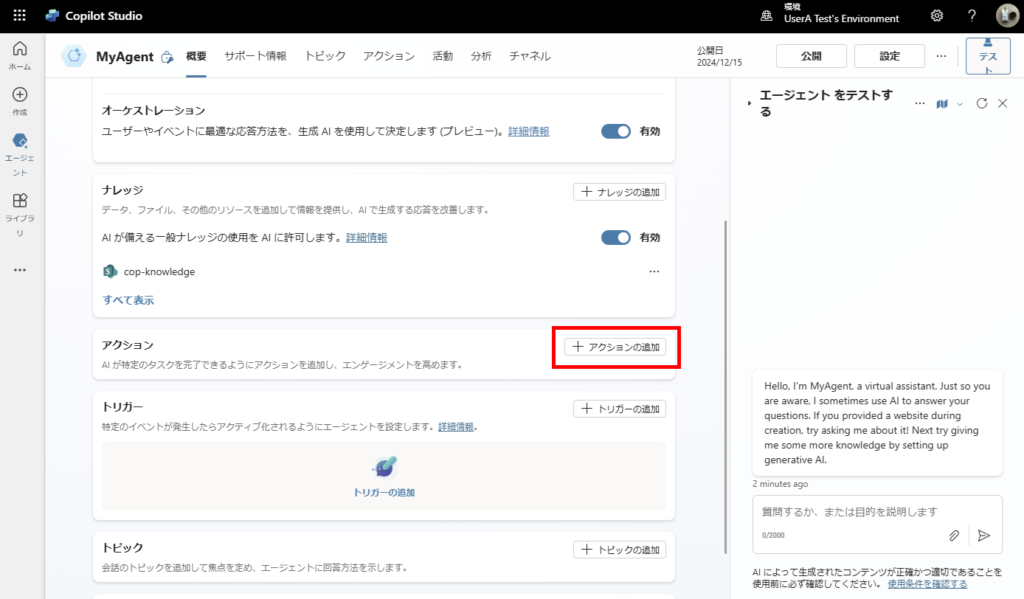
Office 365 Outlookの「HTTP要求を送信します」アクションを選択、
接続先は「エンドユーザー認証」を選んで、
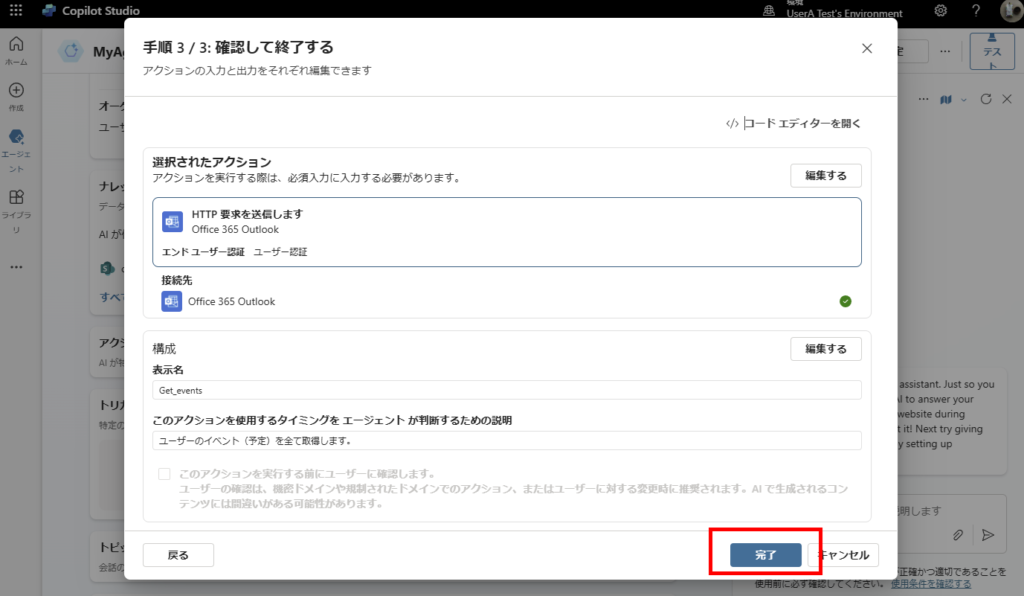
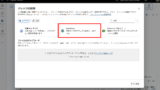
構成でアクションの「名前」「表示名」「説明」を設定する。
※特に「説明」はAIがアクションを使うかどうかの判断に使用するため、丁寧に書く。
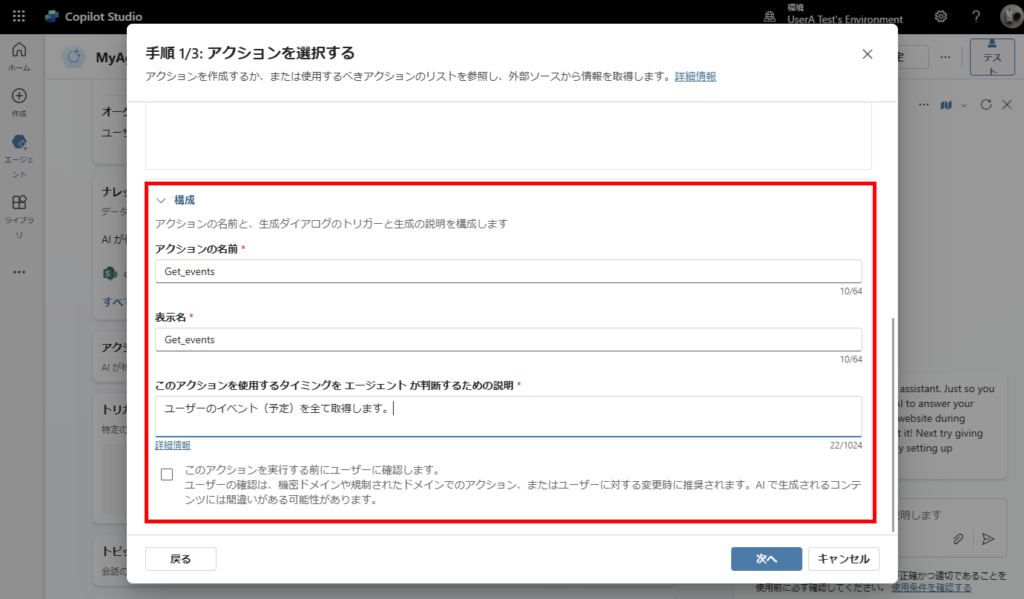
※特に「説明」はAIがアクションを使うかどうかの判断に使用するため、丁寧に書く。
[次へ]で次のステップに進んだら、[入力の編集]を押し、
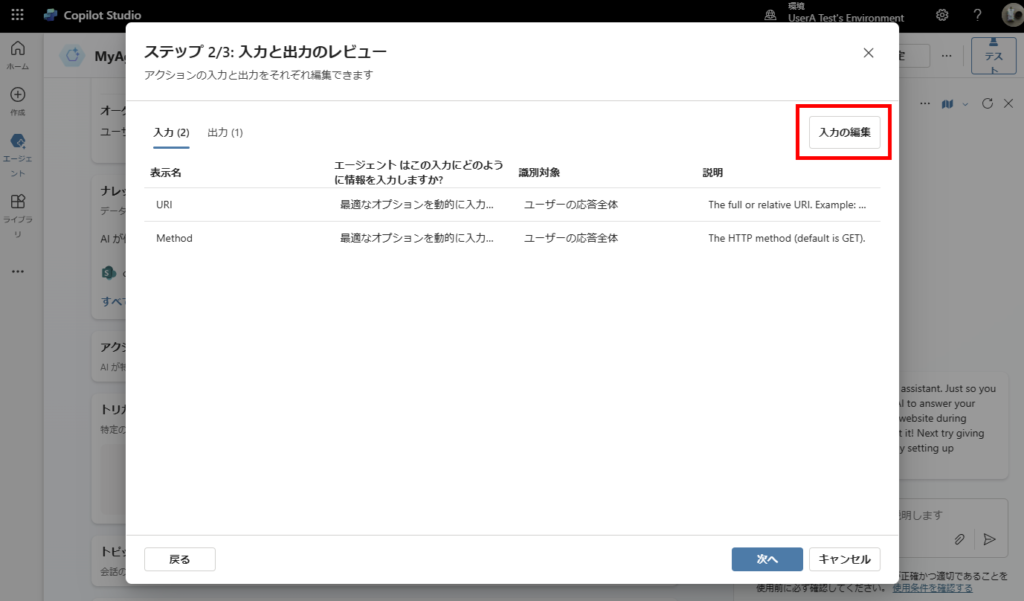
今回は「予定を取得するAPIのみを使用する」ため、引数「URI」と「Method」共に固定値を入力するように設定し、それぞれ値を設定する。
※URIには予定取得のAPI「https://graph.microsoft.com/v1.0/me/events」を設定。
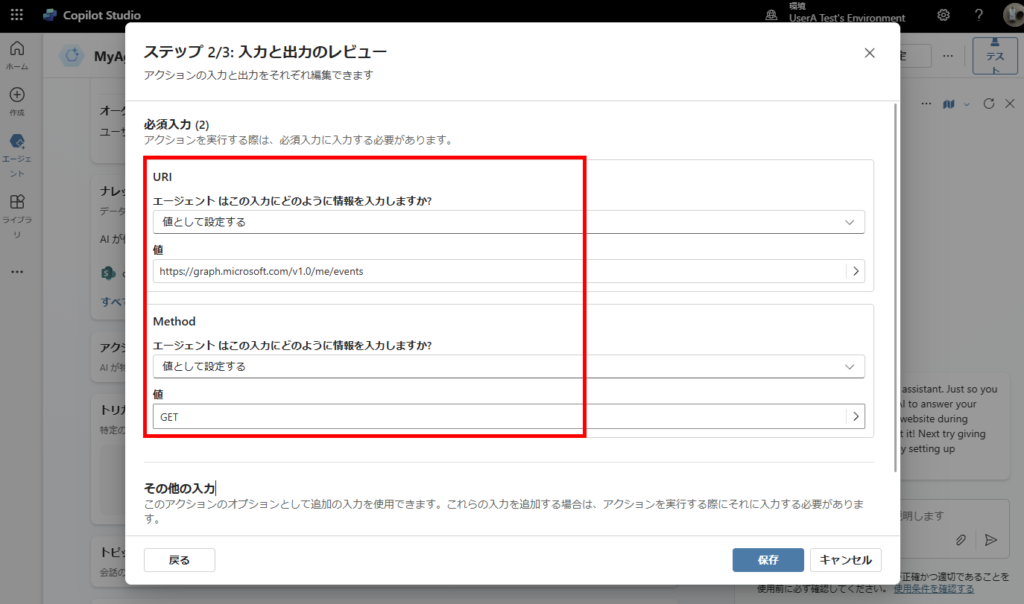
※URIには予定取得のAPI「https://graph.microsoft.com/v1.0/me/events」を設定。
[次へ]を押して、確認画面で[完了]を押す。
最後に追加したアクションの[編集]を押して、
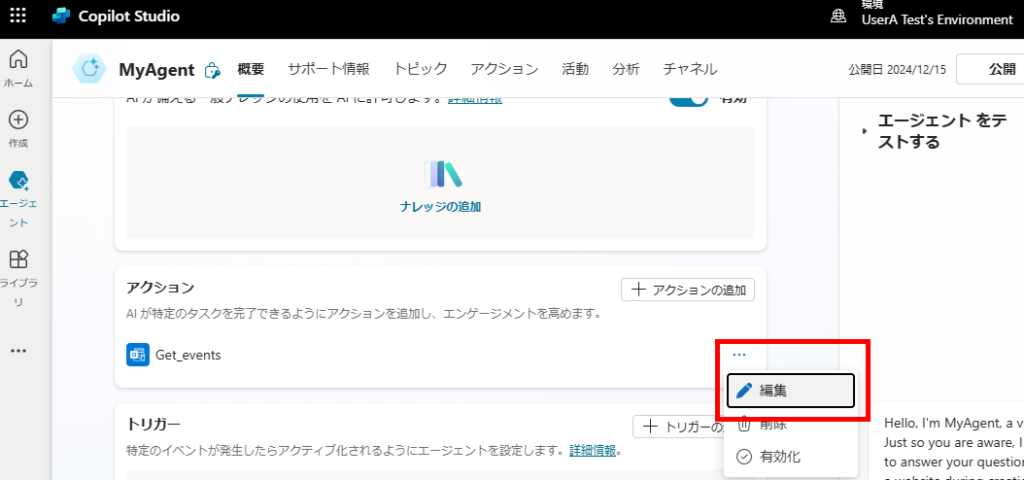
状態をオンにして保存し、

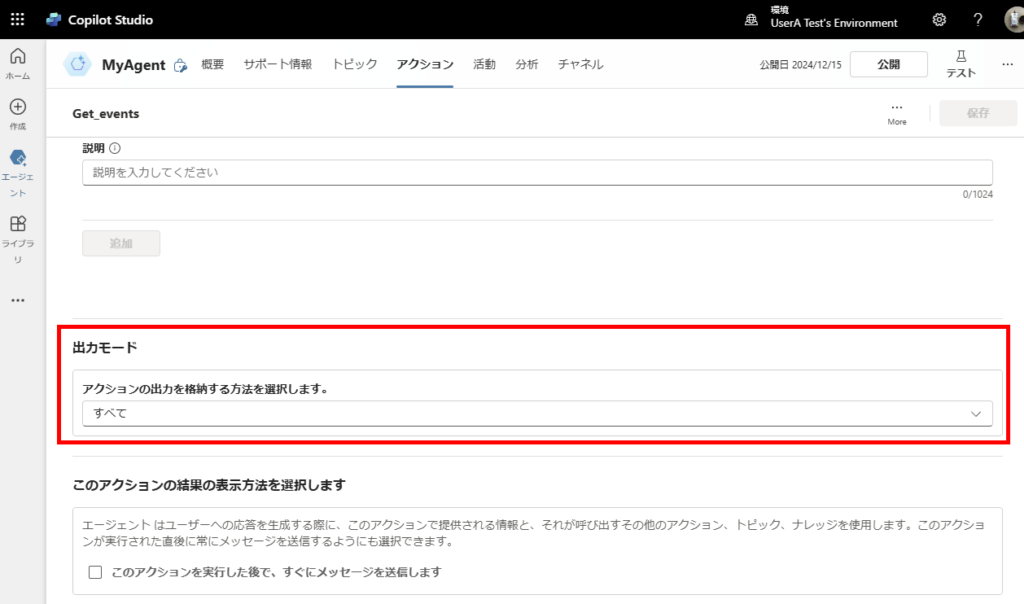
[出力]タブで[出力モード]を「すべて」にする。
以上で構築は完了。
動作確認
エージェントに対して先ほどのアクションを使用しそうなメッセージを送ると、「接続」を求めるメッセージが返ってくるので「Connect」を押す。
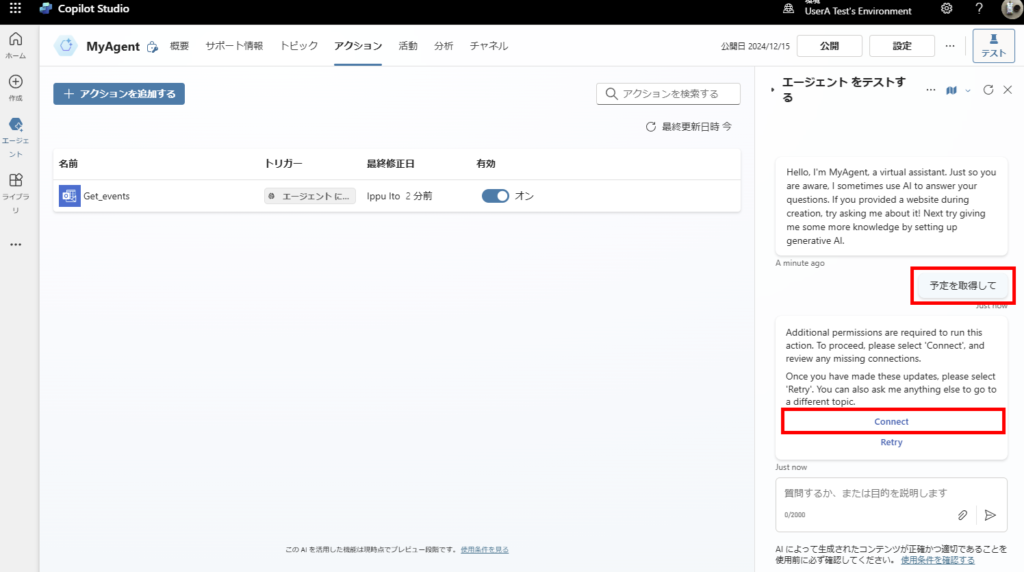
そしたら「接続の管理」画面に飛ぶので、接続を実施。
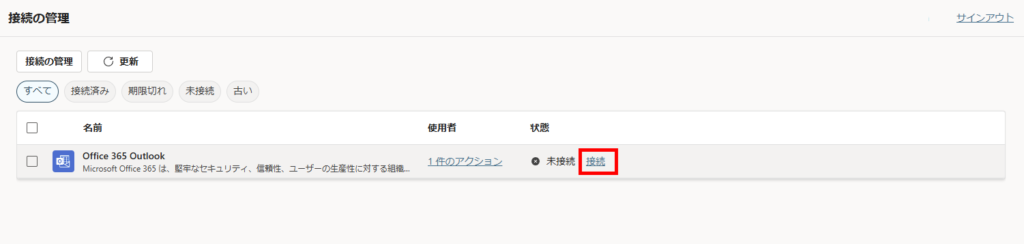
「接続済み」になったら準備完了。

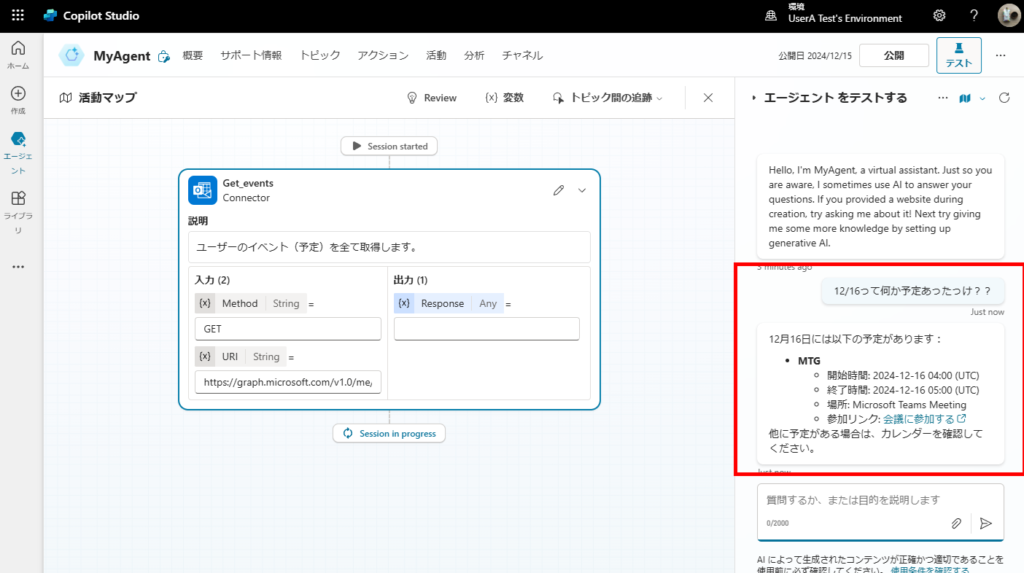
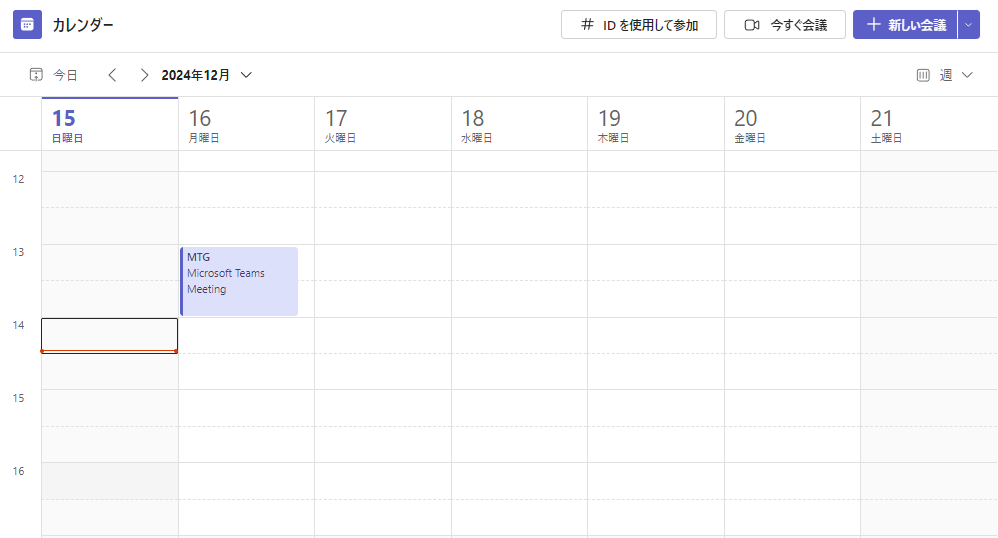
もう一回予定を聞いてみると、Outlookのイベント(予定)を確認して、RAGで回答を生成してくれる。
今回はコネクタから直接アクションを作ったけど、Power Automateを使用してアクションを作成した方が様々なことができる上、柔軟性もある。
ということで次回はPower Automateを利用したアクションの構築にチャレンジ。
※2024/12/21現時点で、トピックなしのアクション起動は「言語を英語にして会話で生成AIを利用するをON」にする必要あり。

コメント