How to Add Custom Connector Actions to Your Copilot Studio AI Agent.

As I begin learning about Copilot Studio, I’m documenting my findings. In this article, I’ll explain how to add “Actions” to our previously created agent.

スポンサーリンク

Actions

Actions (formerly known as plugins) are used to register “functionalities” to your agent.

The following can be registered as actions:

  • Connectors/Custom Connectors
  • Power Automate
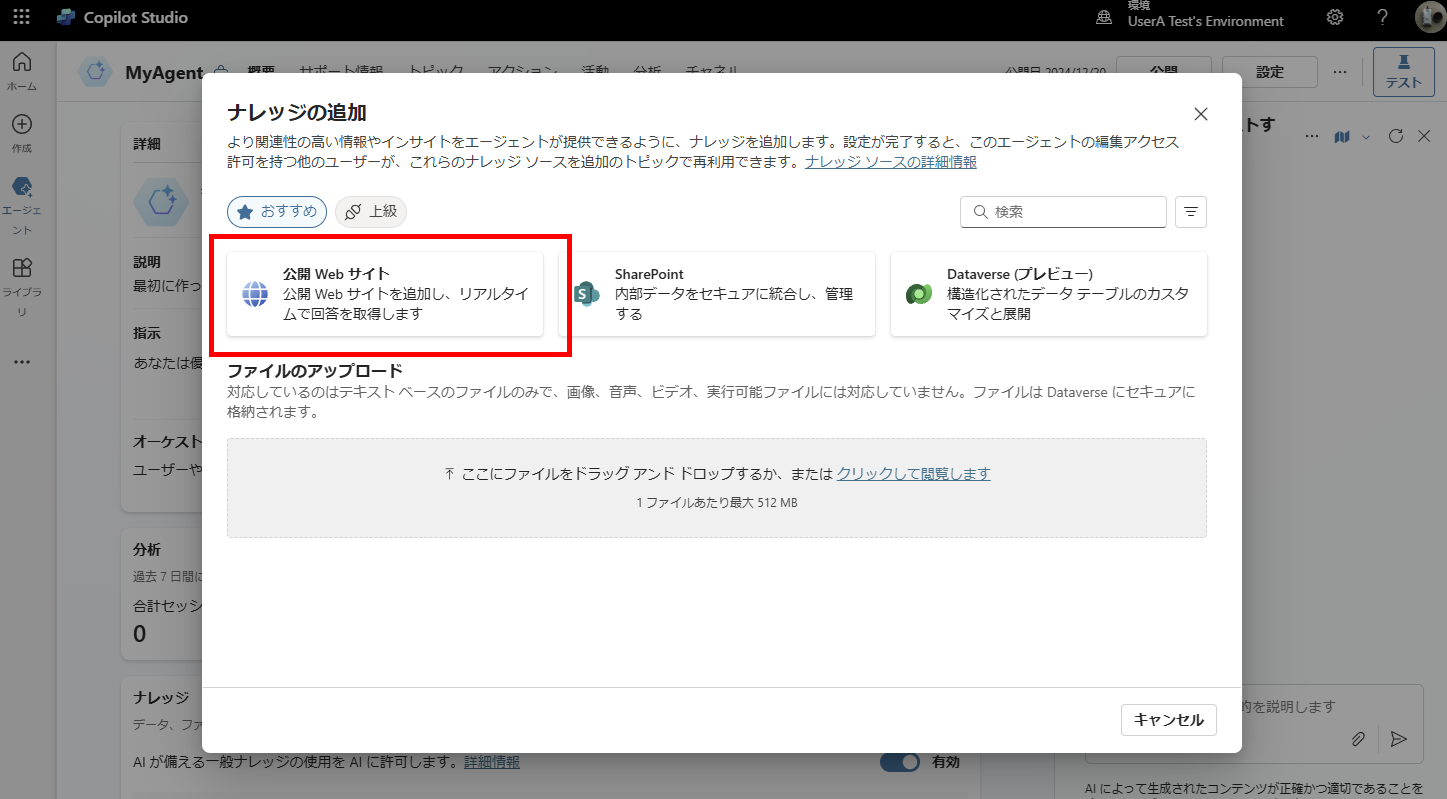
  • AI Builder Prompts
  • Skills (Azure Bot Framework)

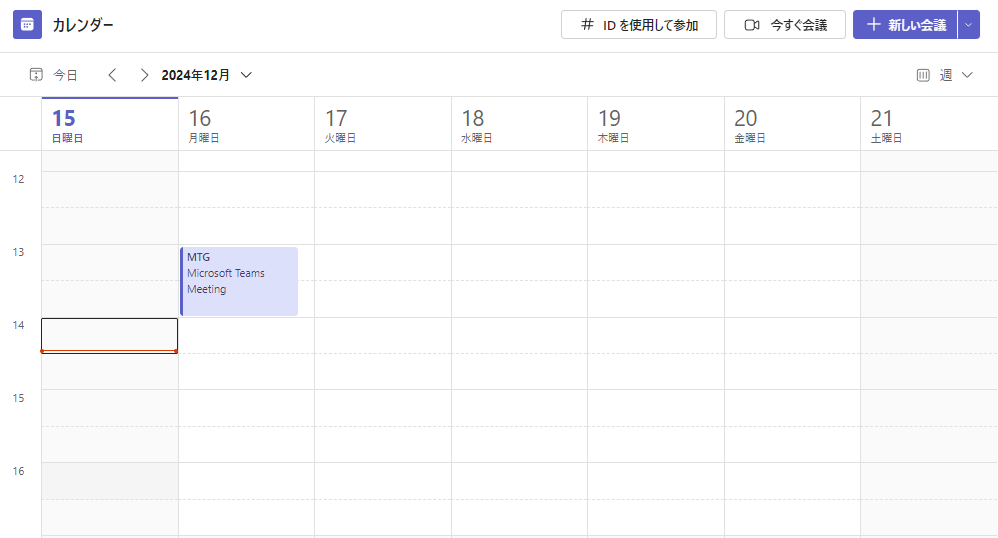
In this article, we’ll create an action that retrieves user schedules as an example of directly using connectors.

Implementation
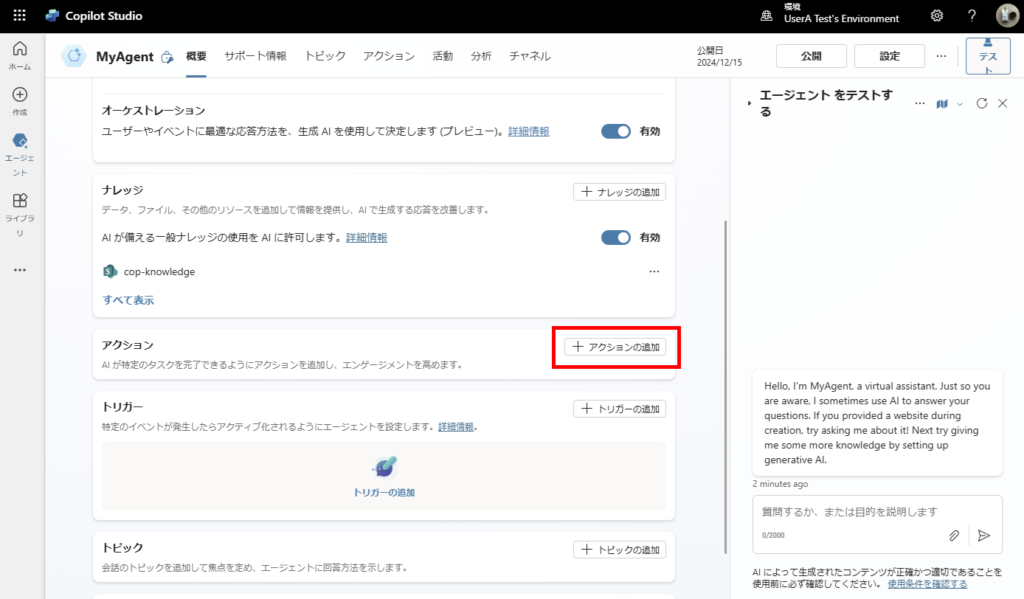
From your created agent, select [Add action],
Screenshot showing how to add an action in Copilot Studio
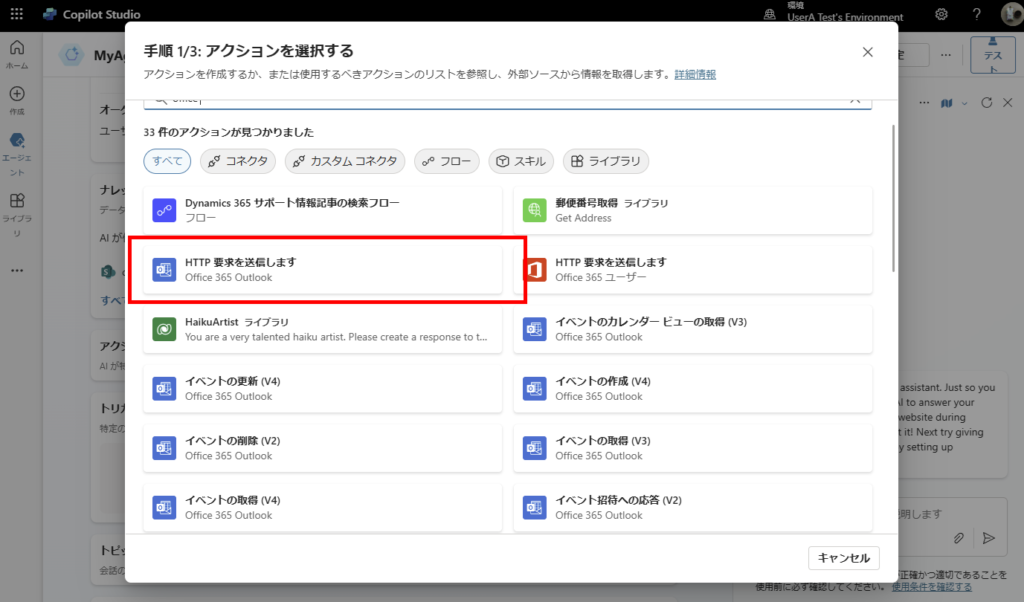
Select the “Send an HTTP request” action from Office 365 Outlook,
Screenshot showing HTTP request action selection
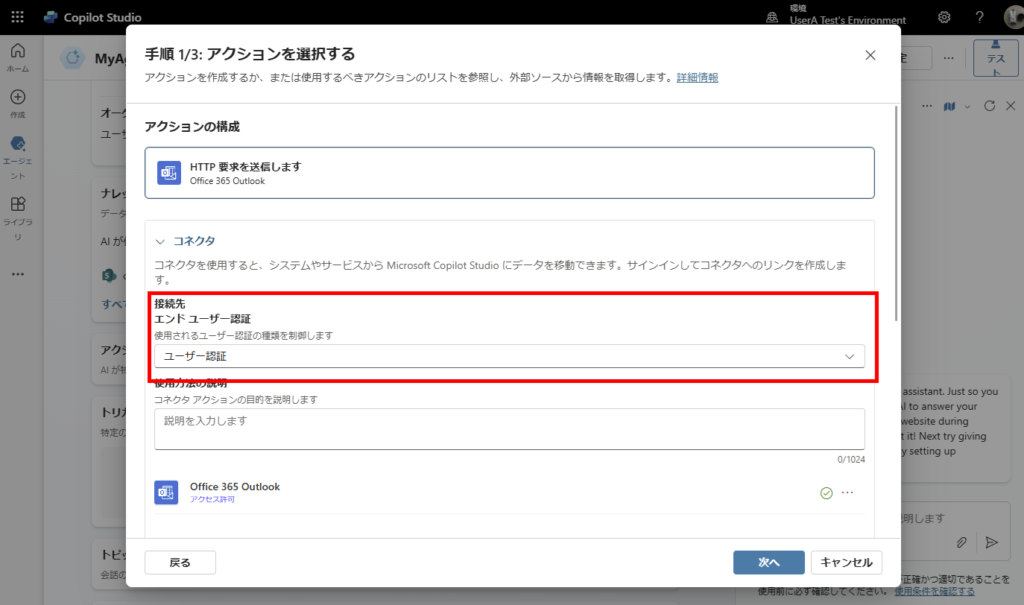
Choose “End-user authentication” for the connection,
Screenshot showing authentication selection
Configure the action’s “name,” “display name,” and “description” in the settings.
Note: The “description” should be detailed as the AI uses it to determine when to use this action.
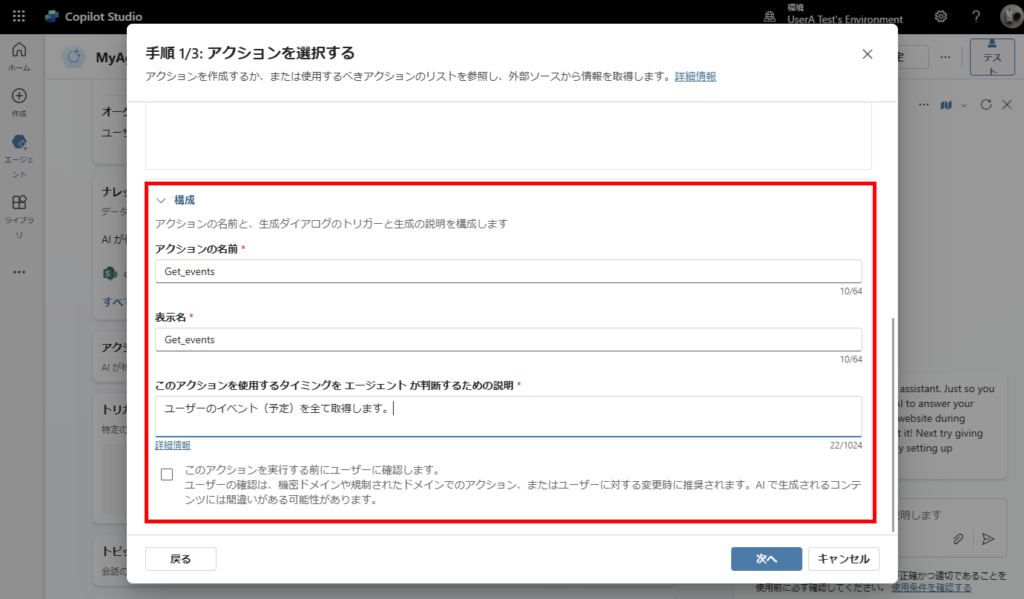
Screenshot showing action configuration
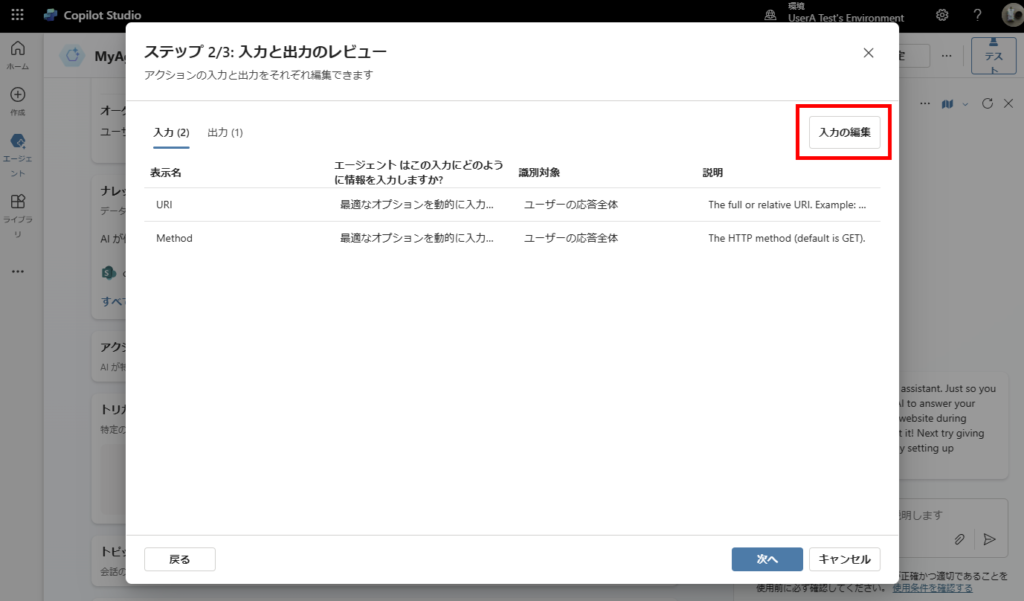
Click [Next] to proceed to the next step, then click [Edit inputs],
Screenshot showing edit inputs option
Since we’re only using the calendar retrieval API, set both “URI” and “Method” arguments as fixed values.
Note: Set the URI to the calendar retrieval API “https://graph.microsoft.com/v1.0/me/events”
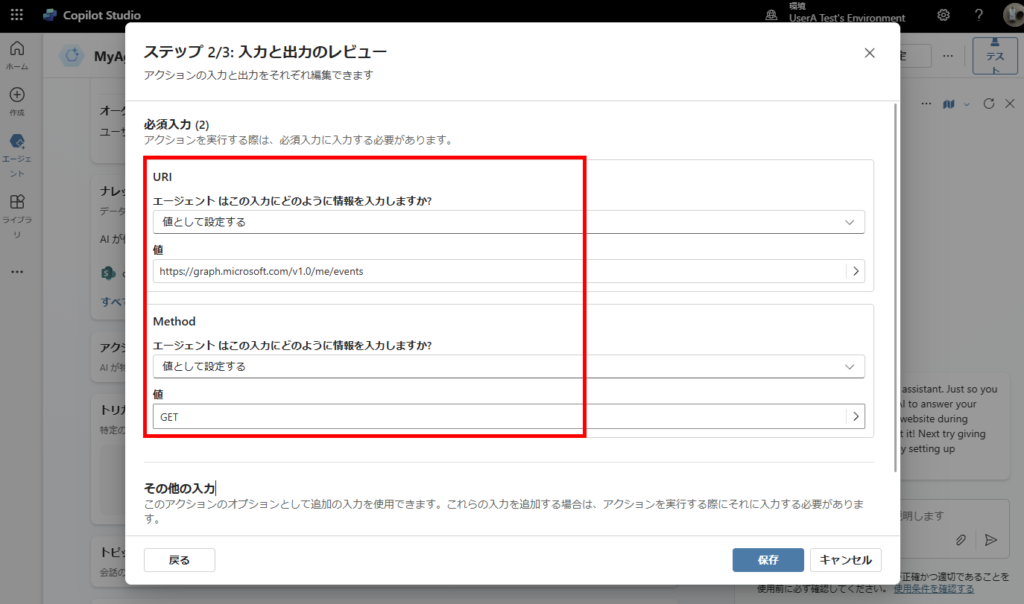
Screenshot showing URI and Method configuration
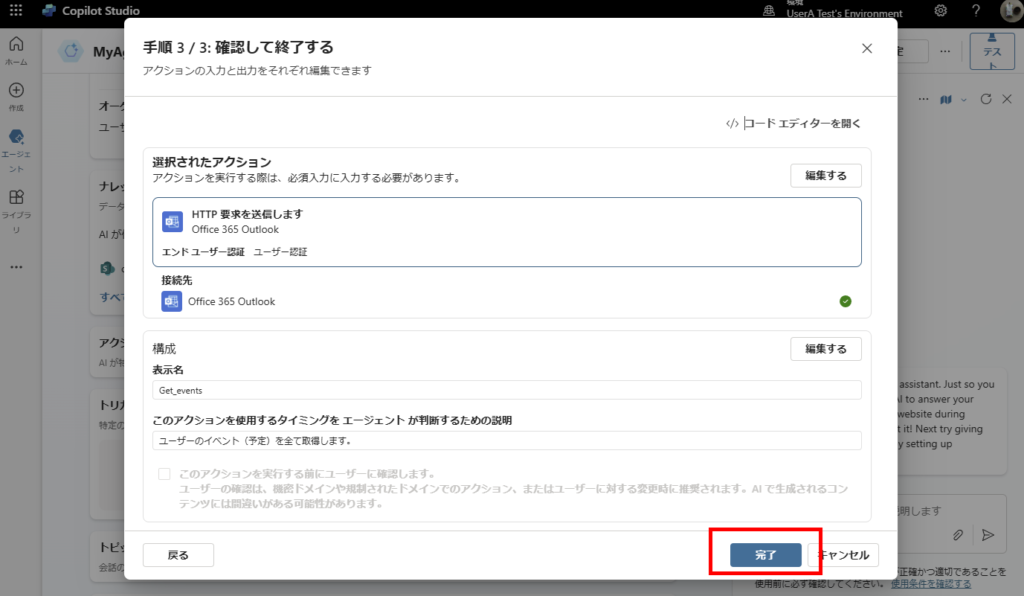
Click [Next], then [Finish] on the confirmation screen.
Screenshot showing completion step
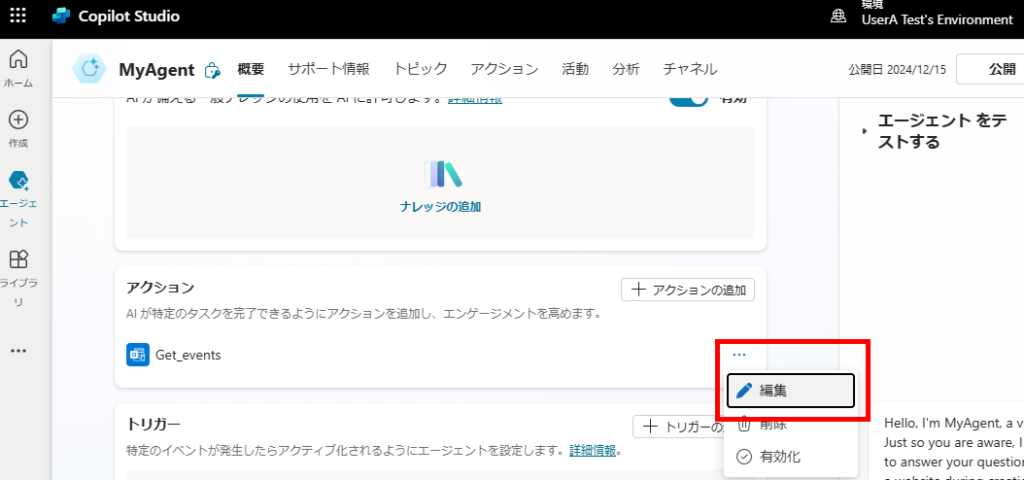
Finally, click [Edit] on the newly added action,
Screenshot showing edit action option
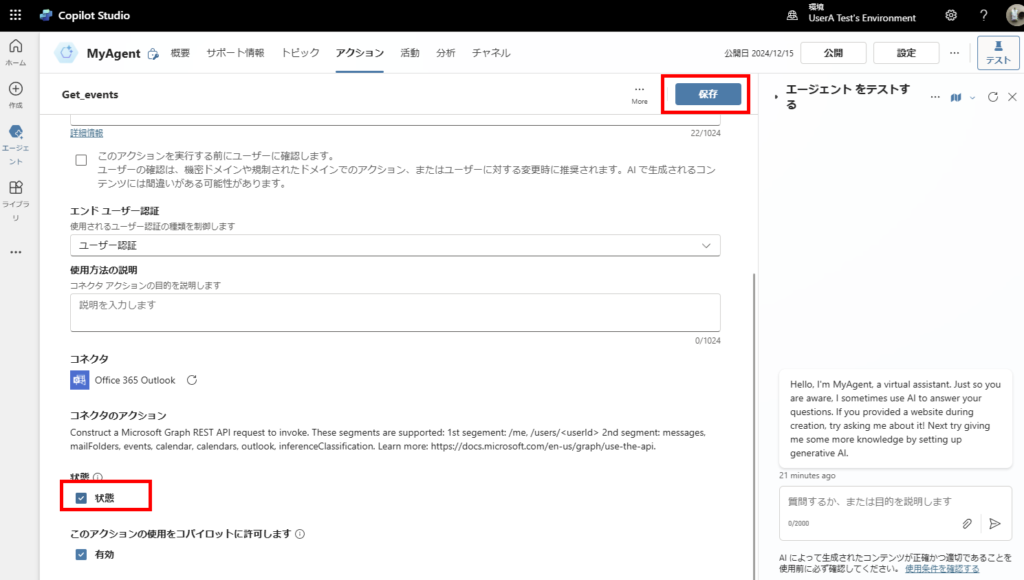
Turn on the status and save,
Screenshot showing status activation
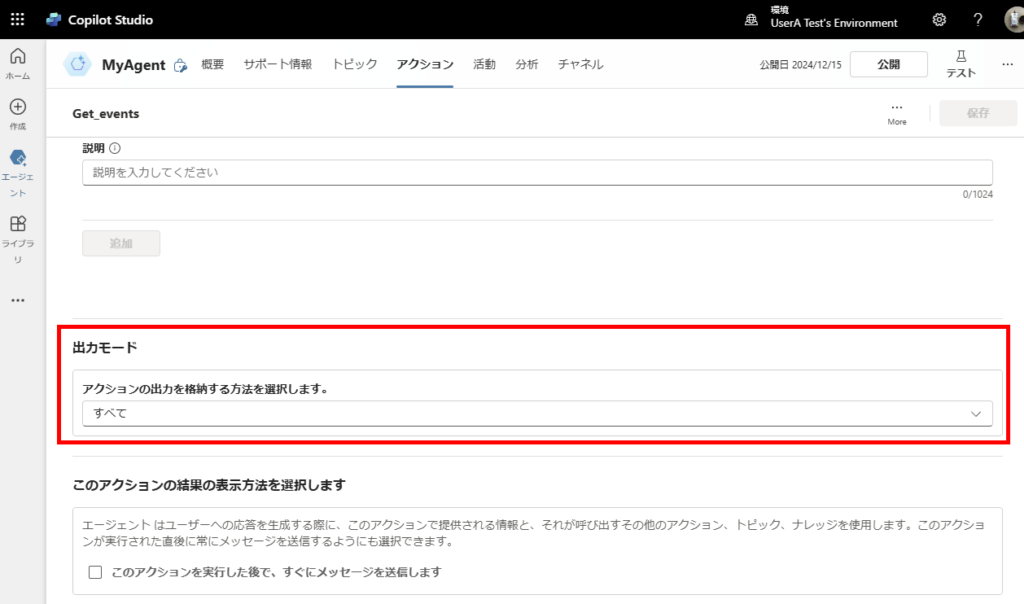
In the [Output] tab, set [Output mode] to “All”.
Screenshot showing output mode configuration

This completes the implementation.

Testing
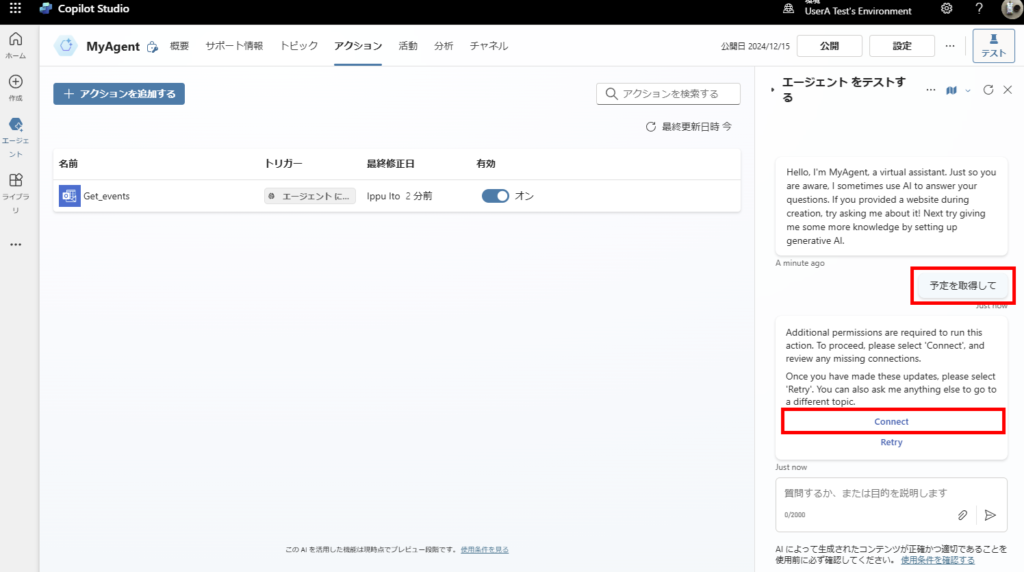
When you send a message to the agent that might trigger the action we just created, you’ll receive a connection request message. Click “Connect”.
Screenshot showing connection request dialog
You’ll be directed to the “Manage connections” screen to establish the connection.
Screenshot showing connection management screen
Once the status shows “Connected”, setup is complete.
Screenshot showing connected status
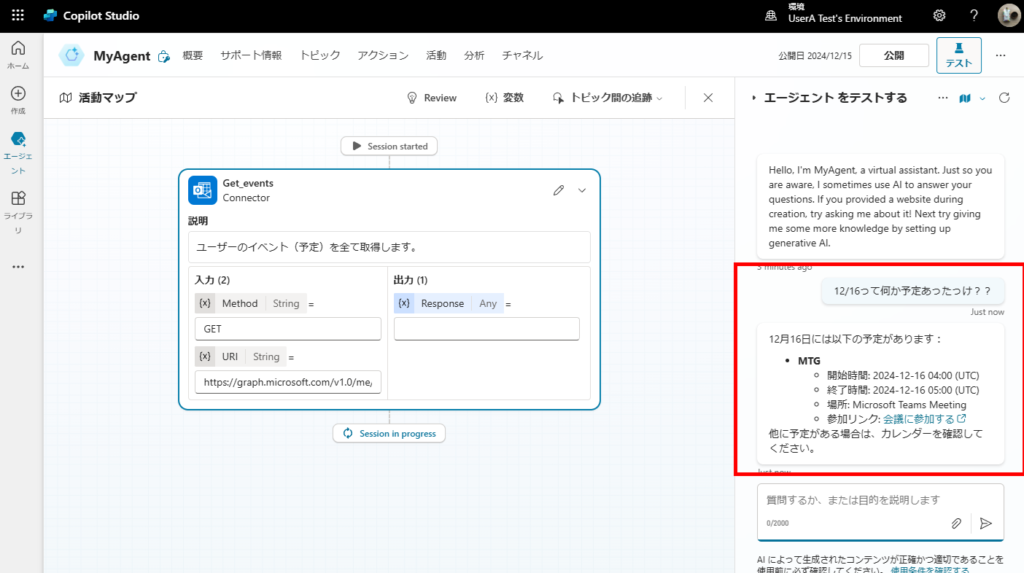
When you ask about your schedule again, the agent will check Outlook events and generate a response using RAG.
Screenshot showing schedule query response
Screenshot showing detailed schedule information

While we created this action directly from a connector, using Power Automate to create actions offers more capabilities and flexibility.

Therefore, in the next article, we’ll explore building actions using Power Automate.

Note: As of December 21, 2024, to trigger actions without topics, you must set the language to English and enable “Use AI in conversation.”
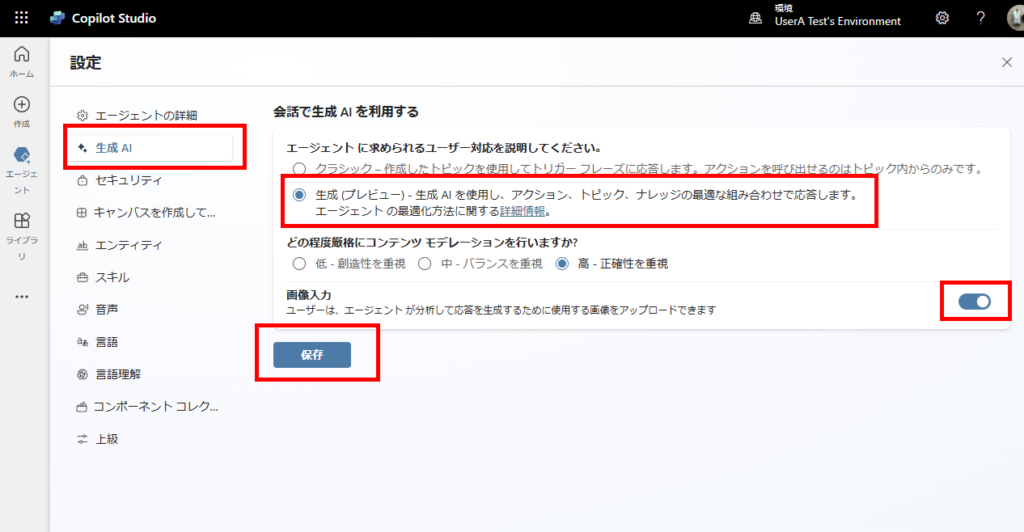
Screenshot showing required agent settings

Related Articles

コメント

Copied title and URL