Power Appsでユーザーを表示するときに、Teamsとかに表示される「連絡可能」みたいなステータスを表示したいという要望があったので、GraphAPI経由でステータスを取得する方法をメモ。
Teamsのステータス情報
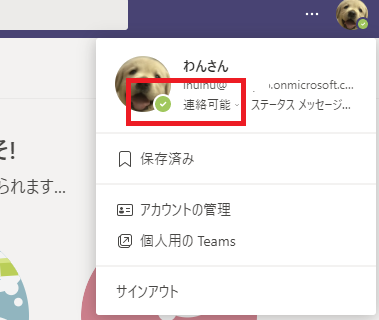
今回表示したいのはこちらのステータス情報。
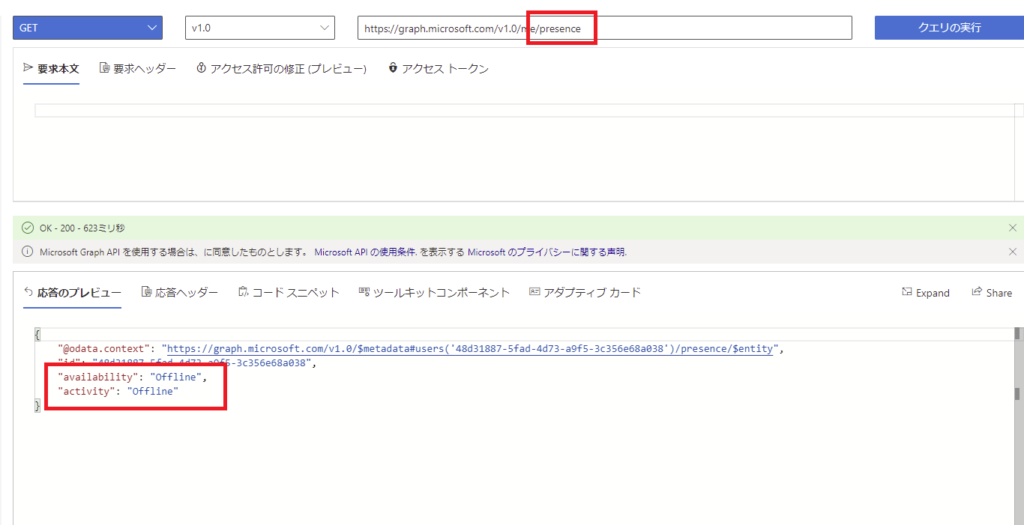
このステータス情報はGraphAPIの「Presence」で取得するので、カスタムコネクタを使用する。
公式2:プレゼンスの種類(availabilityとactivityの違いはこちら)
![]()
![]()

プレゼンス リソースの種類 - Microsoft Graph v1.0
可用性やユーザー アクティビティなど、ユーザーのプレゼンスに関する情報が含まれます。
docs.microsoft.com
事前準備:カスタムコネクタの作成とアクションの追加
前述の通り、まずはGraphAPIとのカスタムコネクタが必要。
GraphAPIへのカスタムコネクタの作り方はこちらから。
![]()
Power Apps(Power Automate) Graph APIへのカスタムコネクタの作成
Power AppsでGraph APIの情報を使用したいことがあり、カスタムコネクタを作成したので、作り方をメモ。Power BI APIへのカスタムコネクタのつくり方はこちらAzureへアプリを登録するまずはAzureへアプリの登録を行...
ippu-biz.com
2020.10.15
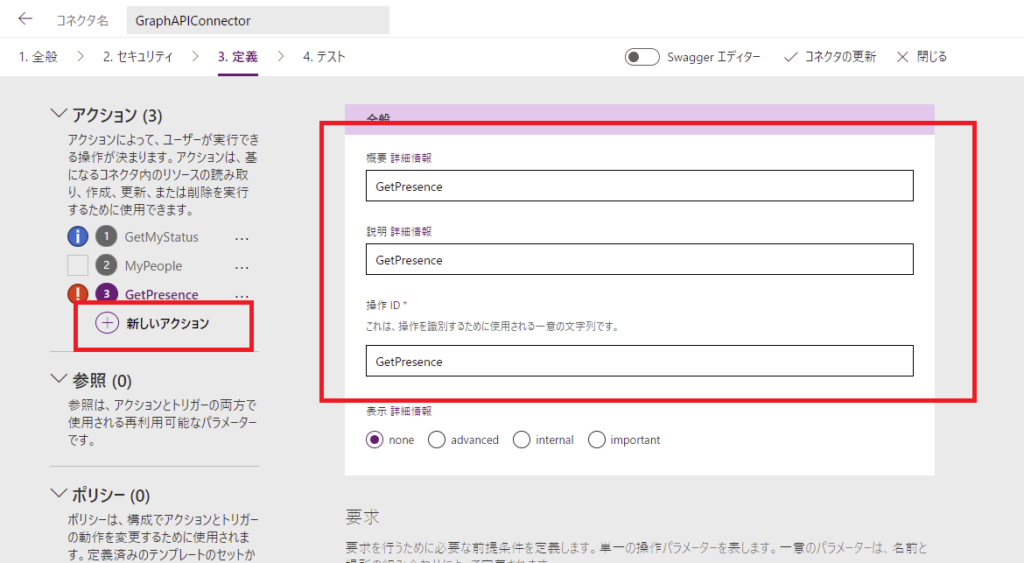
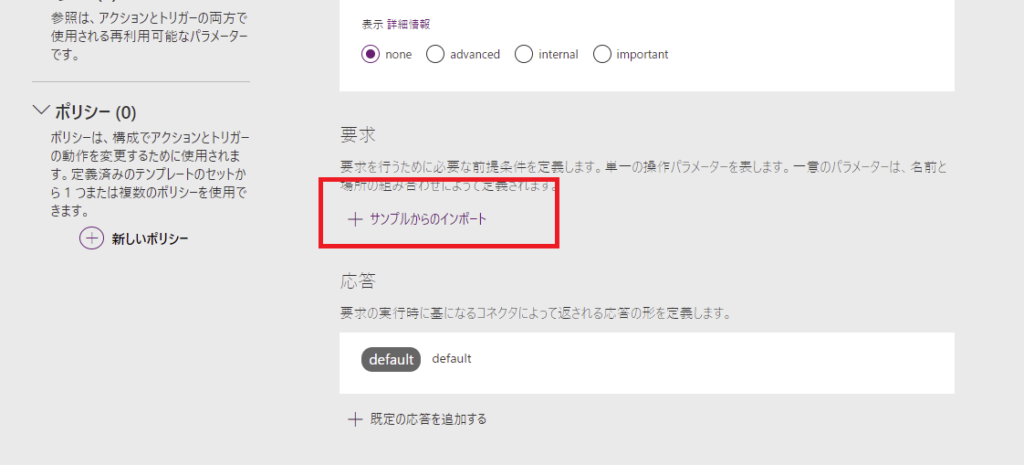
上の手順でカスタムコネクタが完成したら、[定義]→[新しいアクション]でGetPresenceみたいな名前を入れてあげる。
※本当は「概要」とか「説明」は使う人がわかりやすく書いた方がいいけど今回は適当。
※本当は「概要」とか「説明」は使う人がわかりやすく書いた方がいいけど今回は適当。
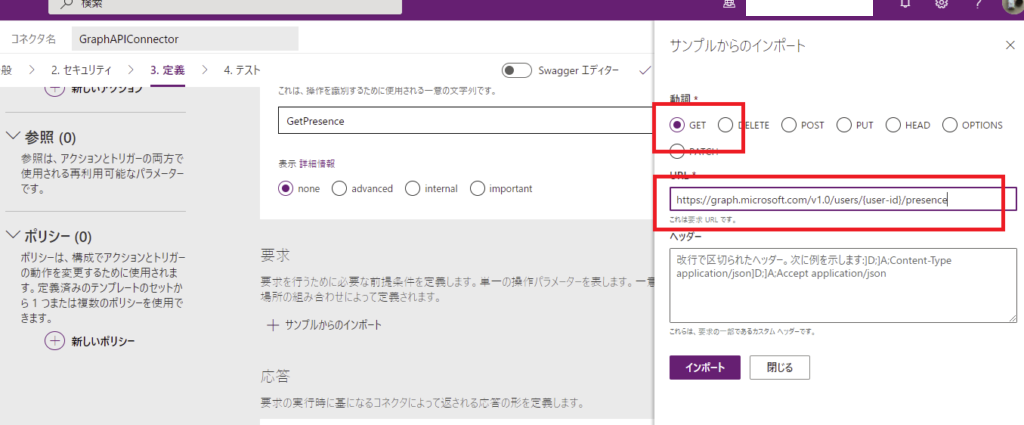
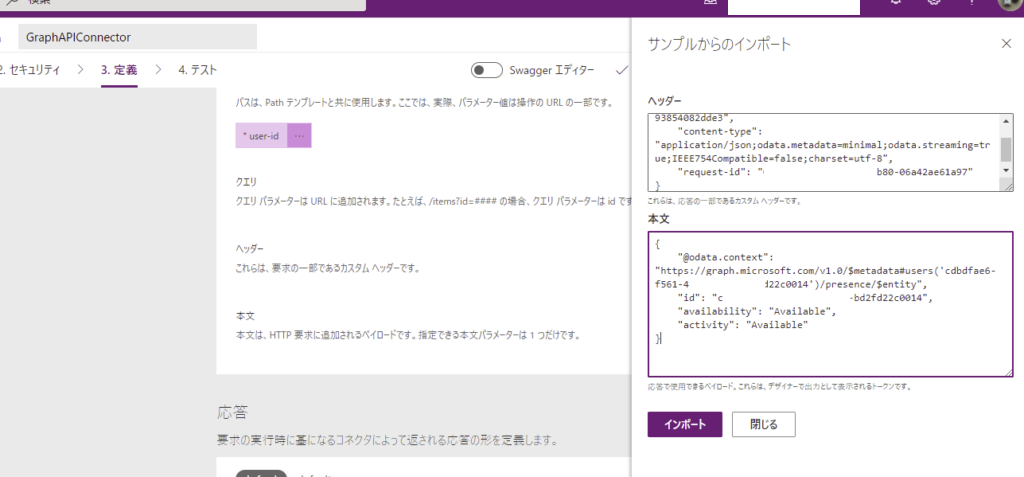
そしたら[要求]→[サンプルからのインポート]を選んで
「Get」を選んで「URL」に「https://graph.microsoft.com/v1.0/users/{user-id}/presence」を入れて[インポート]を押す。
最後に、[応答]→[既定の応答を追加する]を設定するんだけど、
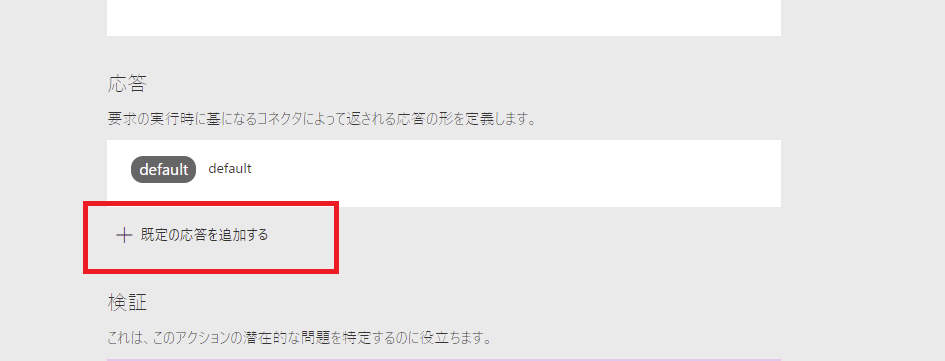
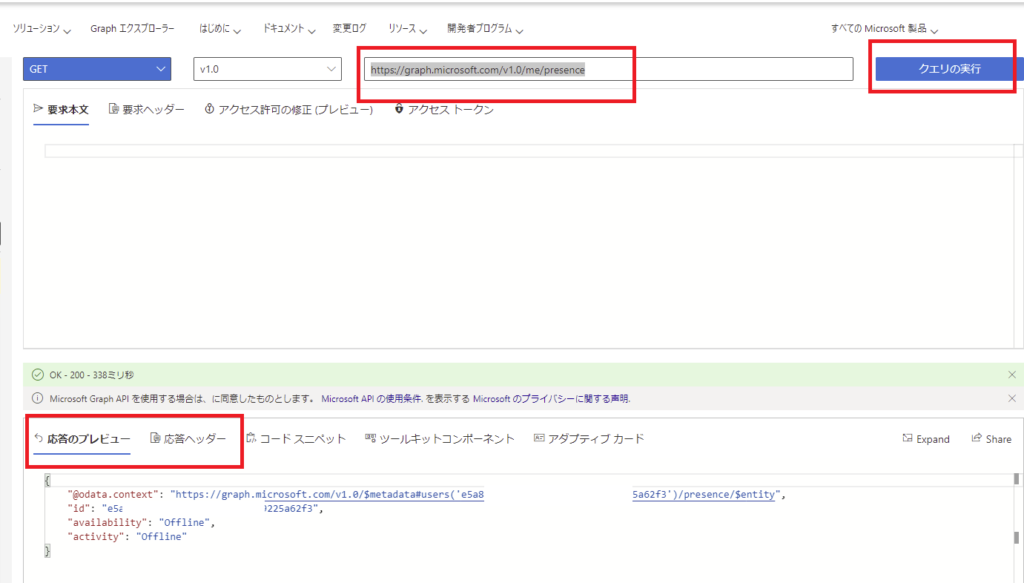
そのときの「応答のプレビュー」を[本文]へ、「応答ヘッダー」を[ヘッダー]へまるっとコピペする。
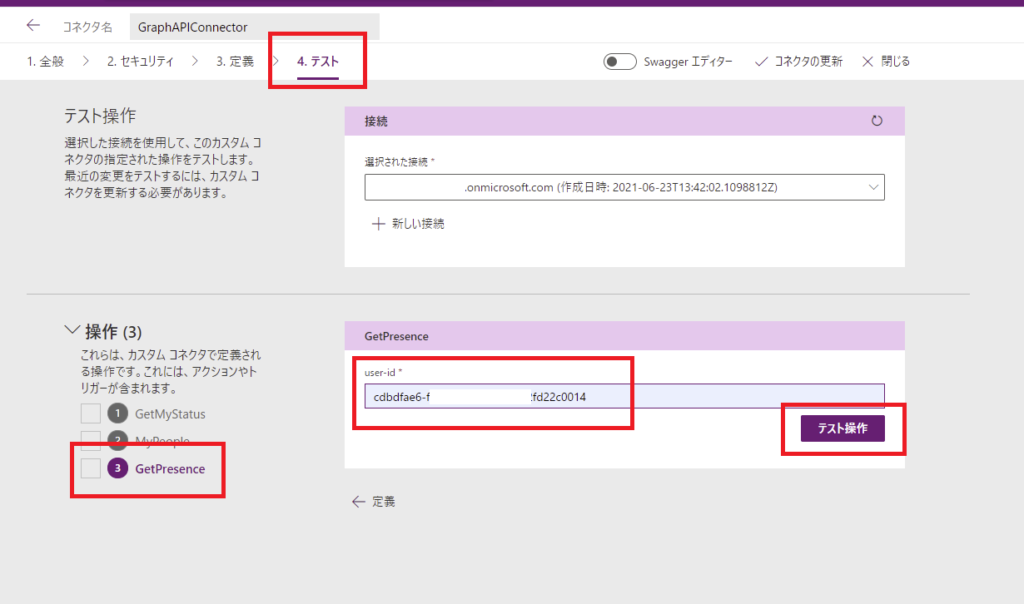
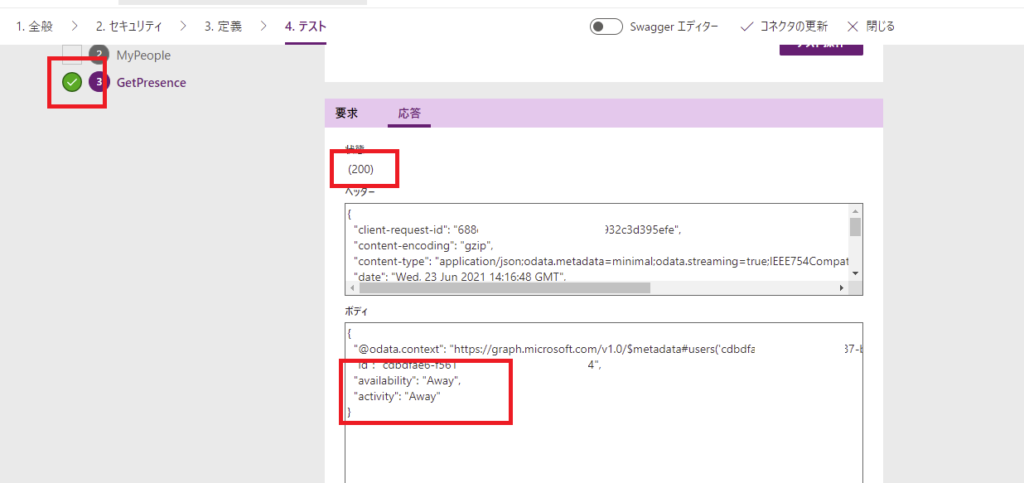
これで作成は完了したので、[テスト]へ移動して、[user-id]に適当なユーザーのID(もちろん自分でもOK)を入れてあげて「テスト操作」を押すと、
成功!これでカスタムコネクタの作成は完了。
2025/1/31追記:アバターコントロールの利用
Power Appsのモダンコントロールに「アバター」が追加され、ユーザーの情報をPower Appsに表示する際は、このアバターを利用すると簡単になりました。
以降はモダンコントロールが使えない場合に参照してください。
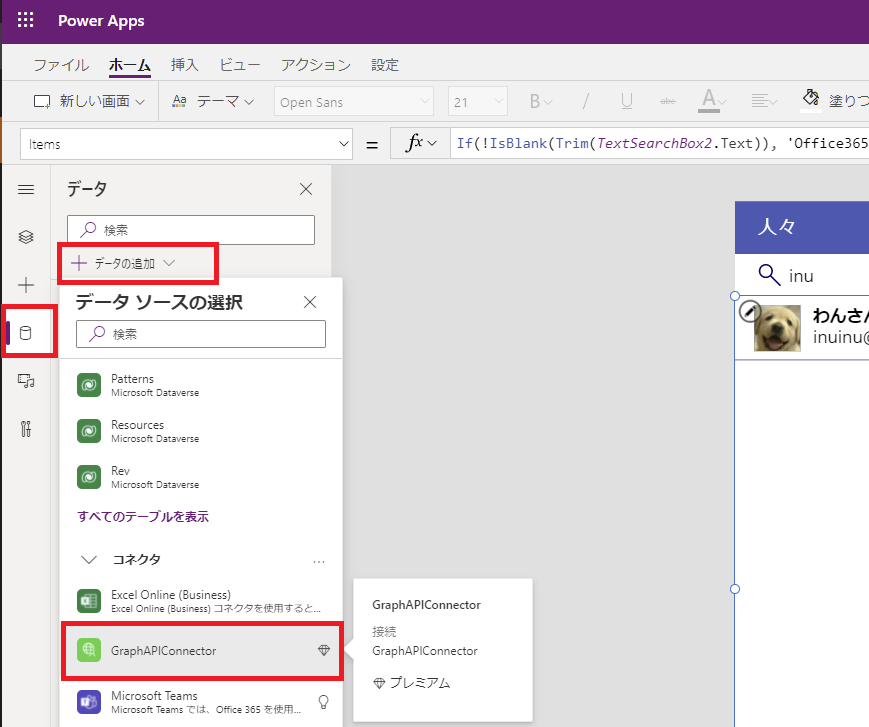
事前準備:Power Appsにカスタムコネクタを追加
ここからPower Appsの作成画面に移動して、「人々」画面を追加
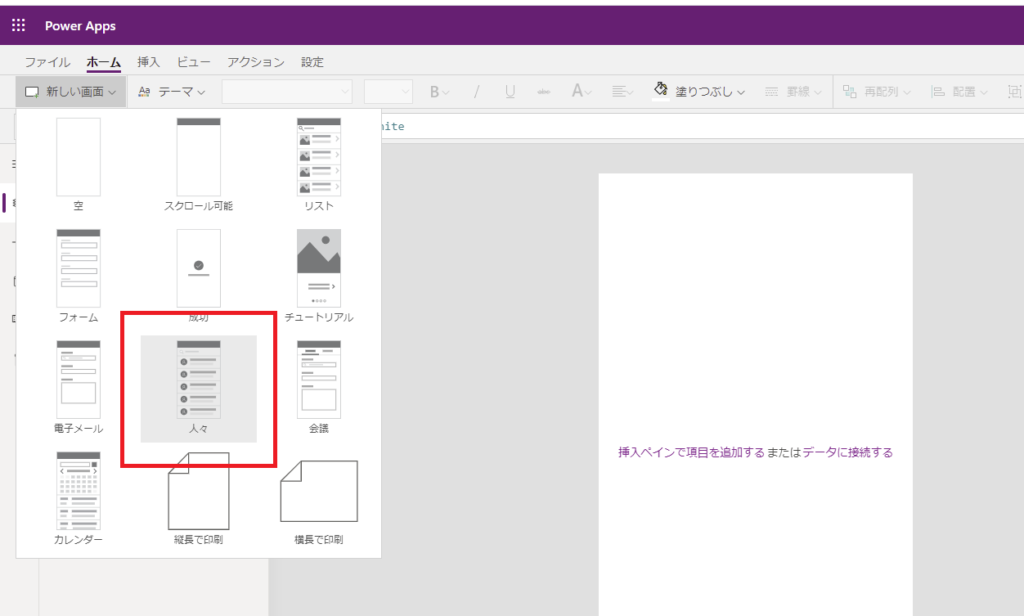
そして「データの追加」から作成したGraphAPIとのカスタムコネクタを追加すれば準備完了!
Presence情報の定義
まずは↓の公式サイトを参考に、Presence情報をAppのOnStartとかで定義していく。
![]()
![]()
Teams でのユーザーのプレゼンス - Microsoft Teams
チームのプレゼンス状態とプレゼンス機能の管理設定について学習します。
docs.microsoft.com
今回は細かいステータスは見ないので、availability値を参照する。そこで、定義はこんな感じかなと。
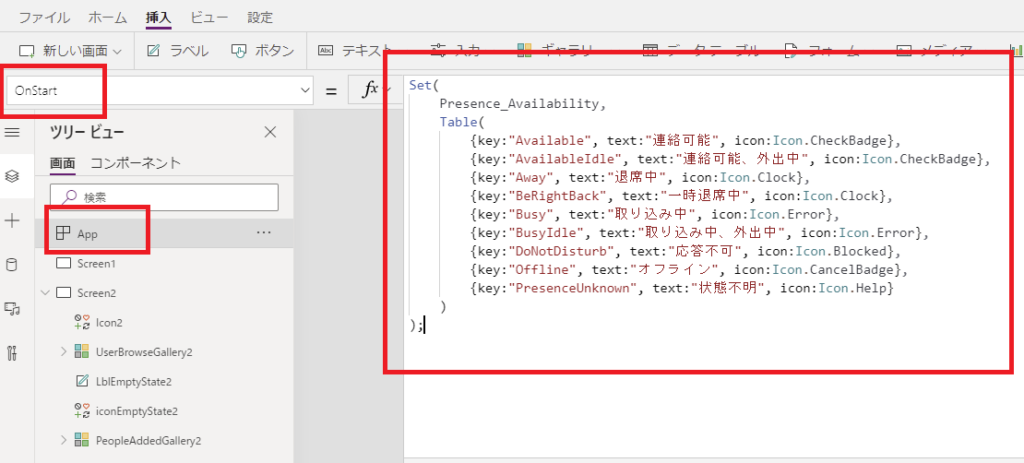
Set(
    Presence_Availability,
    Table(
        {key:"Available", text:"連絡可能", icon:Icon.CheckBadge},
        {key:"AvailableIdle", text:"連絡可能、外出中", icon:Icon.CheckBadge},
        {key:"Away", text:"退席中", icon:Icon.Clock},
        {key:"BeRightBack", text:"一時退席中", icon:Icon.Clock},
        {key:"Busy", text:"取り込み中", icon:Icon.Error},
        {key:"BusyIdle", text:"取り込み中、外出中", icon:Icon.Error},
        {key:"DoNotDisturb", text:"応答不可", icon:Icon.Blocked},
        {key:"Offline", text:"オフライン", icon:Icon.CancelBadge},
        {key:"PresenceUnknown", text:"状態不明", icon:Icon.Help}
    )
);
ギャラリーにavailability列を追加する
そしたら、検索したユーザーを表示する「UserBrowseGallery」にステータスを表示する。
UserBrowseGalleryのItemsはデフォルトではこんな感じになっていると思うので、
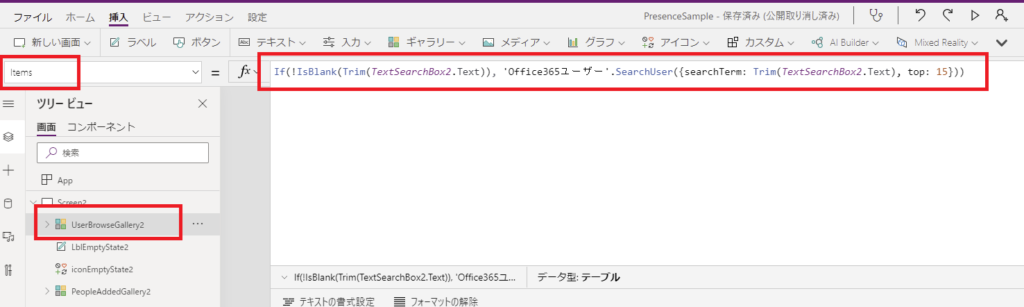
こんな感じに変更する

コードはこんな感じ。
Office365ユーザーコネクタのSearchUserで取得したユーザーテーブルに、AddColumnsでavailability列を追加して、その値にGraphAPIConnectorのGetPresenceの結果を入れていく。
Office365ユーザーコネクタのSearchUserで取得したユーザーテーブルに、AddColumnsでavailability列を追加して、その値にGraphAPIConnectorのGetPresenceの結果を入れていく。
If
(
    !IsBlank(Trim(TextSearchBox2.Text)),
    AddColumns('Office365ユーザー'.SearchUser({searchTerm: Trim(TextSearchBox2.Text), top: 15}),"availability",GraphAPIConnector.GetPresense(Id).availability)
)
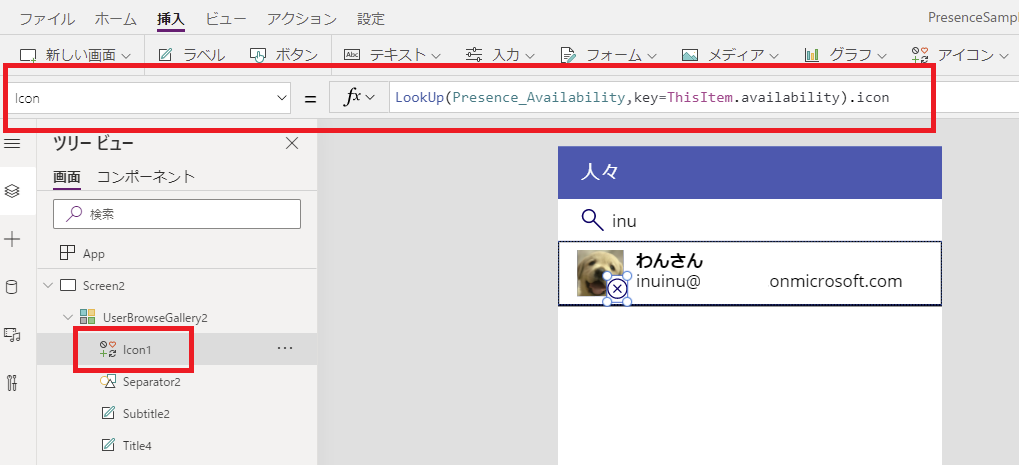
そしたら、UserBrowseGalleryにアイコンを追加して、Iconプロパティにこんな式を書く。
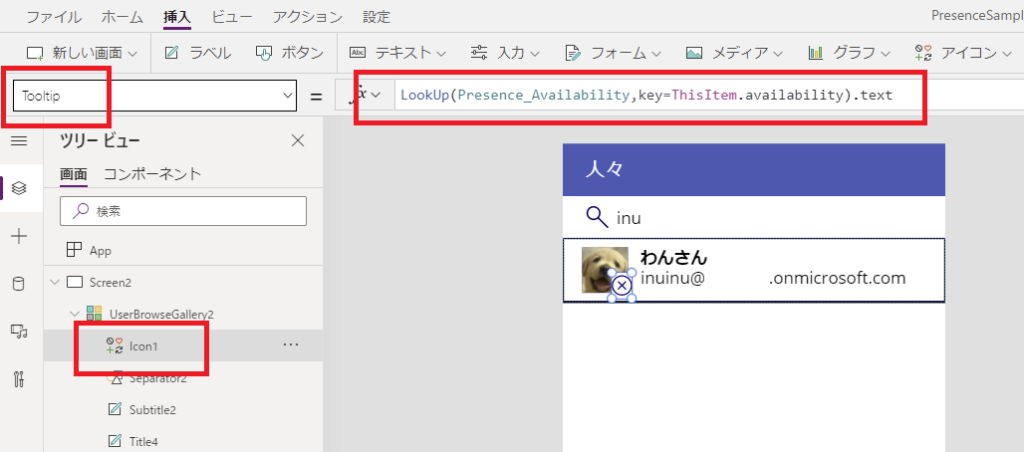
おまけでアイコンのTooltipプロパティにはこんな式を
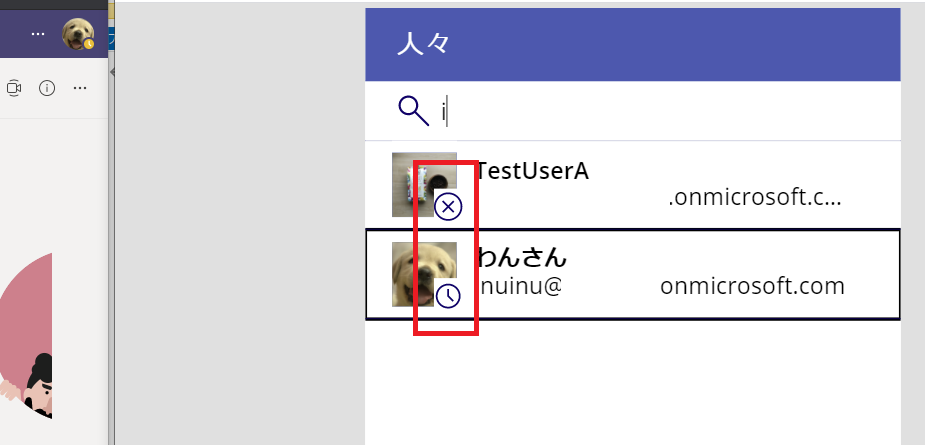
すると、こんな感じでユーザーのステータスに応じてアイコンが表示される!
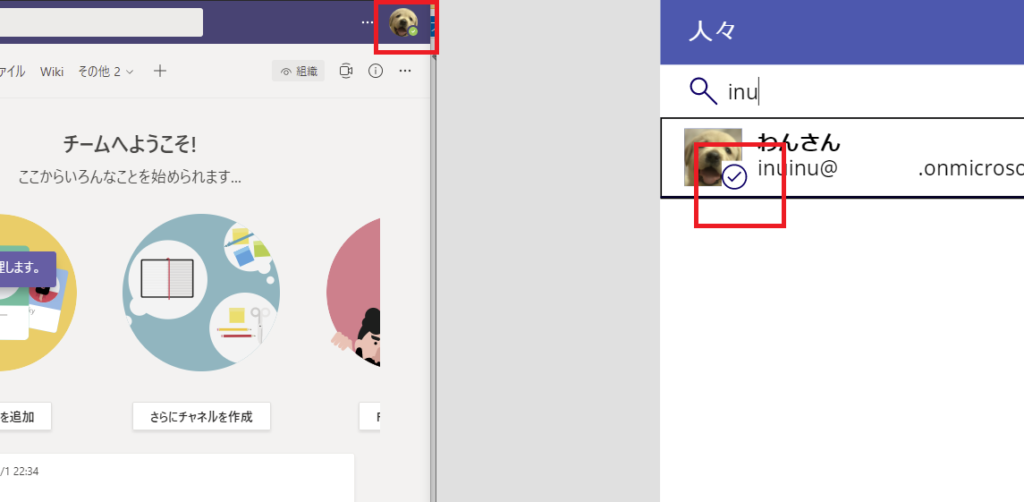
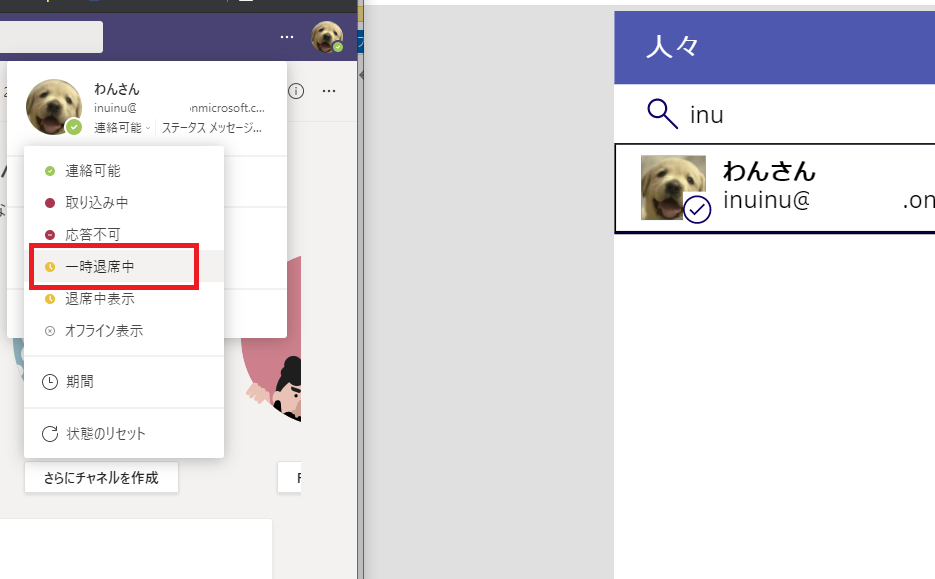
ステータスを「一時退席中」とかにして、検索テキストボックスを再度入力し直して表示を更新すると、
表示がきちんと変わる!

もちろんユーザーを複数表示すると、それぞれ別のステータスが表示される!
これにタイマーを絡めれば一定時間ごとに自動でステータスの更新もできるし、今回は標準のアイコンを使ったけど、自分で画像を用意すればもう少し見栄えが良いステータス表示も可能!