Power AppsでGraph APIの情報を使用したいことがあり、カスタムコネクタを作成したので、作り方をメモ。
Power BI APIへのカスタムコネクタのつくり方はこちら
![]()
Power AppsやPower AutomateからPower BI APIを呼び出すカスタムコネクタを作成する手順を解説
Power AppsやPower Automateで、PowerBIからワークスペースとかグループ、タイルの情報を引っ張ってこようと思うと、標準のコネクタではどうしても機能が足りない。そこで、今回PowerBIとのカスタムコネクタを作成した...
ippu-biz.com
2020.10.15
Azureへアプリを登録する
まずはAzureへアプリの登録を行う。

続いて、アプリの登録を選択し、
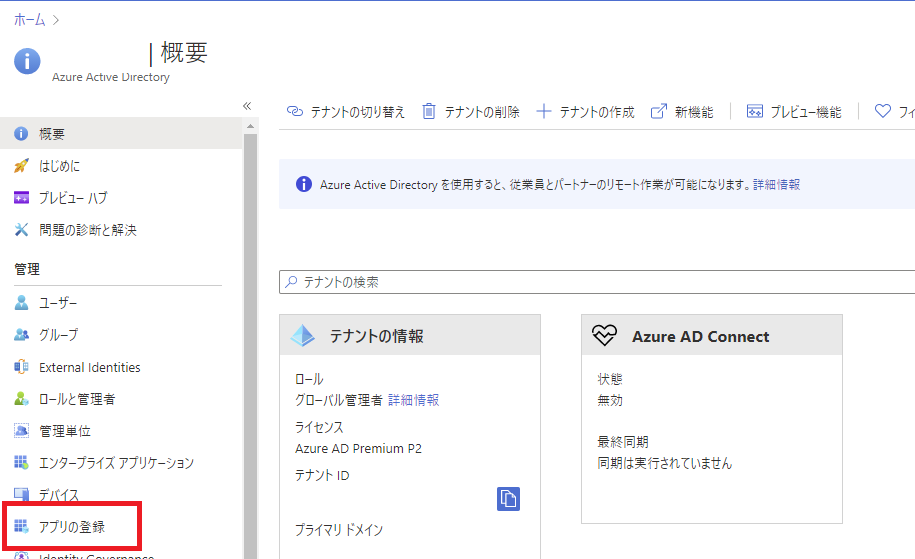
「新規登録」を選んで、
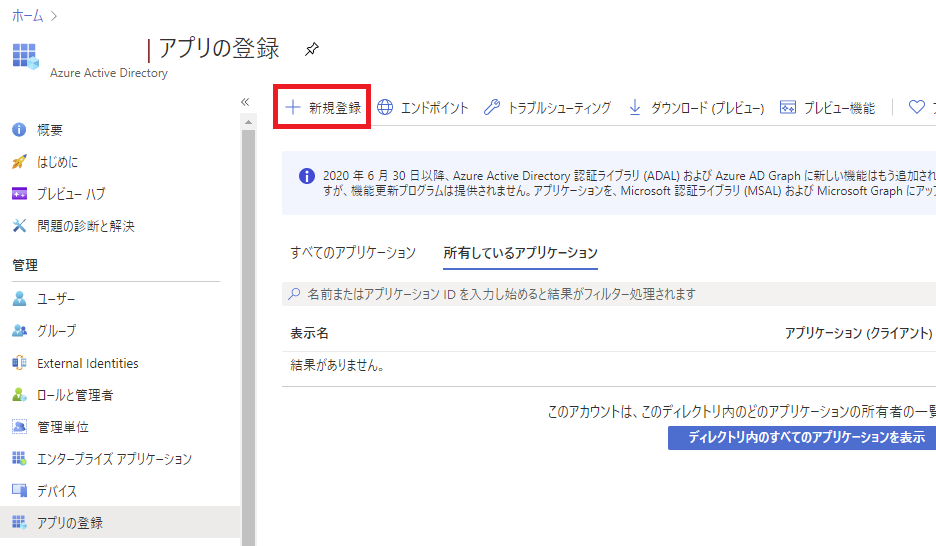
アプリ名をいい感じに付けて、登録。
※リダイレクトURLは後で設定。
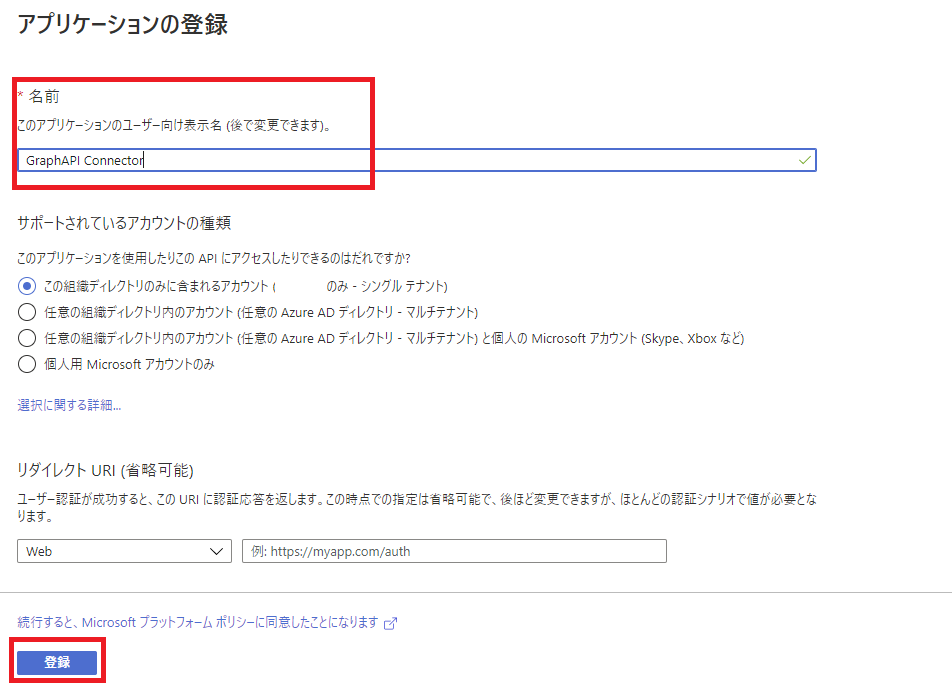
※リダイレクトURLは後で設定。
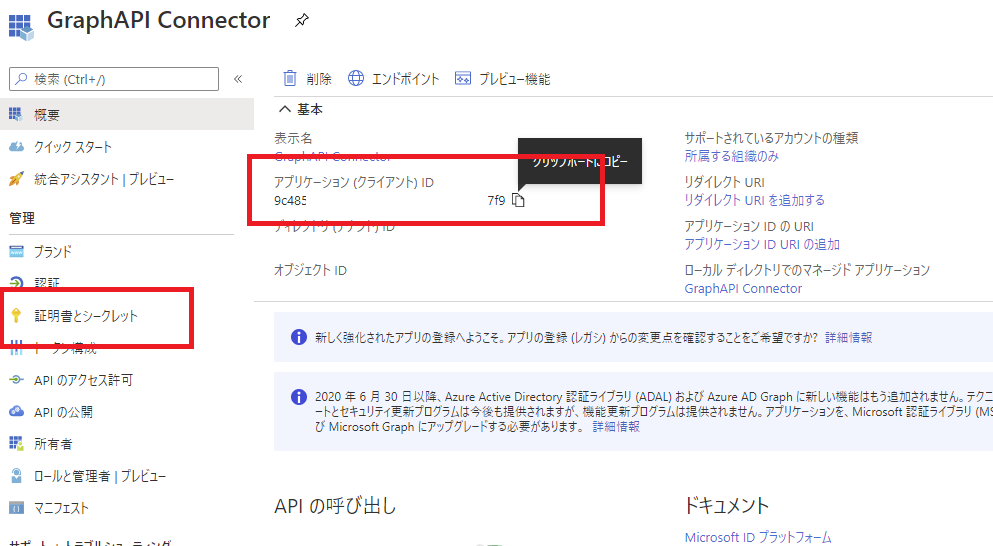
アプリが登録されるので、クライアントID(アプリID)をメモし、「証明書とシークレット」へ移動。
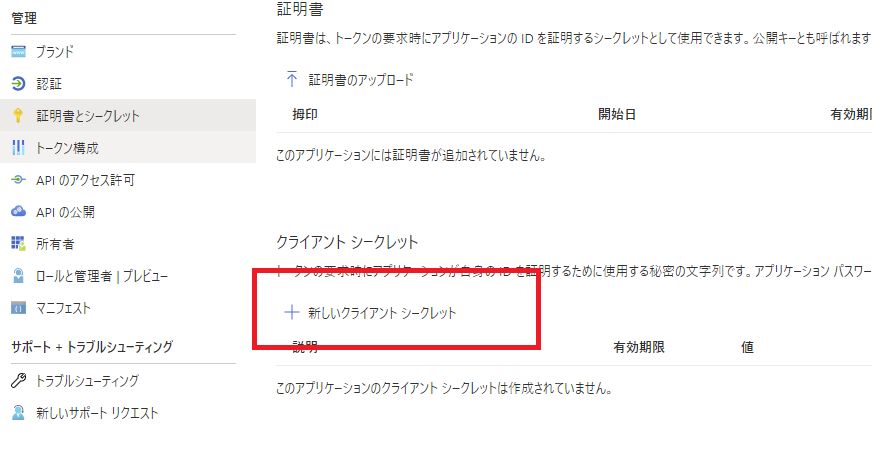
新しいクライアントシークレットを押して、
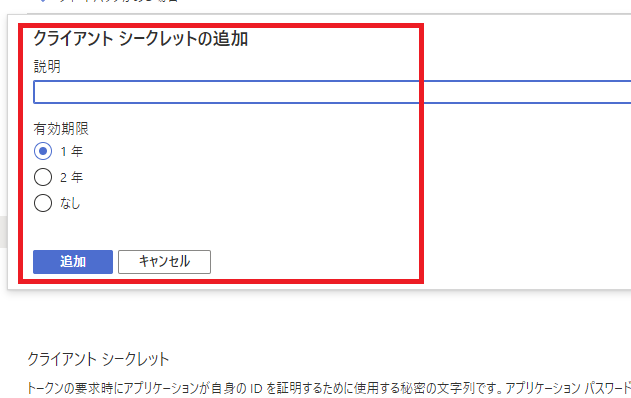
適切な有効期限を付けて、追加。
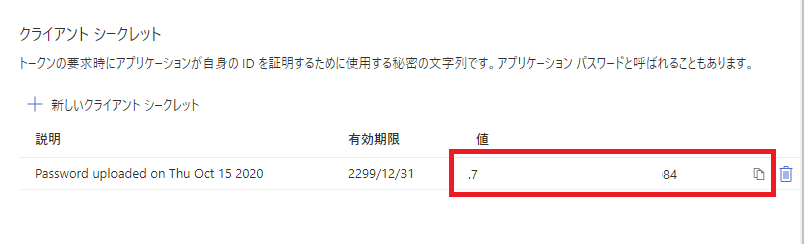
クライアントシークレットキーが払い出されるので、これもメモ。
そしたら一旦Power Appsへ移動。
Power Apps カスタムコネクタの作成
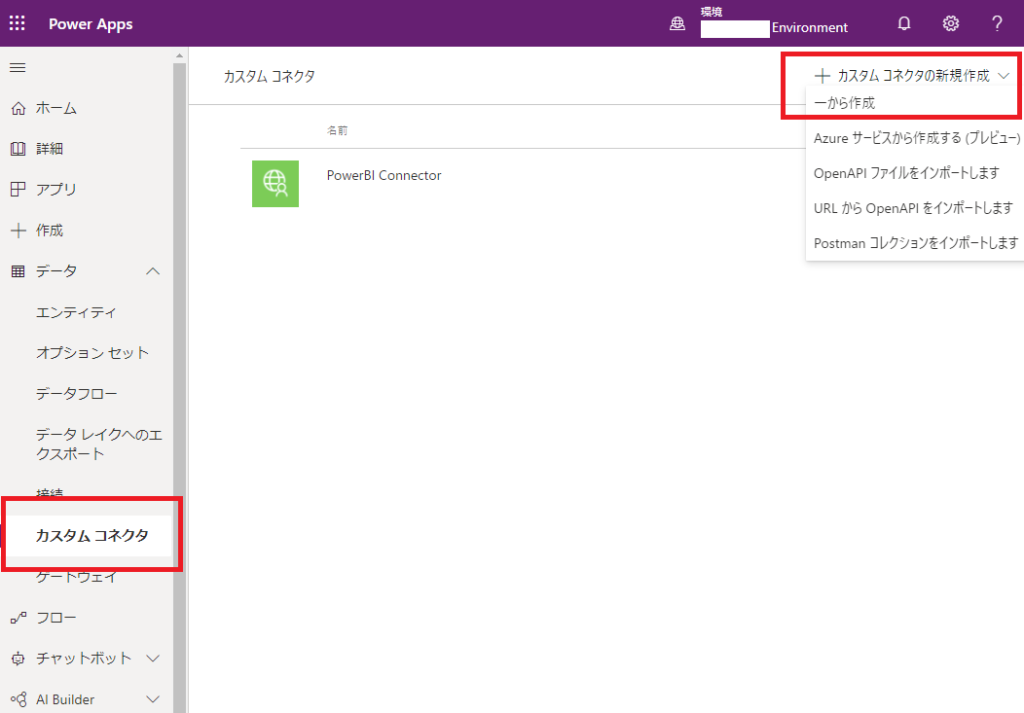
Power Appsへ移動したら、[データ]->[カスタムコネクタ]を選択し、[カスタムコネクタの新規作成]から[一から作成]を選ぶ。
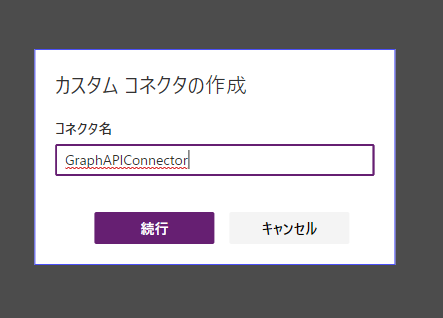
名前は適当に。
そしたらこんな画面へ遷移するので、
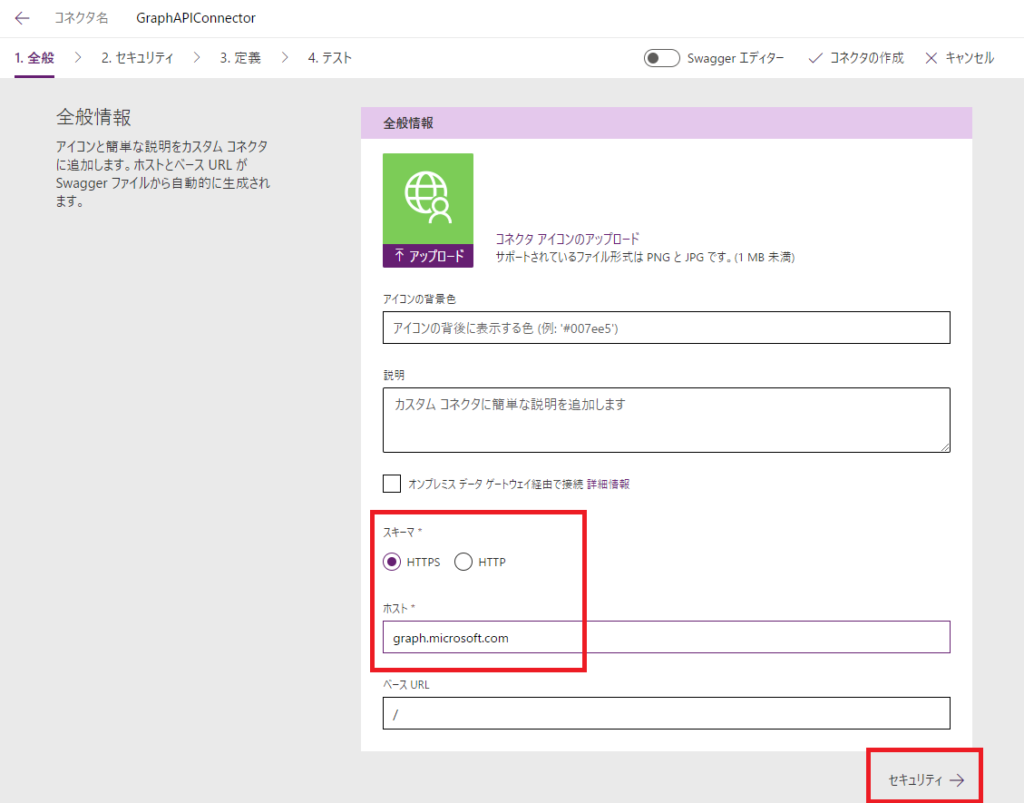
- スキーマ:HTTPS
- ホスト:graph.microsoft.com
を入力して、「セキュリティ」を押下。
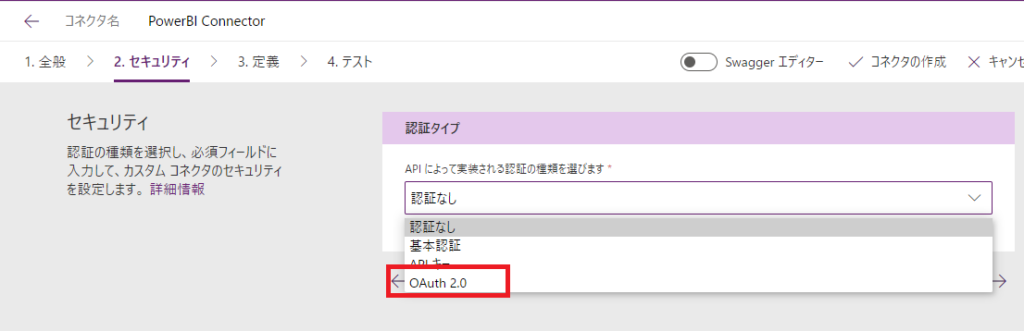
認証タイプは「OAuth 2.0」を選択。
残りの情報はこんな感じ。

- IDプロバイダー:Azure Active Directory
- Client id:AzureADでメモしたクライアントID
- Client secret:AzureADでメモしたシークレットキー
- LoginURL、TenantID:そのまま
- Resource URL:https://graph.microsoft.com
- スコープ:https://graph.microsoft.com/.default
そうしたら、「コネクタの作成」を押す。
するとリダイレクトURLが出るのでメモして、Azureへ戻る。

Azure リダイレクトURLの設定
Azureへ移動したら、左のメニューの[認証]を選択し、[プラットフォームを追加]を押す。
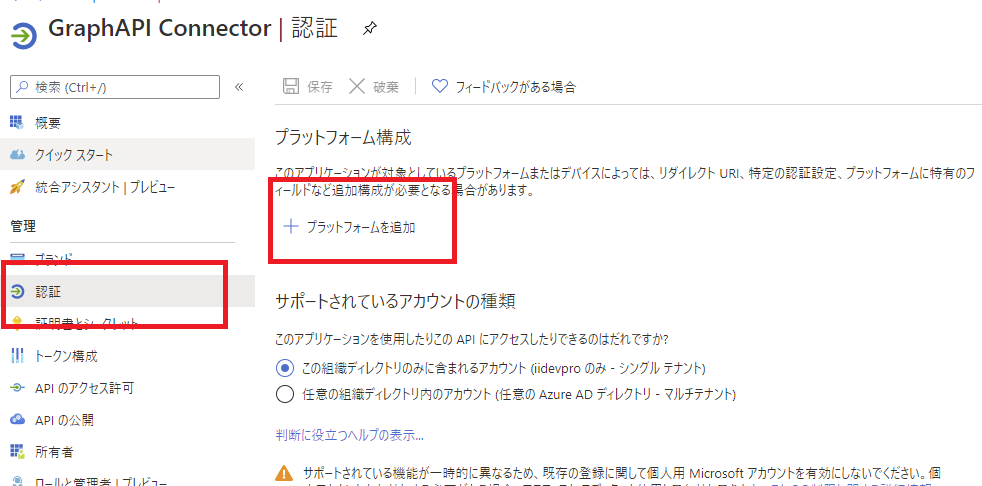
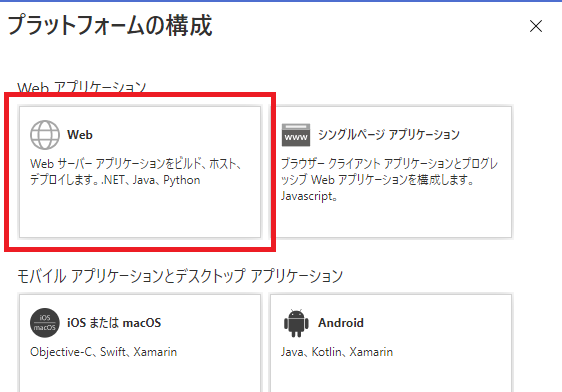
WebアプリケーションのWebを選んで、
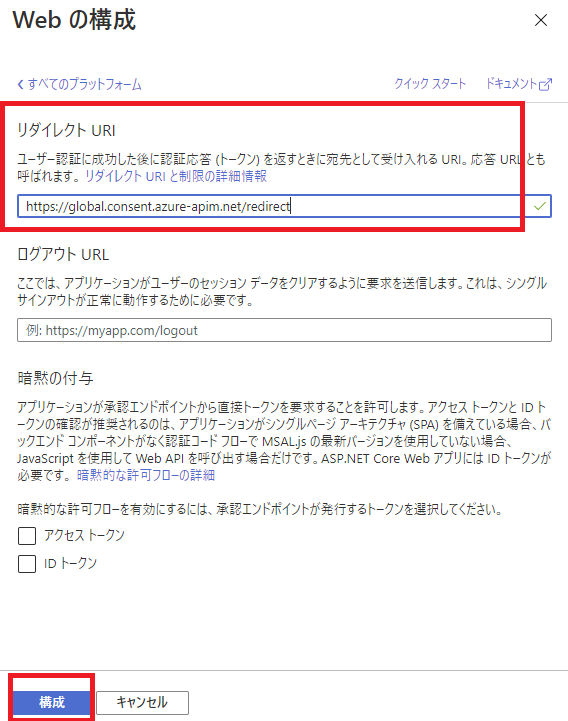
先ほどのリダイレクトURLを入力し、[構成]を押す。
追記:AzureにAPIのアクセス許可を追加する
ここからは実際にカスタムコネクタを使用してGraph APIを呼び出す際に必要な設定について。
作成したカスタムコネクタからGraphAPIを呼び出す際、APIごとに以下のようにアクセス許可を設定する必要がある。
例えばこちらの記事で紹介する「連絡可能」みたいなユーザーのステータスを表示したい場合、
![]()
Power Apps Graph APIでTeamsに表示されるユーザーのステータス(連絡可能、不在 など)を取得する
Power Appsでユーザーを表示するときに、Teamsとかに表示される「連絡可能」みたいなステータスを表示したいという要望があったので、GraphAPI経由でステータスを取得する方法をメモ。Teamsのステータス情報今回表示したいのはこ...
ippu-biz.com
2021.07.19
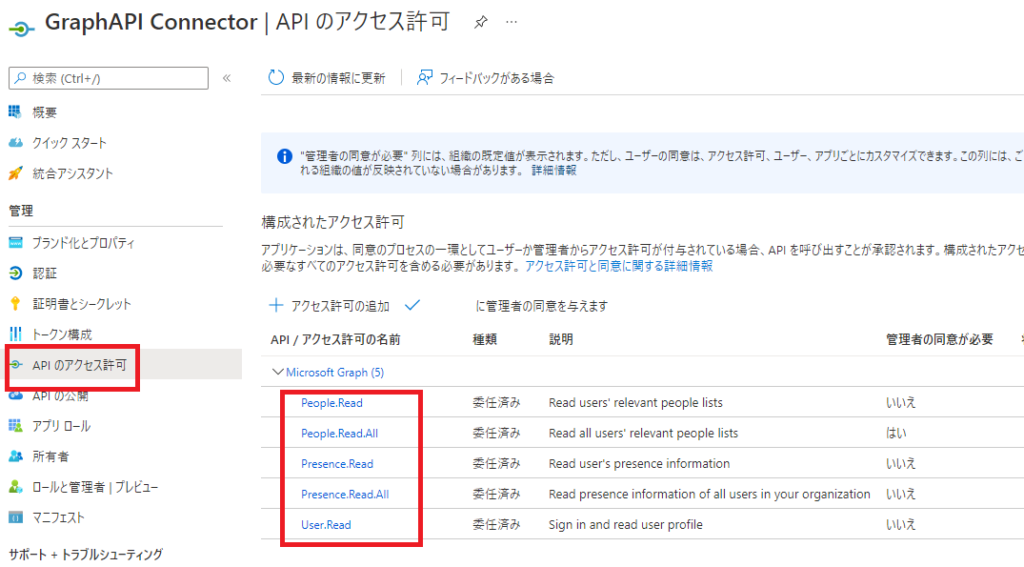
[アクセス許可の追加]から、
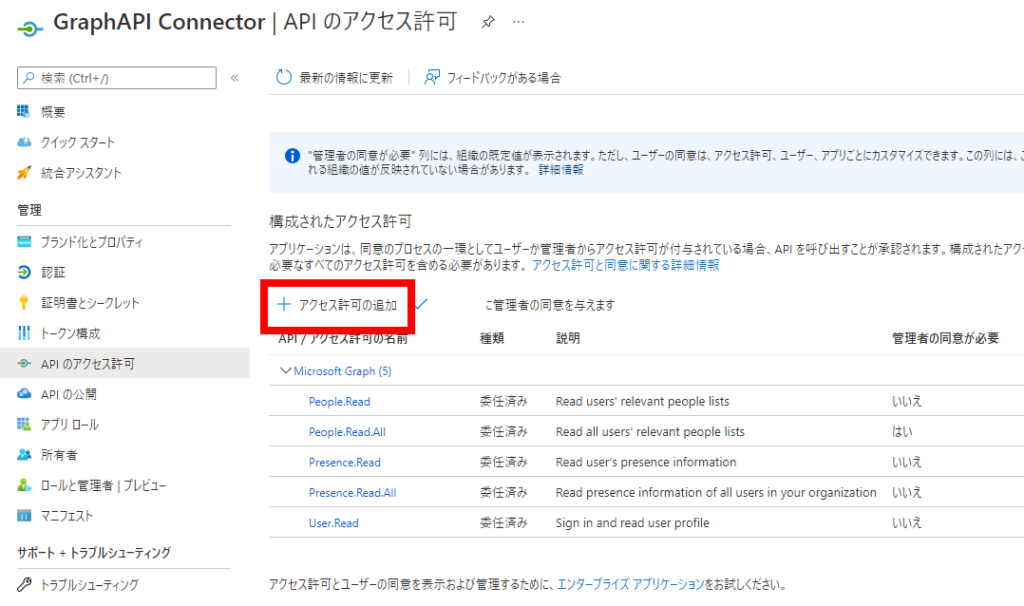
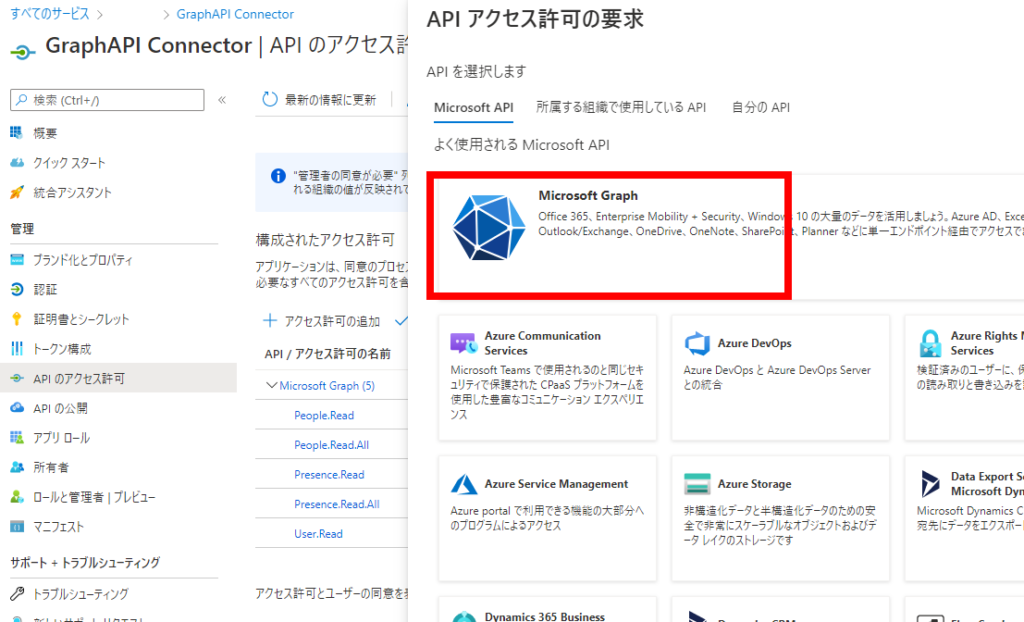
[Microsoft Graph]を選択して、
今回は[委任されたアクセス許可]を選び、
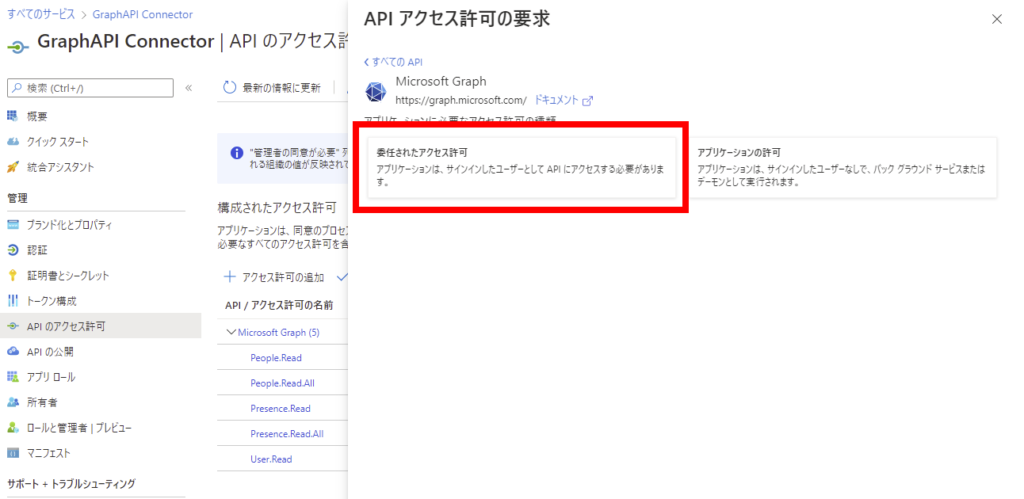
Presenceの読取許可を与えてあげる。
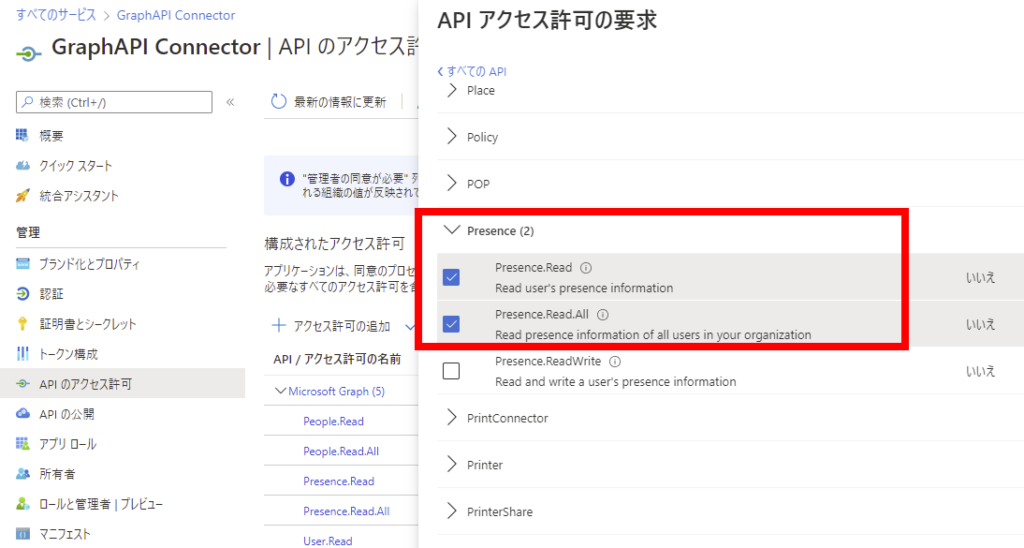
これでこのカスタムコネクタを使用して、Presenceを取得することができるようになり、「連絡可能」みたいなステータスを表示することができる。
※使用するGraph APIによって必要な許可が異なるので、別のAPIを呼び出したい場合は上記以外の設定が必要。
GraphAPIへの接続はひとまず完了したので、Power Appsへ戻って接続テストをする。
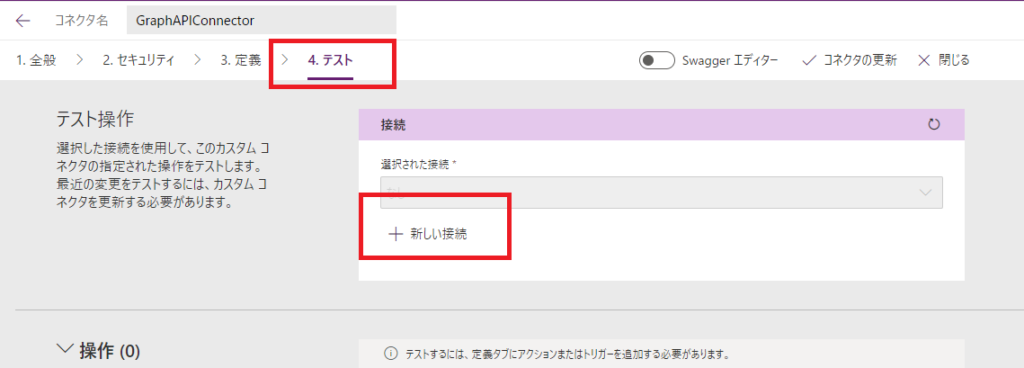
Power Apps 接続テスト
Power Appsへ戻ったら、[4.テスト]->[新しい接続]を選択。
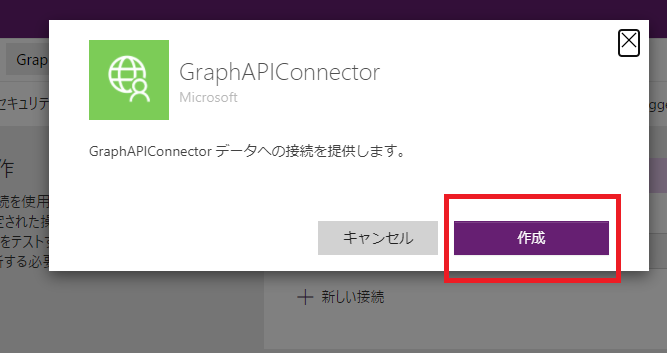
作成を押して、
権限のあるアカウントを選択。
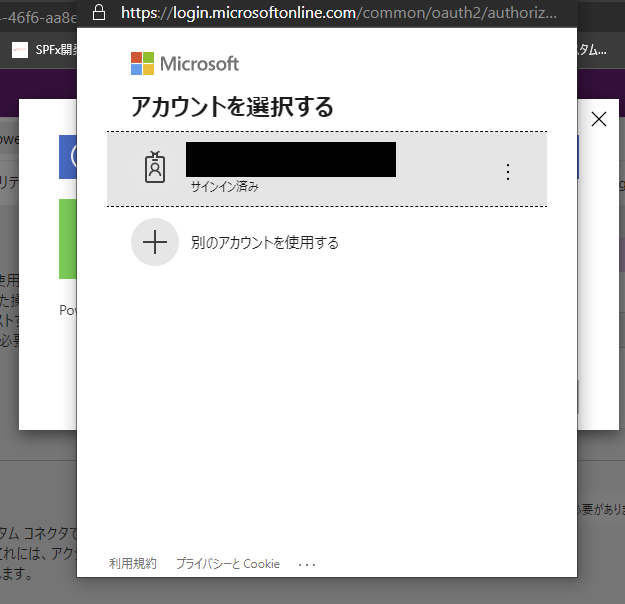
からの承認。
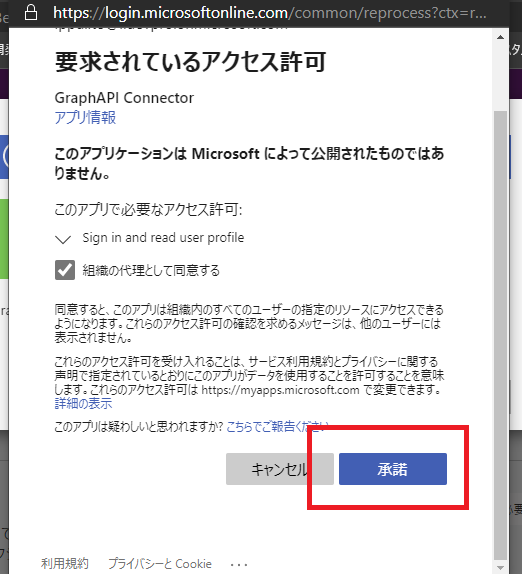
できた!
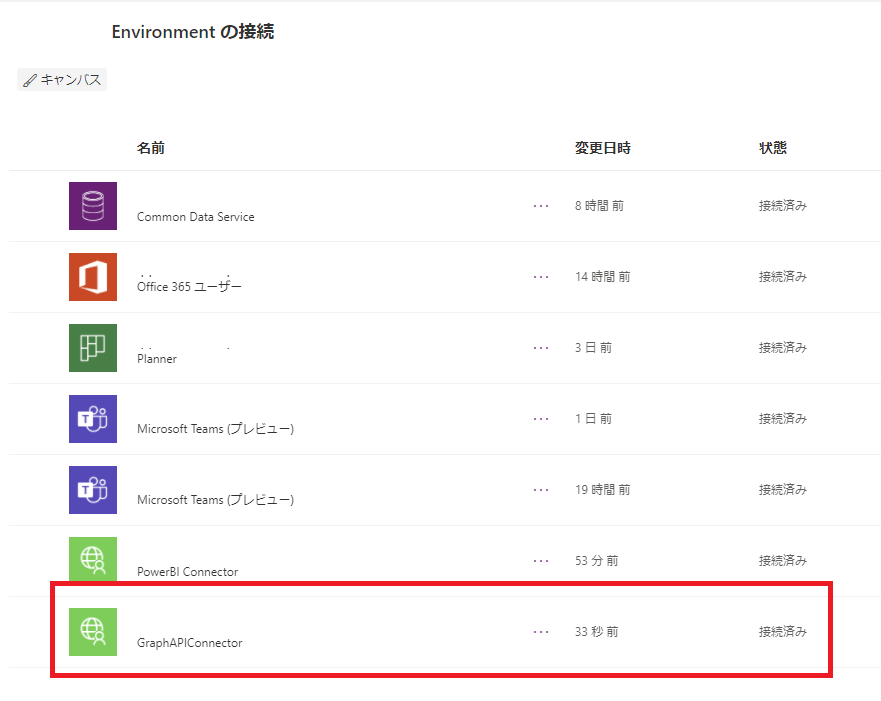
これでGraphAPIへのカスタムコネクタの作成は完了。
コメント
いつも良記事ありがとうございます!非常に参考にさせていただいております!
自分が迷ってしまったので、Azure に API のアクセス許可で Presence.Read.All の設定手順も追加するといいと思いました。
ちなみに Azure に API のアクセス許可を設定したあとにカスタムコネクタの接続を作成しないと、API のアクセス許可が反映されないようでした。
いつも勉強させていただいてます!ねこポータルの続編期待しています!
naono様
コメントありがとうございます!
ご指摘いただいた通りAPIアクセス許可についての設定を追記しました。
ねこポータルも時間を見つけて続編を書きたいと思いますので、今後ともブログ「仕事のあれこれ」をどうぞよろしくお願い致します。
意見を取り入れていただきありがとうございます!分かりやすくなり嬉しいです!
こちらこそよろしくお願い致します。キャプチャが豊富で分かりやすく、助かっています。